Creating a chalkboard wall (aka blackboard wall) in my dining room has been on the agenda for a while now. Like most things, for a while can sometimes mean weeks, months, years…never?
 in your home")
Thankfully, this project only got dragged out for a few months. But wanna know why it happened so ‘quickly’? Because dear hubby took it upon himself one day to whip out the rollers and just start painting.
That’s right, he doesn’t dawdle when it comes to breaking my procrastination cycle.
Well that, and the fact that he knows I’m a sloppy painter. Did I mention that he also really cares about what happens to our flooring? Something about ‘if it were left up to me to paint, we’d never get our deposit back ….’ I’m pretty sure he said some other stuff too, but he mumbled it all under his breath.
 in 6 easy steps / Grillo Designs www.grillo-designs.com")
As of late, he’s getting quite good at the whole ‘mumbling so I can’t hear him’ thing.
And the, ‘I’m so dramatic even even though I’m not a queen’ thing (although I’m partly to blame for that). Hence, I find myself having to make disclaimers like this:
[insert eye roll]
“While I cannot fully account for the state of the flooring in our previous homes, I can assure you that we have always managed to get our deposits back (yes even after painting – but there’s a secret to that)“
 tutorial / Grillo Designs www.grillo-designs.com")
Are you still with me?

HOW TO PAINT A CHALKBOARD WALL
This post contains affiliate links for your convenience – please see full disclosure here
Step 1: Choose your wall.
Every room has a focal point ... by this I mean the first place your eyes lock on to when you enter a room . Some rooms naturally have a focal point but sometimes you can just create your own i.e. Stunning fireplace, bold wallpaper, textured walls (in my case a chalkboard wall)
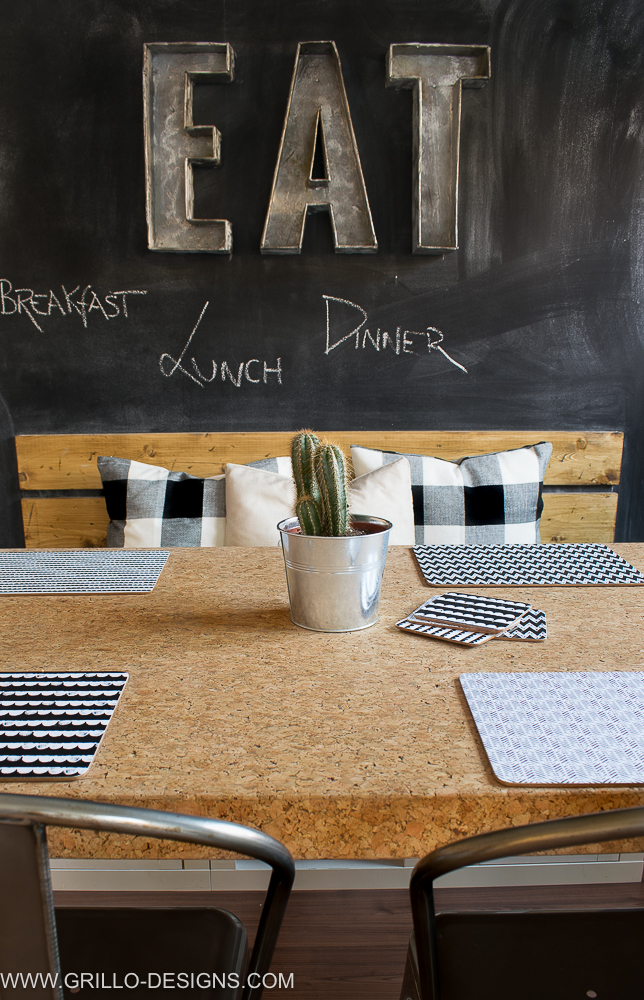
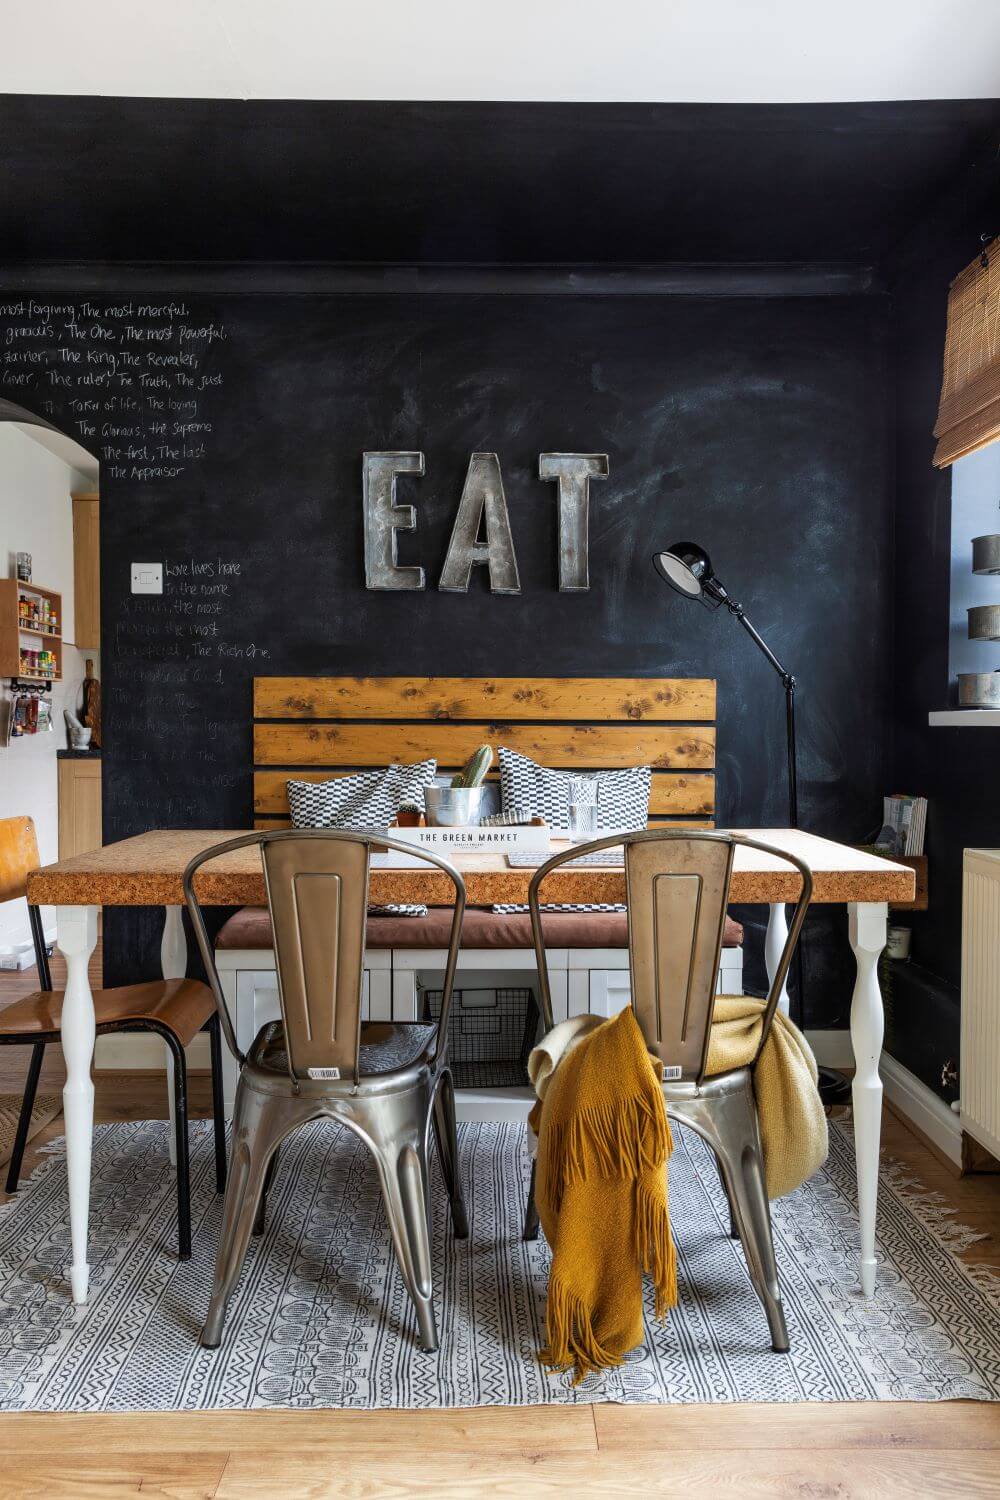
As you can see from the picture below, I chose this wall in the dining room to become the chalkboard.
 was painted")
However , if you’re feeling a lot less riskier (which is so understandable seeing as it’s not everyday you decide to paint your wall black) , you can always paint a smaller wall or an area that isn’t so central to your room.
Knowing what you will be using your chalkboard wall for also helps in deciding where to put it.
Step 2: Choose your product

I have tried and tested this brand numerous times and I love it! It goes on beautifully, stretches a long way and is a reasonable price. Here are some of my previous projects I’ve done with this paint:
The only downside is that it is a European brand (sorry US folks!) and the international shipping costs are horrific! (Yeah, I checked!)

I used this brand to create my son’s magnetic fireplace wall in his old playroom . Whilst the magnetic aspect was a pain to achieve the chalkboard itself was great! (another European brand)
RUSTOLEUM CHALKBOARD PAINT

I hear from other people (mainly my US blogging buddies) that this brand is awesome too. Notice I said that I heard, I’ve never actually tried this particular paint line myself, but cmon, when does Rustoleum ever not have great paint?
Oh and you can buy this in both the US and UK at a decent price so huge bonus!
Step 3: Prepare the wall
Three words. Painters tape and sanding! Well ok technically that was four words, but you get my drift. These two mini steps are really important.
Sticking painters tape along the edges of your wall and moulding just ensures the chalk board lines are clear and straight. And the sanding because.. .well who wants to write on a bumpy uneven wall. Not I.

The sanding can be done with a sanding machine or a sanding block. No brainer to which one we decided to use. #ialwayschooseryobi
")
Oops got my husband in this picture. He may or may not kill me when he sees this.
Step 4: Paint your chalkboard wall
My husband always does the borders first with a paint brush or mini roller and then uses the larger roller for everything in the middle. Is this how you do it? If you’ve got a quicker way to do it … Holla!
")
And this too – he likes to use an old carpet to protect the floor when he paints (clearly I don’t, hence the sloppiness) .
 in your home")
Paint at least two coats of the chalk paint and then leave to dry the exact amount of time its says to on the back of the paint tin. Finally, remove all the tape from the edges when its completely dry.
I think this picture is the cleanest the wall has ever been.
 / grillo designs www.grillo-designs.com")
Step 5: Season/prime your wall
Truthfully, I had no idea about this step until about a month prior to this but basically it ensures things you write on the wall are permanently erased when cleaned as opposed to it just looking ‘faded’
To season : Take a piece of chalk (use it’s side rather than the tip) and rub the entire chalkboard wall vertically. Then do the same thing to the wall horizontally.

Word of warning, this is very messy dusty business!
Wipe it all off with a damp cloth and you have yourself a gorgeous chalkboard wall my friend. I added in faux letters I made from cardboard to the wall to give it that extra POW
Step 6: This isn’t really a step but I just thought I’d add it in in case you suck at typography, like me.
I mean check out my lousy half hearted scribbles with the chalk below if you don’t believe me……
and seriously…what’s a chalkboard wall without fancy looking lettering?
So I wanna help you out. Here are some ways to get perfect lettering:
- Buy some white font wall stickers
- Use chalkboard stencils and practice filling in the lines
- Use a chalk pen rather than your standard chalk for more accuracy.
- Purchase a book about chalkboard lettering – practice makes perfect right?


I hope you found this tutorial beneficial and I would really appreciate a share! Don’t forget to follow me on my social media below. And if you’ve got a chalkboard wall you want to share with me, send it over here, I would love to see! I am so nosy!
INSTAGRAM / FACEBOOK / PINTEREST / GOOGLE + / TWITTER
ARE YOU A FAN OF PROJECTS USING CHALK PAINT? CHECK OUT THESE POSTS
PROVINCIAL DRESSER MAKEOVER WITH HOME MADE CHALKBOARD PAINT

KIDS MINI TOOL BENCH WITH A CHALKBOARD DOOR

HOW TO MAKE YOUR OWN CHALK PAINT

INDOOR HERB GARDEN WITH CHALKBOARD LABELS


What grit should I use to prepare my wall?
Have you tried using chalk pens with your painted wall? I’m reading all kinds of warnings against using chalk pens or markers on a painted chalkboard wall because it’s not a non-porous surface. Before I order them I’d like to know if you have used them and if they erased ok. Thank you.
Was there any type of base coat? And it looks like you painted right over the glue lines from the carpet padding…. does this show? It looks absolutely beautiful!!!
i just did this also in my dining room – i am wondering about the damp cloth step, did you find that is definitely necessary or, can a regular soft cloth serve the same purpose? I made a mistake of using sidewalk chalk on one section of the wall and when I wiped and erased it looked nothing like the first section I completed a week ago. It left many flecks of white everywhere (my walls are super old) –
bad idea i guess to use the sidewalk chalk 🙁
I was trying to cover more ground and get a better grip.
I am beginning again with regular old school chalk and this time may also try damp cloth vs. soft dry cloth?
did you find using the damp cloth eliminated ghosting?
your room and wall looks awesome! i hope mine finally ends up looking nifty 🙂
Yes I used a damp cloth because I found it just make the board look cleaner and more fresh once i had completed the ‘priming’ step. You can use a dry cloth too if you like but it will have a greyish look to it once done. Good luck with your wall
Fabulous job. Just wish I had the perfect spot in my home to do the same.
Aww thank you! The great thing about chalk boards is that you can paint them anywhere 😉
Your wall looks awesome with the style of your kitchen table and chairs and adding the EAT sign to it! Thumbs up for taking the plunge and painting a chalkboard wall! Thanks for linking up with Funtastic Friday!
Thank you Heidi 🙂
Whoa, glad I came across this! I didn’t know there was a process or even a priming part. I already know the wall I’ll do it to, but was trying to figure out how to remove the stupid intentional bumps it has.
Im glad you found it beneficial! Thanks for stopping by 🙂
Great tutorial. Thank you for linking with us at #HomeMattersParty . We would love to have you again next week.
Thanks for having me!
It looks fantastic. We have a chalkboard wall in our hallway. I want to put another one somewhere, though. We’d love to have you share this at our weekly link party. http://www.thelifeofjenniferdawn.com/2016/12/rustic-christmas-farmhouse-decor-weekly.html Hope to see you there!
I’d love a wall like that. You could write loads of stuff on it depending on the season. Or personal birthday messages for members of the family. So many possibilities!
Thanks claire and great idea!
I love the EAT letters mounted in the center of the board. Very cool.
Thanks kim!
Thanks so much for sharing these great tips at Project Inspire{d}! Pinned.
That turned out beautifully! I never knew about priming the chalkboards either and failed to see that noted when I made my first one. Your EAT letters look great hung up there, it’s a good thing they are so light 😉 and easy to hang.