Hi there. Join Grillo Designs on Instagram and Pinterest to keep up with our latest posts and ideas. If you’re on Facebook, why not join our Home decorating, Upcycling, and DIY group too – inspiration is guaranteed!
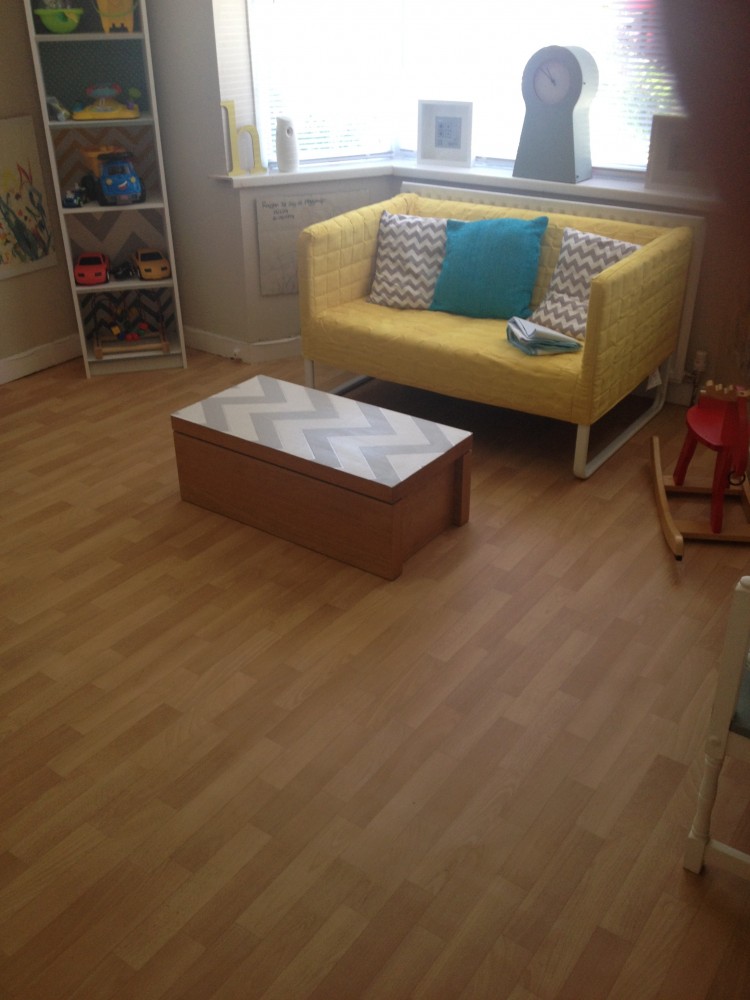
This is how the playroom looked before. The walls were a very boring Magnolia! Something had to be done!
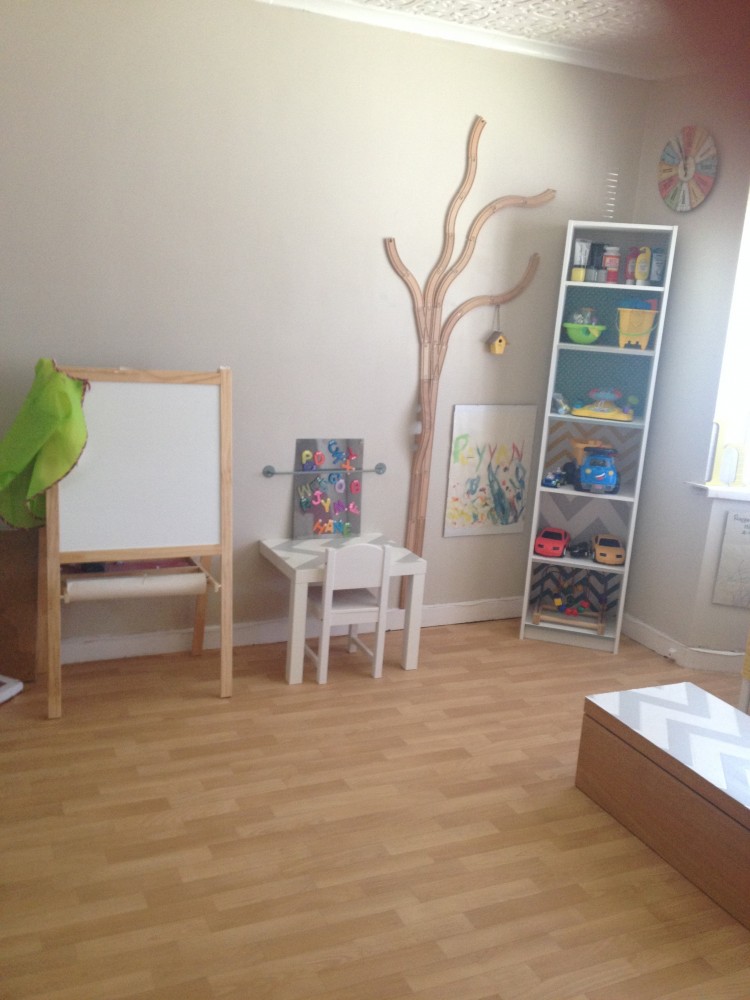
Another before picture….
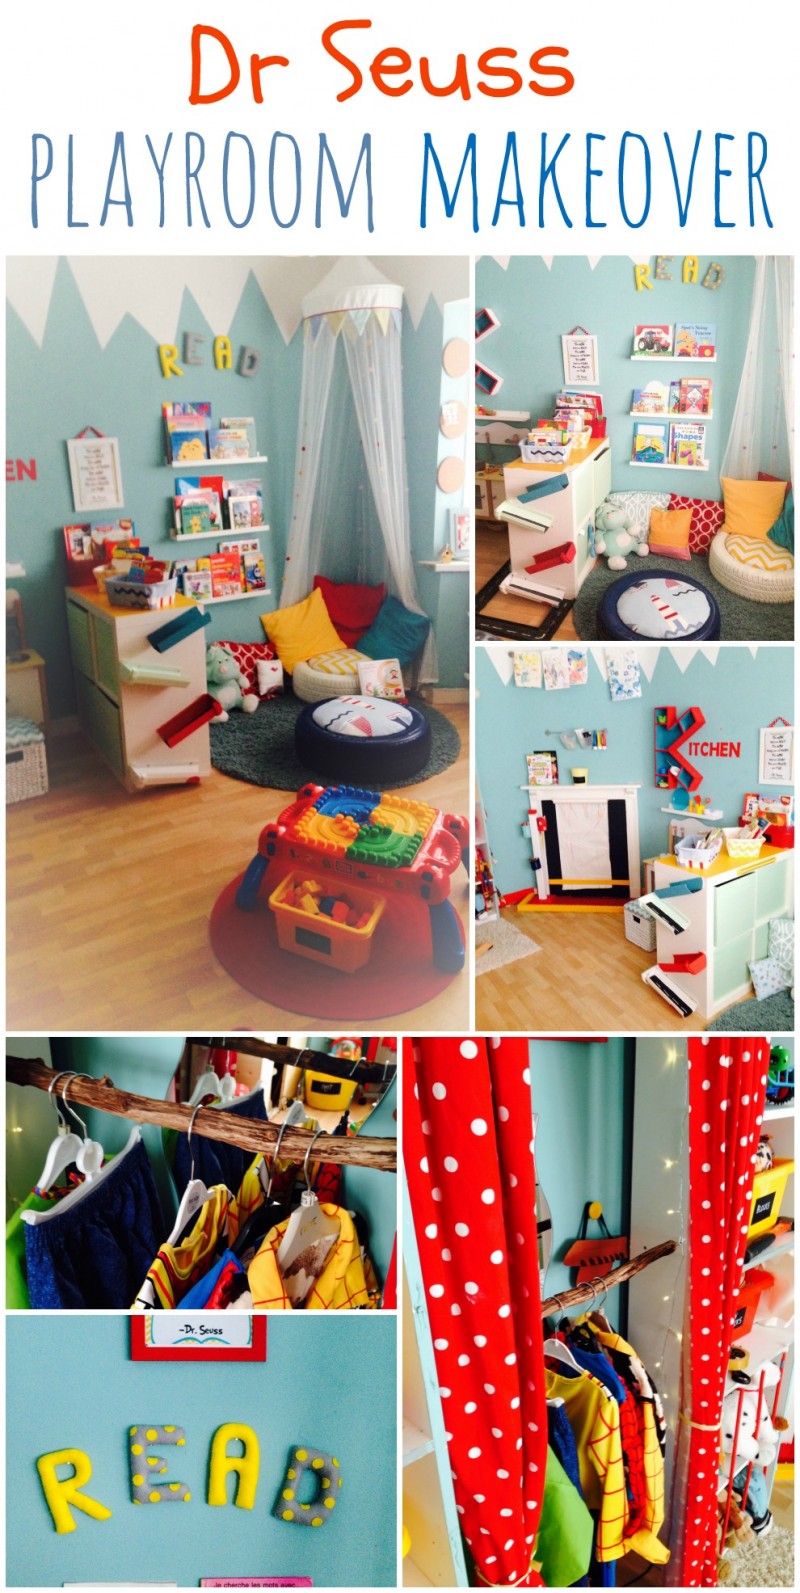
We decided to separate the playroom into different ‘zones’. We did this because our son is autistic and we didn’t want to overwhelm or overstimulate him too much. The different zones included:
Kitchen area
Dress up/Toy area
Art corner
Other areas
I’ll take you through a virtual tour of the different areas.
READING NOOK:
This reading nook was created using tyres as the main seating area (see the tutorial for kids seating here).
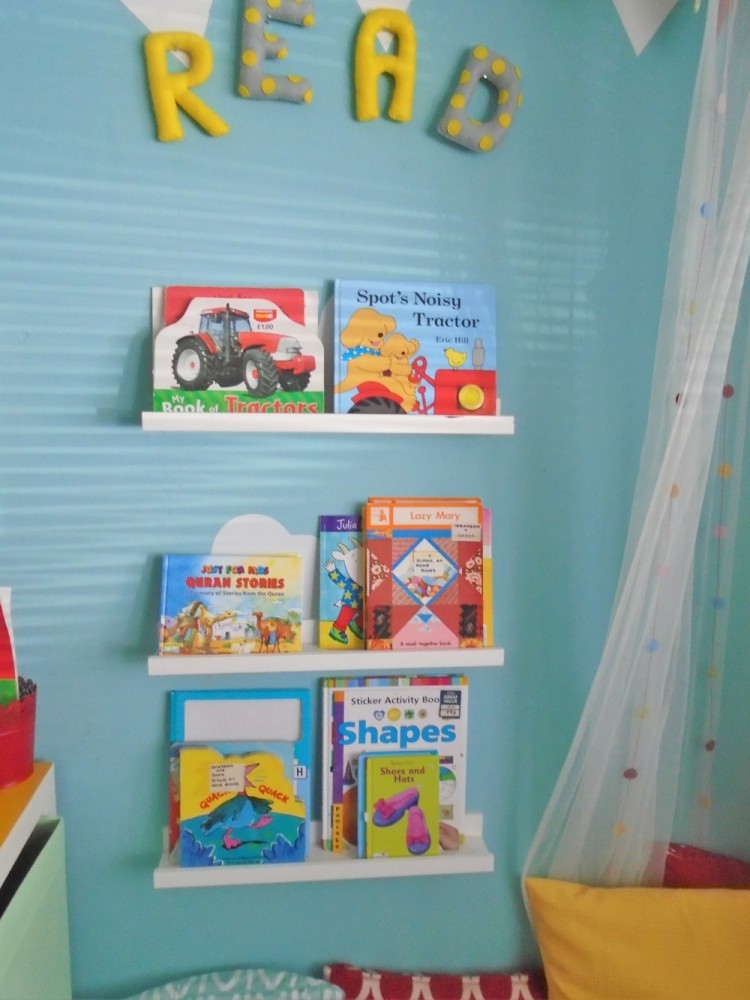
We used IKEA RIBBA ledges as the bookshelves and the IKEA KALLAX cube to separate the area off.
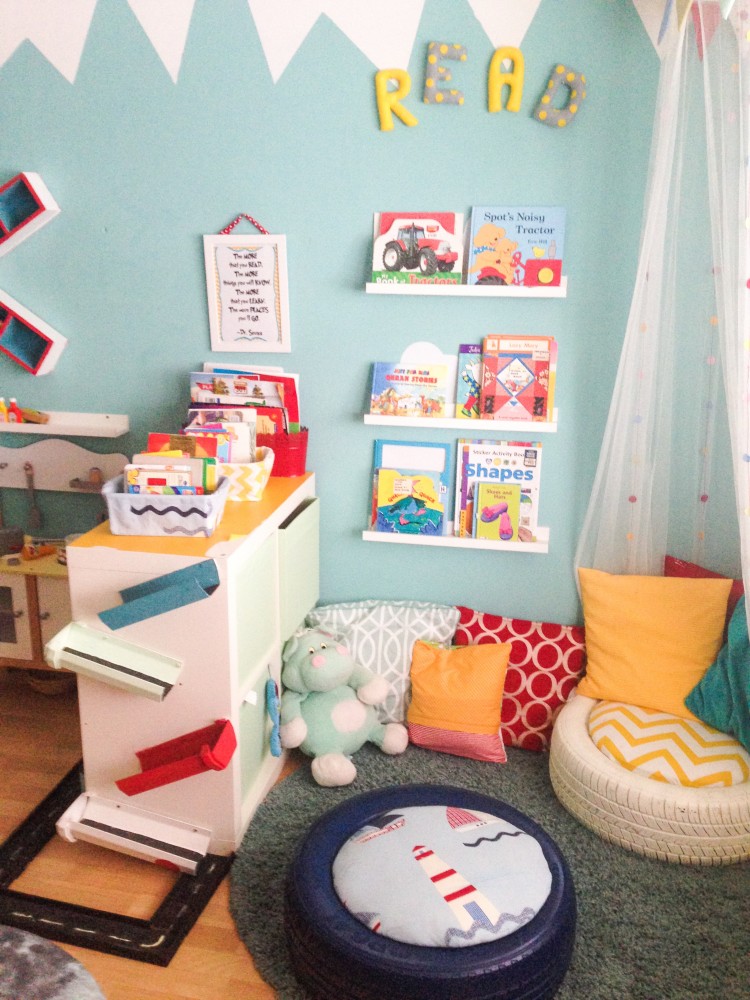
We also added some colourful cushions, a comfy rug, and baskets for book storage!

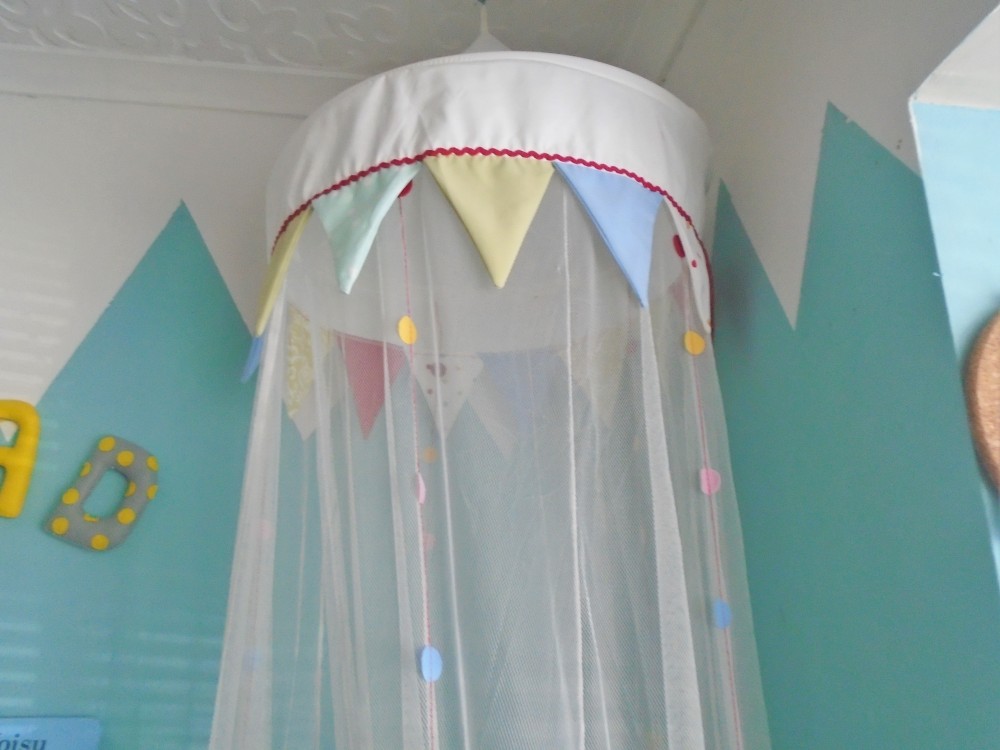
We bought this canopy from IKEA quite a while back now but I’ve recently heard they no longer sell them.
[wp_ad_camp_1]
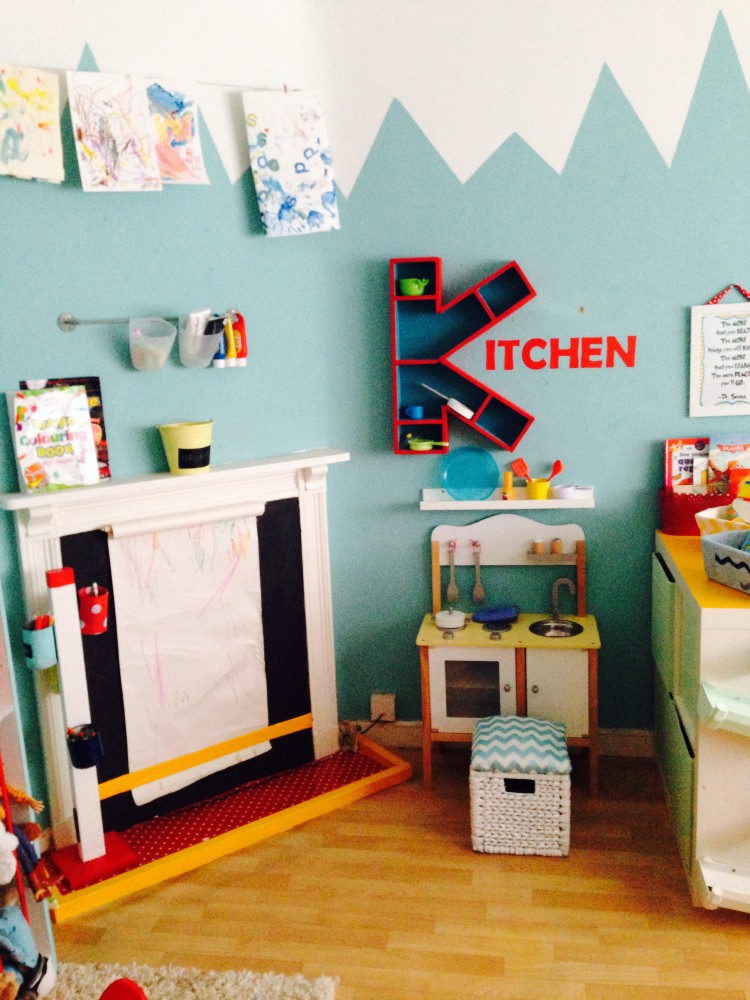
KITCHEN AREA:
My son struggles with imaginary play, however, a part of his learning development targets set by his speech and language therapist included trying to encourage imaginary play, whether he participated in it or not.
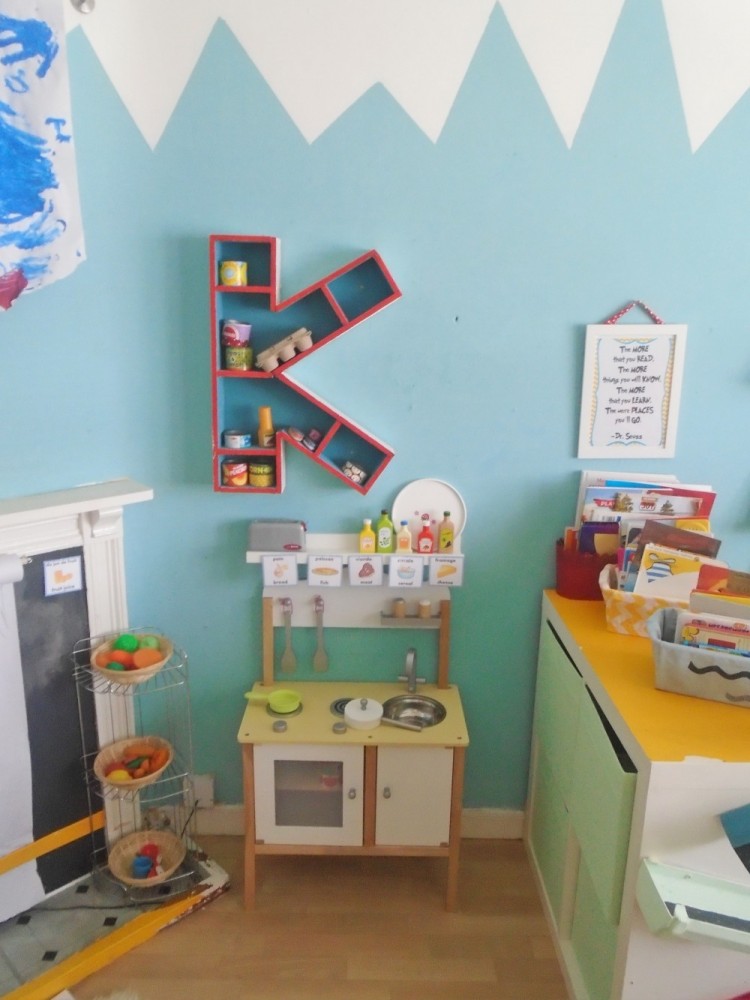
So, I bought him this play kitchen and set the whole area up to look like a cooking zone The K on the wall which stands for Kitchen was designed by me and built by my husband (under my careful instruction of course!).
DRESS UP/TOY AREA:
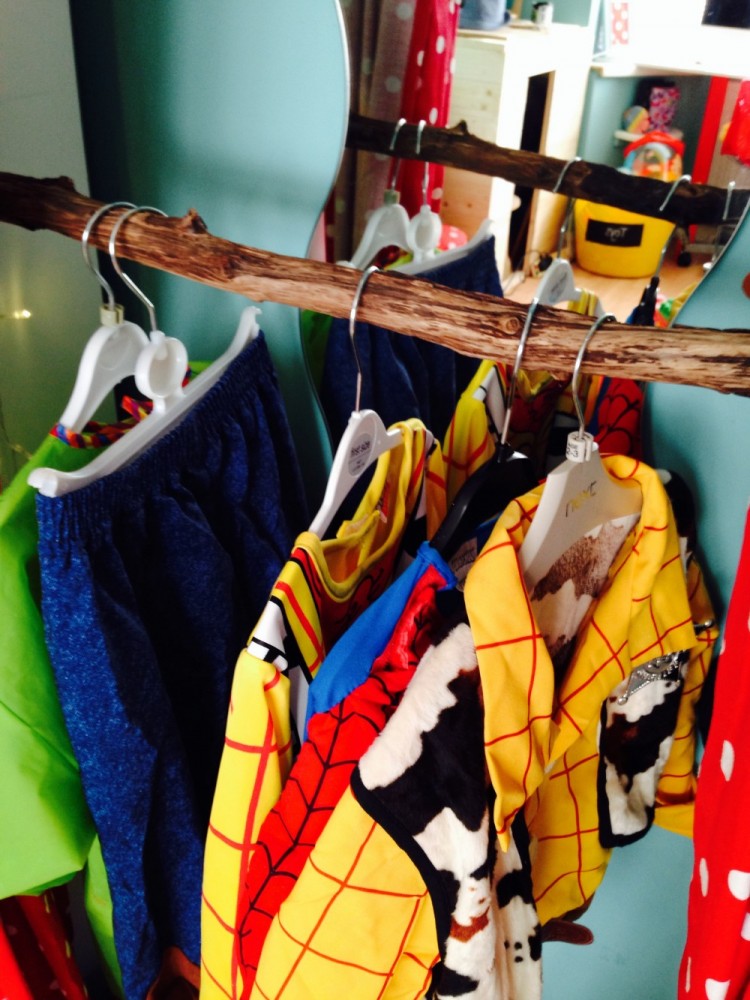
When my son hit the age of two he went through an obsessive Toy Story craze. He loved everything Woody, Buzz, Andy, and Woody (I mean to repeat myself here – that’s how much he loved the little cowboy!).
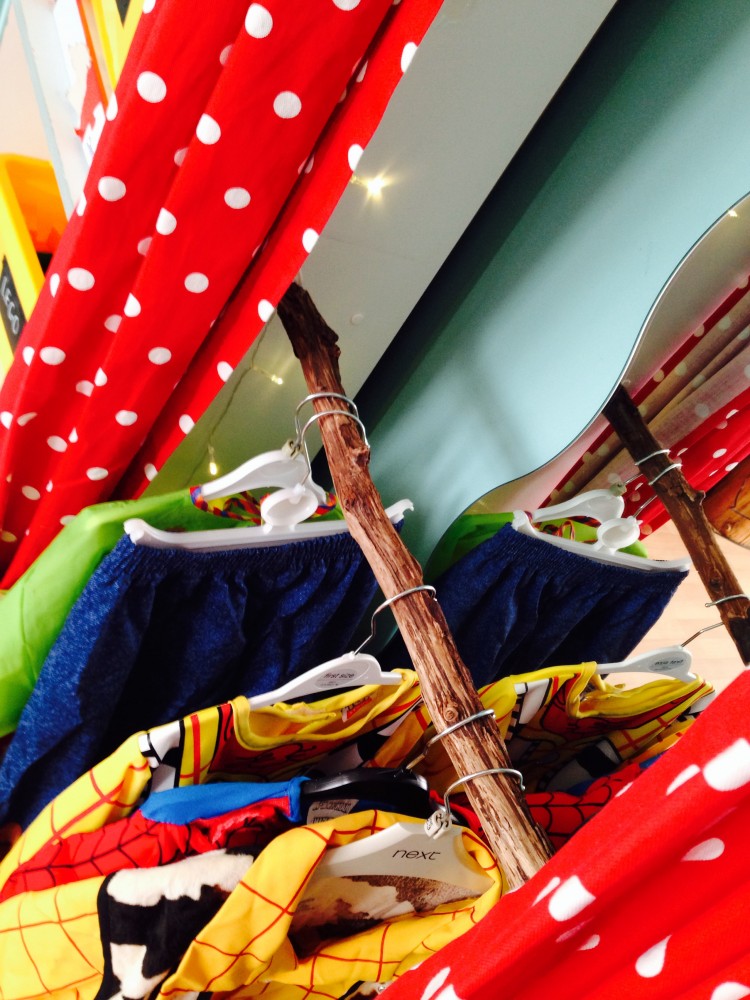
He had quite a few woody outfits along with various other superhero outfits.
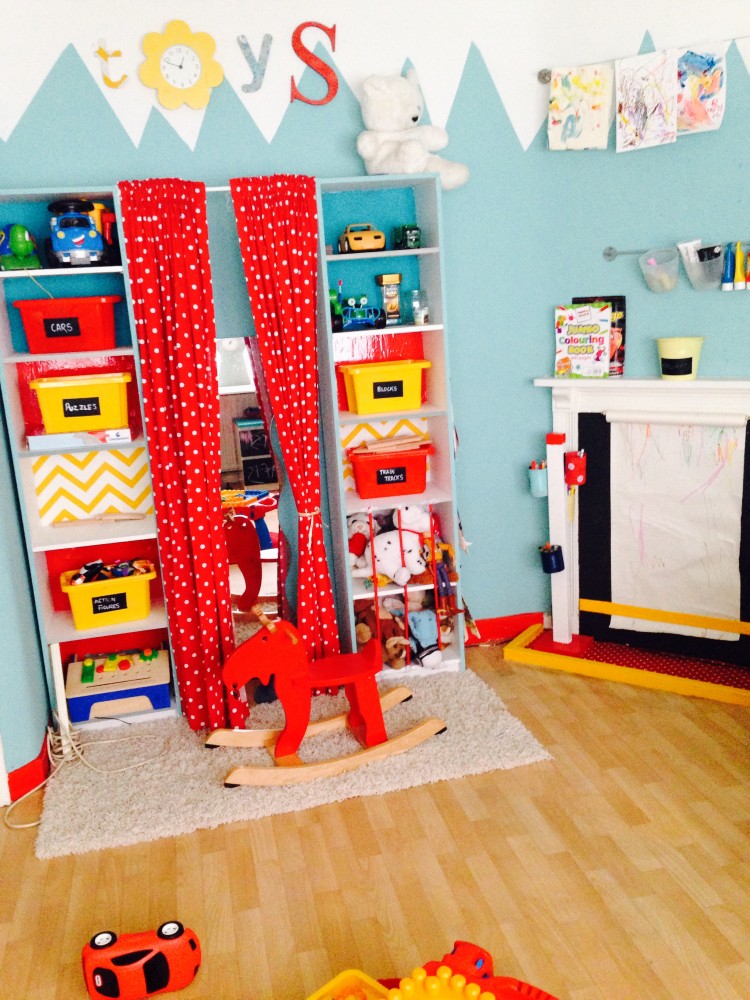
To create this area I screwed in a rail (well it was just a piece of driftwood really) between two bookshelves and hung up some red polka dot curtains.

I then added in some lights and a mirror to give it a glamour/celebrity dressing room type feel (I chuckle here).
By utilizing the space between the bookcases, I managed to save a lot of space. It meant I could use the bookshelves to store his toys and various other bits and keep things organized!

[wp_ad_camp_2]ART AREA:
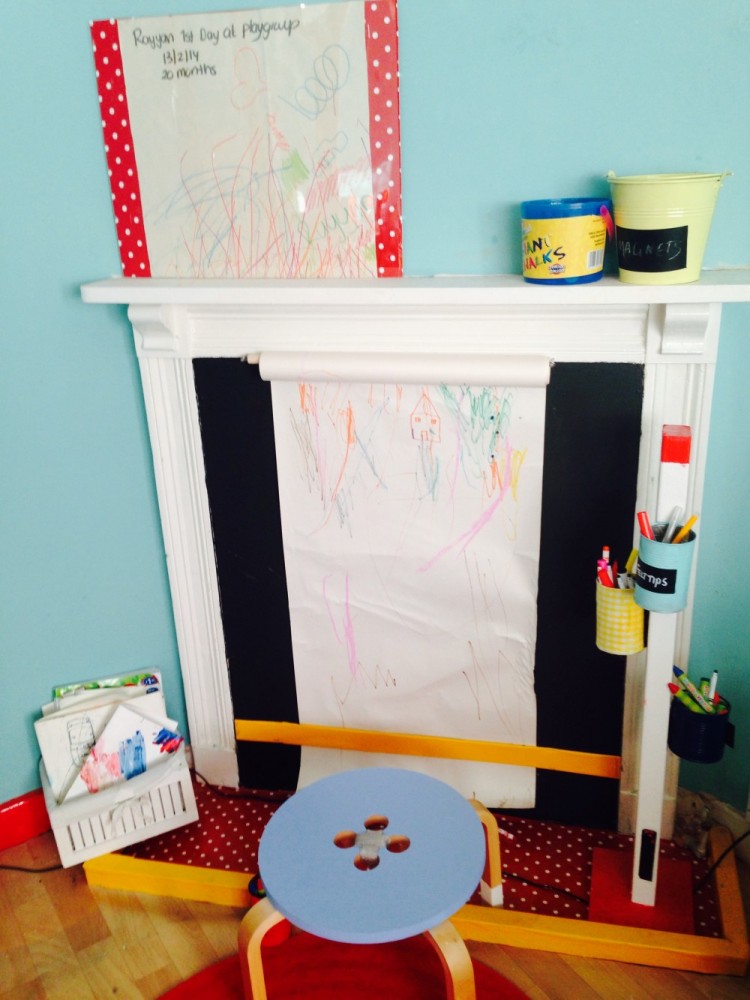
This area was fun to create! I think every child needs that corner where they can be creative and artistic.
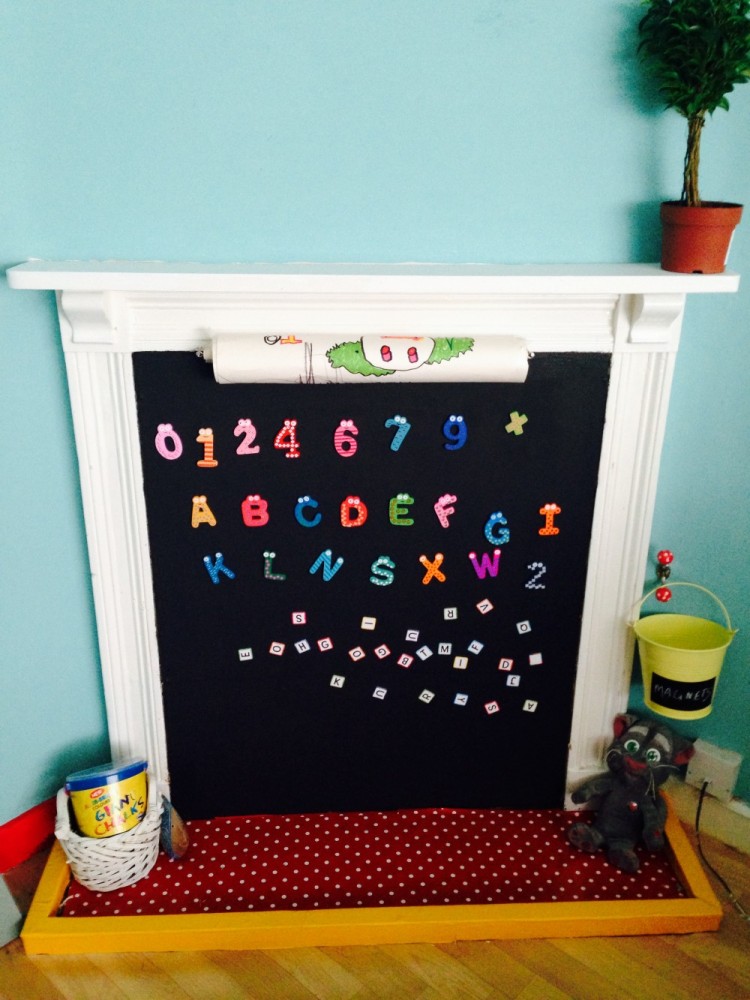
As you can see the drawing/magnetic board here is in the actual fireplace. We boarded it up with a large piece of MDF wood, and then painted it with DULUX magnetic paint (that was a nightmare might I add – it took about 7 coats to get it magnetic!).
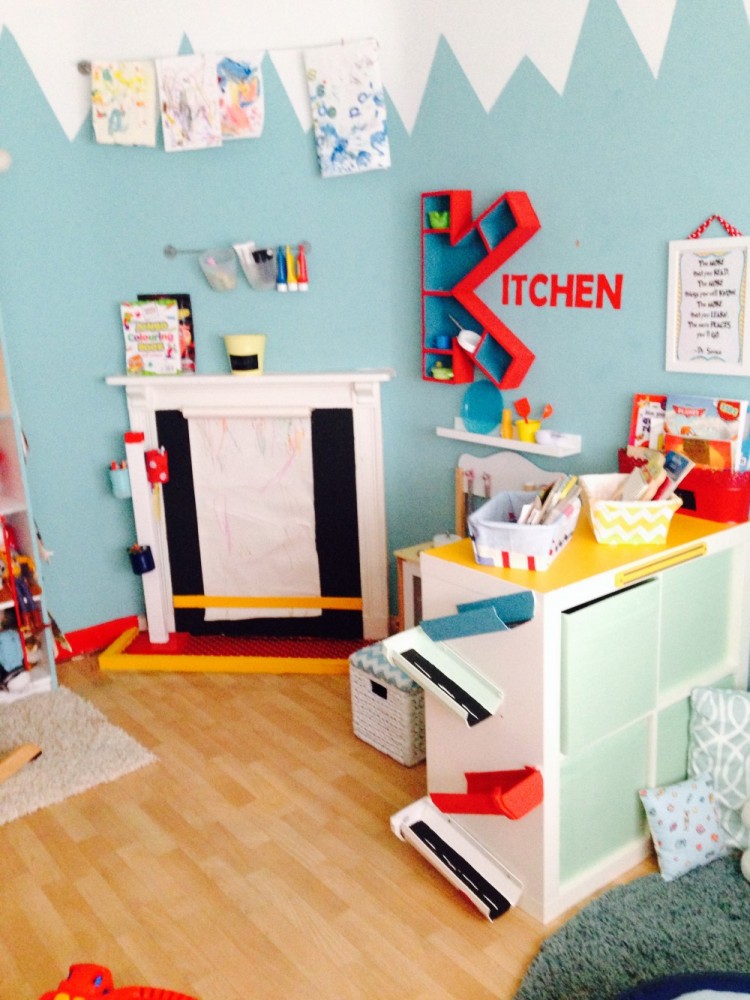
I hung a roll of IKEA drawing paper to the top using a dowel rod and slid the paper under a piece of thick cardboard to keep it in place.
OTHER AREAS:
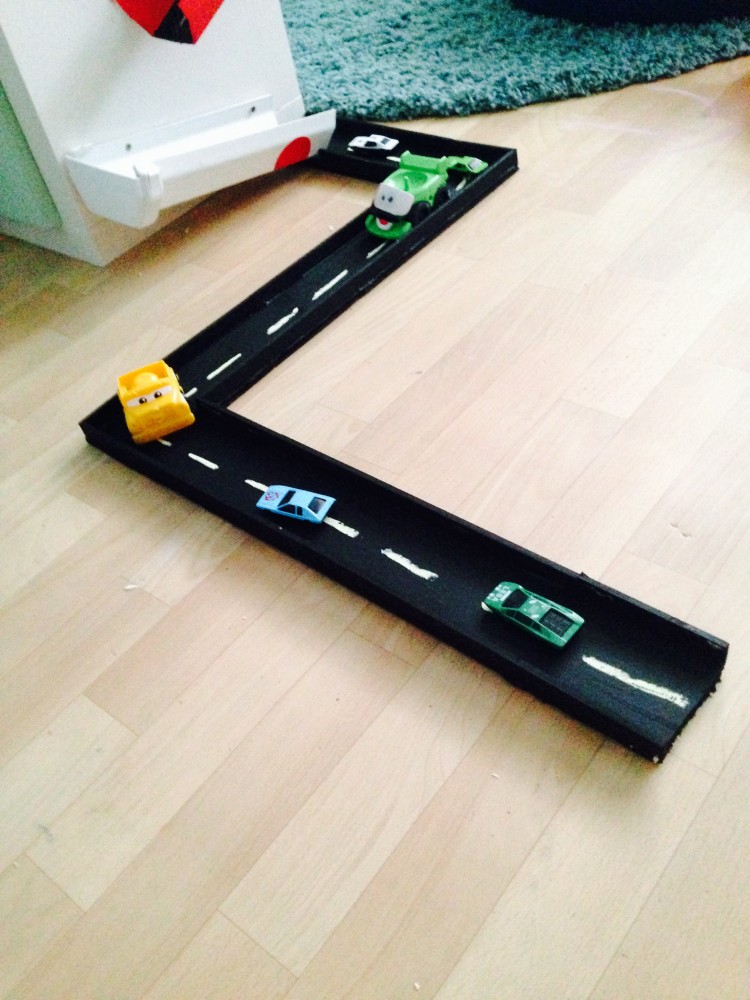
CAR/MARBLE RUN:
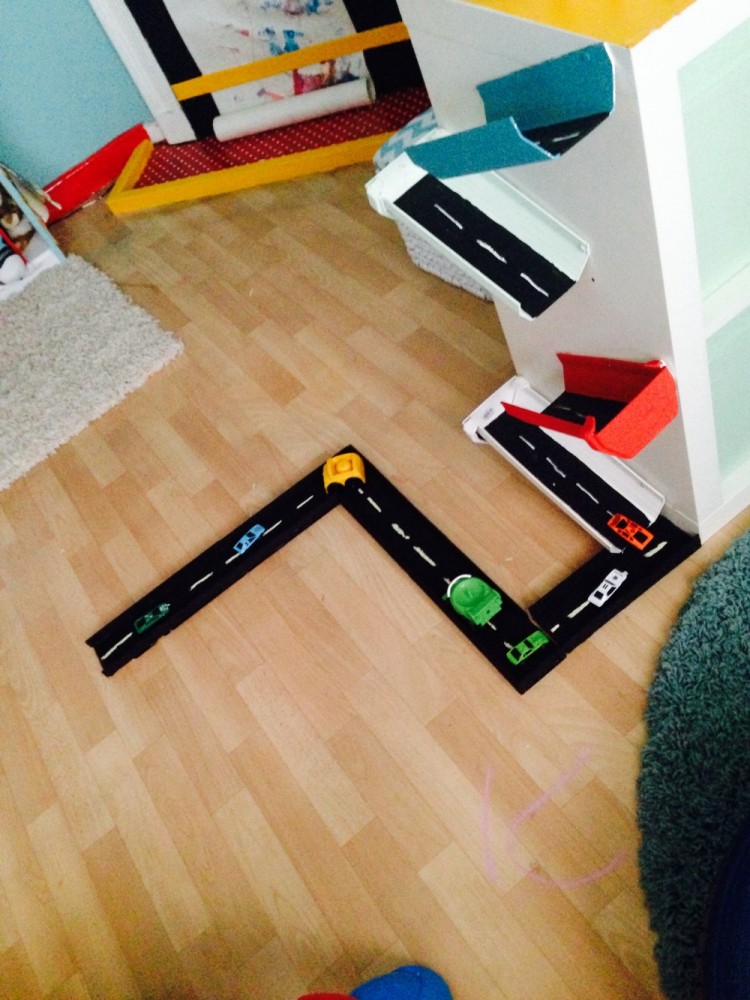
The ramps were made using guttering pipes.
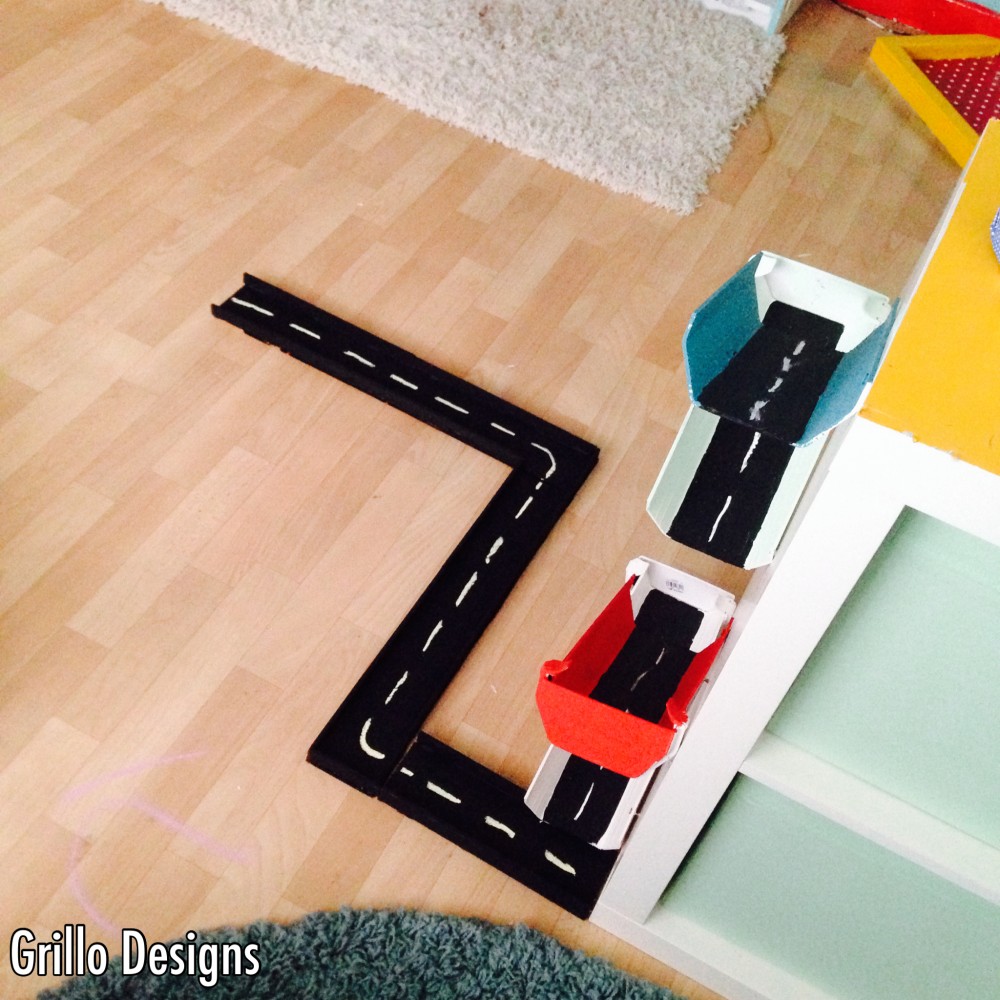
I painted them as seen in pictures and attached them at an angle off the side of the IKEA KALLAX cube.
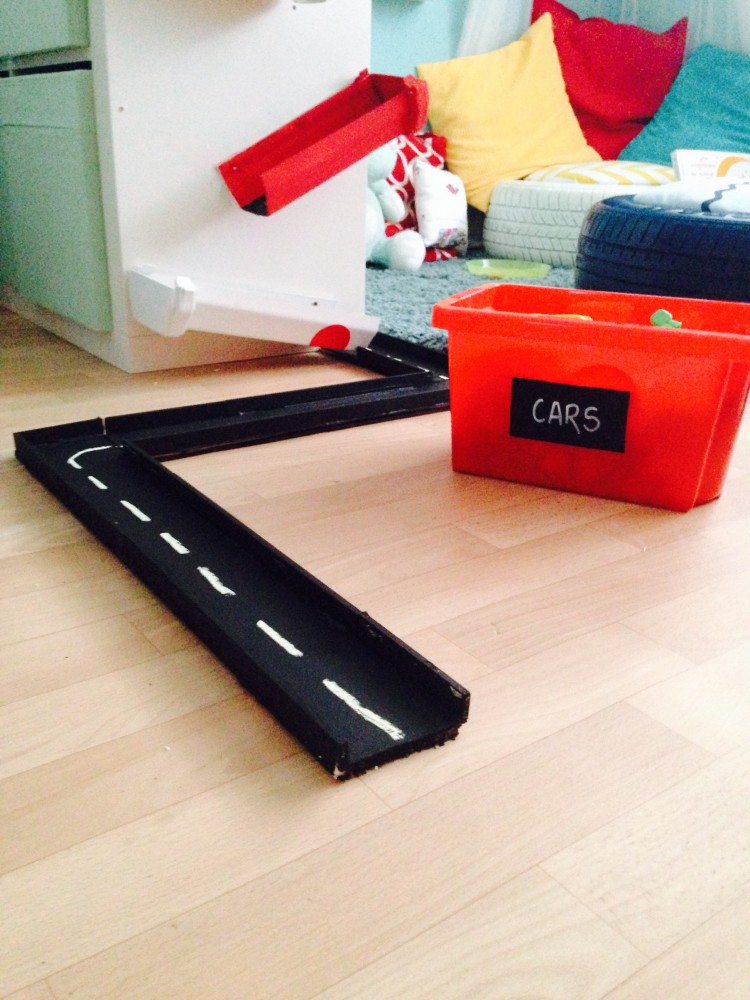
To make the road ramp, I used timber floorboards and chalk painted them.
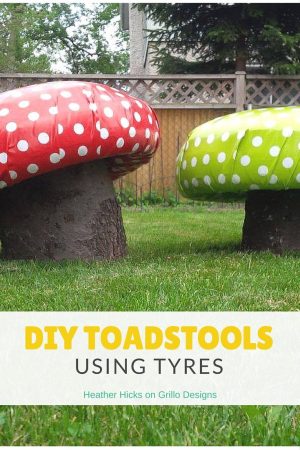
THE TOADSTOOL TABLE AND CHAIRS:
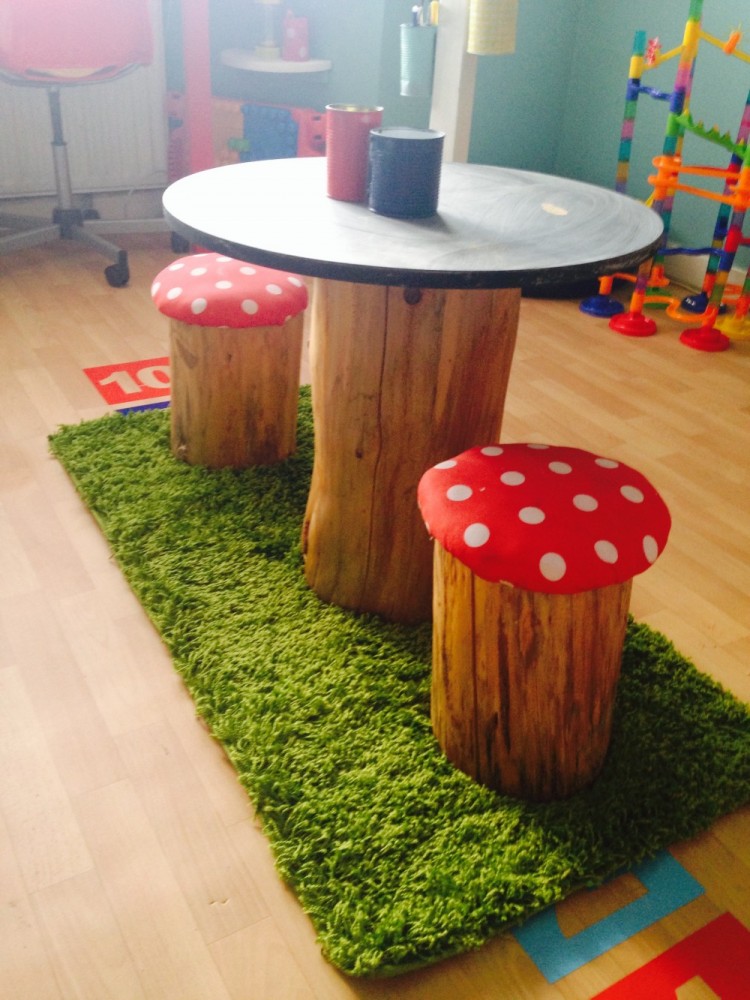
I made this set using tree trunks
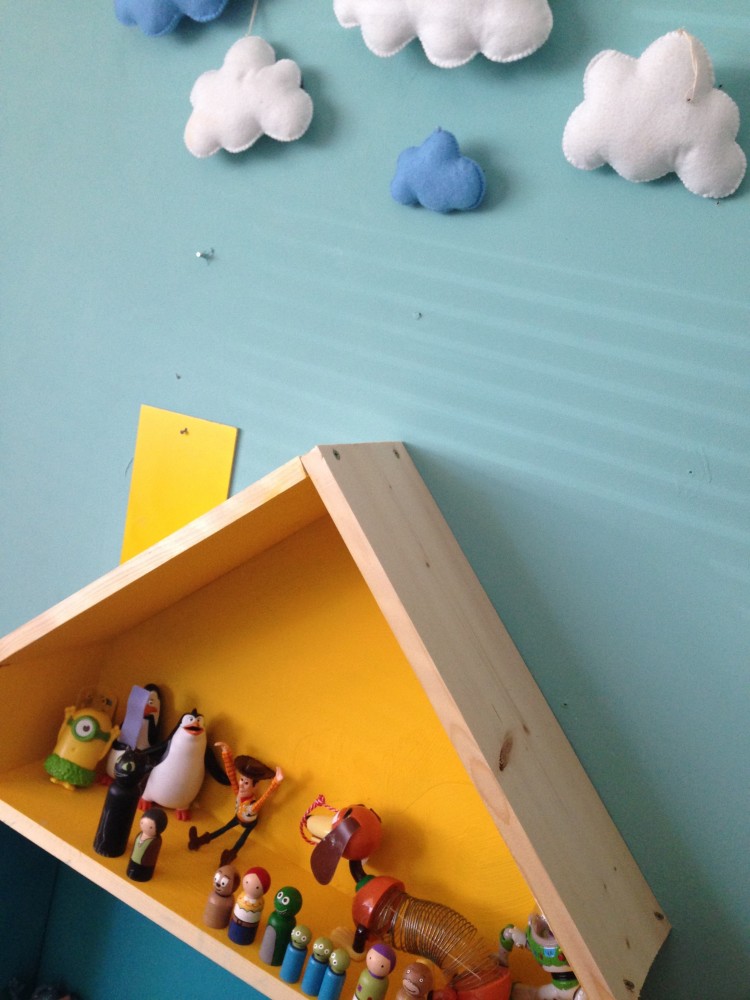
THE ‘FIGURINE’ HOUSE:
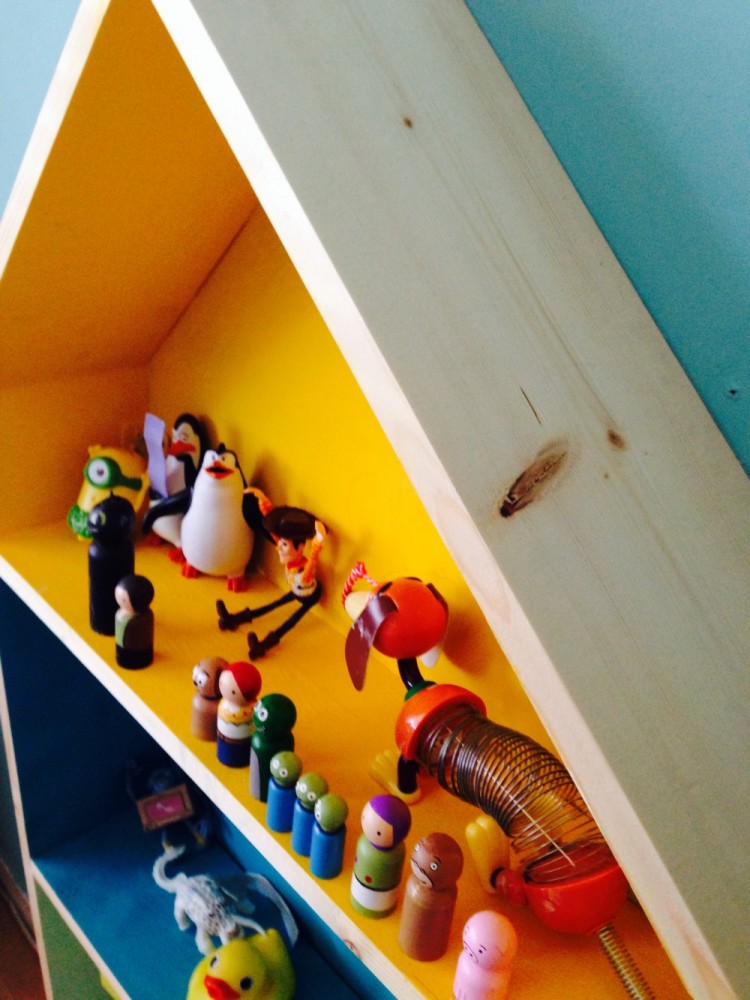
Still a project that needs to be completed. It’s meant to have a door and little dollhouse windows!

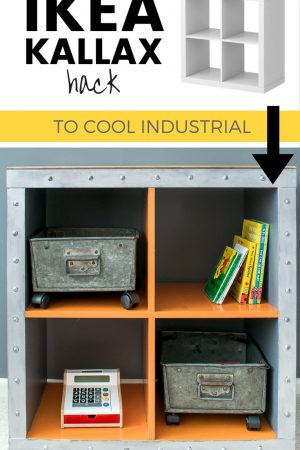
IKEA KALLAX HACK FOR BOYS BEDROOM
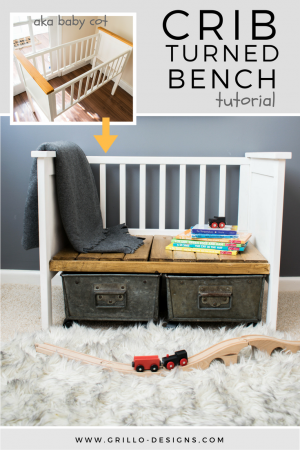
HOW TO TURN A COT (CRIB) INTO A BENCH


This is so cool! All the hard work and effort you put in over 5 months, must be definately worth it, looks amazing. I’m sure your son is loving it too. I especially love the mushrooms seats, very cute!
#UKbloggergroup
This is awesome! I loved doctor Seuss as a kid and this room is spot on – good job, lucky kid! I love this blog theme btw x
Thank you so much 🙂
This is exactly how I’d want my playroom to look. It’s adorable. I love the little toadstool seats and art fireplace! I’ll pin these idea for later.
Roxie | The Beautiful Bluebird
Thank you so much Roxie 🙂
I am in awe of this! I wish I had a play room like this as a kid! I’ve barely begun my daughters room decorating but now after seeing your post I had loads more ideas! You are amazing by the way, love the toadstool chairs & table!!!
Well done !! You are very talented Mashallah and also so inspiring to other mothers ! xx
Medina , you are very tallented and i want to ask how do you get your motivation and how do you start,cause i have sooo many ideas but none of it is put into action.
Thank you so much Dalia. I Really appreciate your comment. My son is usually what motivates me most days. I enjoy seeing him playing with the things I have made.
🙂