
Yes, I jumped on the painted arch wall trend July last year (sorry I’m a little behind with these blog posts!) and painted the wall behind my office a very deep mustard yellow. For someone who says not to follow trends, I sure do follow a lot of trends, don’t I?
Maybe I should rephrase that – follow trends because you love them and not just because they’re on-trend. Trends will come and go over the seasons. If you’ve jumped on board because you saw a way that you could lovingly and authentically incorporate it into your home (as opposed to just feeling the need to copy others), then it’s more likely to become a timeless statement in your space. One that lives longer than the normal shelf life of a trend because it just feels right for YOU.
So yeah I painted an arch on my wall and I’m not ashamed to say it! I’m a big believer in the power of paint, so an arch seemed like the perfect way to add personality and fake a little architectural interest on a wall without darkening the space. And it could be easily painted over – if and when we moved (or got bored … ) . I rent (please tell me you’ve read my book??) – so of course, these are the kinds of things I need to think of.
I’ve seen lots of arches that inspired me, but I had yet to see one featured in an office so, me being me, I decided to give it a go!
Unfortunately, I was so overexcited by the idea – that I forgot to take pictures along the way! Oops. Sometimes, though, when an idea starts to form in your head, you just have to go for it before doubt creeps in.
Here is how my office space looked before.
This space is actually in my dining room.
During the lockdown of 2020, I understood how important it was to carve out a place in my home for myself to work and be creative.
My husband took over the spare room (its now a kind of man cave) which I didn’t mind at all. His computing equipment was far too bulky and ugly to be in the dining room, whereas I knew my office decor would be much more delicate and pleasing to the eye.
I’ll take you through how I did it, but bear in mind there’s probably going to be a lot of imagination needed here on your part. I found this video that also helped.
EDIT NOV 2021: Looking back now I think a lot of my sudden decorating makeovers (the coffee station was one) last year had a lot to do with my own anxiety ( I changed so much in my house last year and made so many valid at the time pandemic induced decisions. I’m just now really working through it all , correcting/updating those things I no longer love) .
Whilst the world seemed to be spinning out of control, I kept thinking if I could control just one thing , I’ll be ok. Decorating was that one thing.
It makes more sense now .
How to create a painted arch on a wall
This post may contain affiliate links. .It is a way for this site to earn advertising fees by advertising or linking to certain products and/or services. Please read my full disclosure Please see disclosure page here.
Materials needed:
- Pencil
- Level
- Painters tape
- String
- Pin
- Paintbrush
- Paint
- Foam Roller
How to Create a Painted Arch:
1. I used the length of my desk (previously my dining room table) to estimate the width of my arch. I used the height of the shelf I hoped to hang to estimate the height of the arch (the shelf is from here) .
So I guess my first advice would be to mark out reference points if you know this arch will be a custom background for a piece of furniture you have. You don’t want an arch that is too wide, too short, and vice versa.![]()
2. The paint I decided to use was Craig and Rose, French Ochre. However it did take me a while to choose a colour . . . hanging up paint samples helped!

2. Now start prepping the wall. Make sure the wall is even and smooth – you can lightly sand if it is not. Wipe up any residual dirt. Tape off the edges of your skirting boards and sockets or doorways (if your arch will touch these features and you want to), and lay down a cloth to protect your floor from spills (dont be like me ha) .
To get the lovely arch you see – The short of it, I used a pencil tied to a string attached to a nail. The length of the string was the width of the arch at its widest point. The long of it, I followed this tutorial here exactly!

3. Then I started painting. I painted the edges of the arch freehand with a paintbrush and the middle of the arch with a foam roller. Here is how it looked after 2 coats of paint.

As you can see my son was very much in awe at this point and asked … “Is this the sun mum?” I had to snap a photo – it was definitely one of my favorite moments from 2020

Once the paint had dried, I put up my shelf! I love how it framed the top of the painted arch.

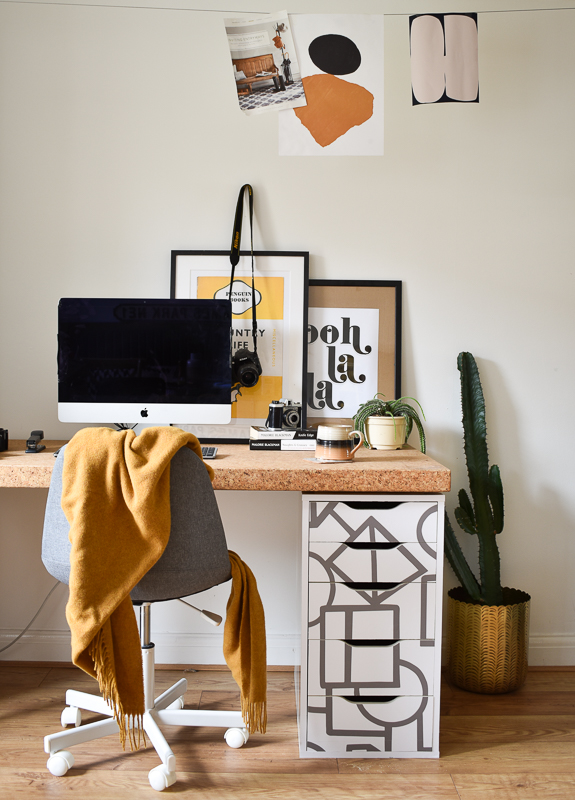
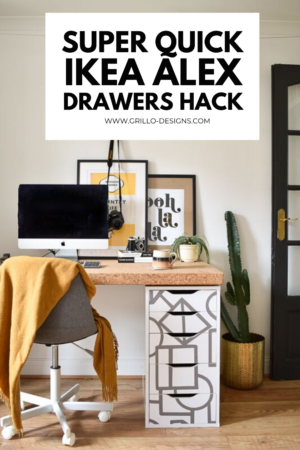
Here is a final image with everything in place. In this photo, the drawers are on the right side of the desk. By the way, here is how I hacked these IKEA ALEX drawers
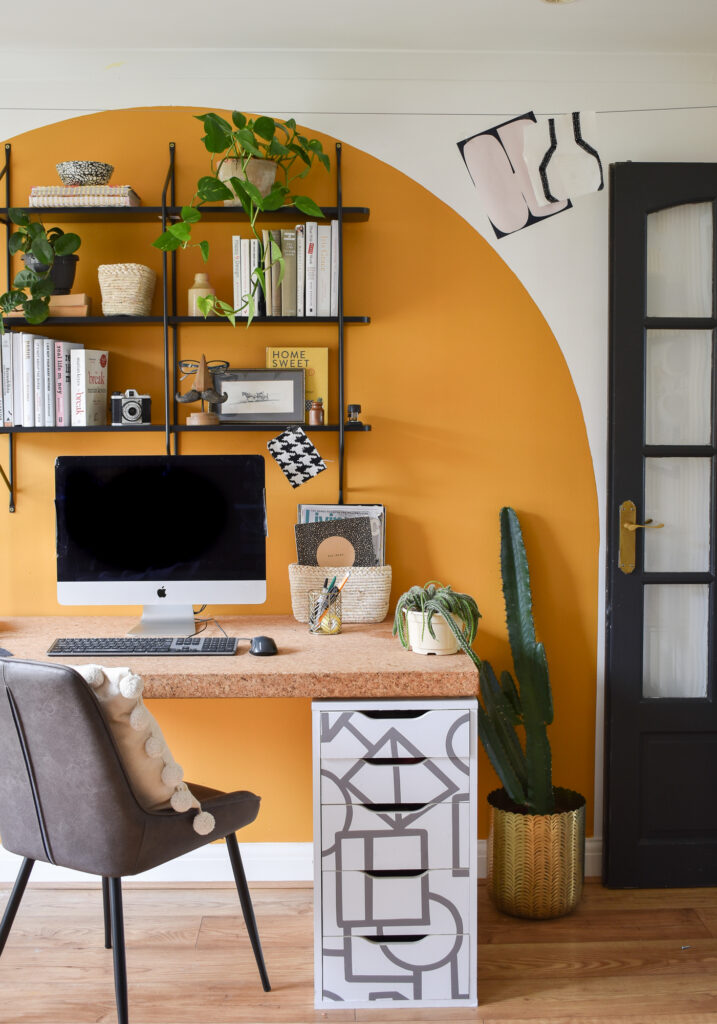

In this image, I switched the drawers to the other side of the desk.


And then the following images are shots of the office reveal. A different monitor, a locker I had in storage and a few other finishing touches! (shot by AMVIO PHOTOGRPAHY)


Let me know what you think of this painted arch in this comments. Have you painted an arch before?
Full transparency, it no longer looks like this (I’m publishing this post over a year later), but I get asked so many questions about it, so decided it definitely deserved a place on my blog.
I’ll be sharing a new view soon of this space… our family has gotten bigger so having three work areas in our home (homework station plus the man cave) just no longer seemed practical. Stay tuned for more details on that.


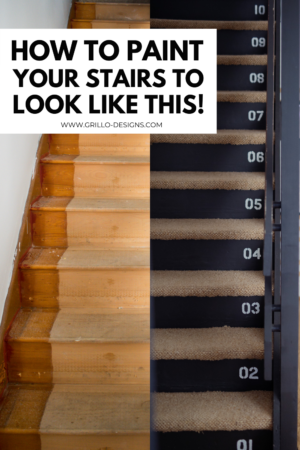
How to Paint Your Stairs to Look Like This!
Super Quick IKEA Alex Drawers Hack


Hi Medina
This is terrific, and your are so talented!
Can you please explain a bit about the cork desktop? I can’t see if this is something you buy or need to hack…
I love getting your email with all your inspiring stuff – I have really taken a liking to this arch idea, and as I am paring back all my junk that made me feel “safe” over this Covid thing, I am now realizing that working to my Diploma goals this year has given me an even better reason to pare back on all the stuff I “really” need. Now to talk hubby into letting me paint a wal l.
Thanks and keep the amazing and simple ideas coming. Big Fan! Lisa xxx
Thanks so much Lisa! And wishing you all the best with your Diploma studies!
This arch looks so good and I typically don’t care for them. It really claims that area and makes it so functional. And I LOVE the tall storage locker! Great job…
Thanks so much!