Patricia from The Wood Spa shares how to paint furniture with a paint sprayer. All posts contributed by Patricia for Grillo Designs can be found HERE.

[Psst! Join Grillo Designs on Instagram and Pinterest to keep up with our latest posts and ideas. Got a question? Join the discussion in our HOME & DIY chat forums!]
…………
Hello Grillo Friends!
In this post, I will show you step by step how I paint furniture using a paint sprayer. When I started refinishing furniture, I painted all my pieces using a foam/sponge roller and paintbrushes, and I loved it.
I still do. It is simple, the finish is nice and smooth and the process is not too messy.
However, once in a while I get some large orders, such as entire bedroom sets and six chair dining sets (see below pictures), and trust me, painting those with rollers and brushes is VERY time consuming. Not to mention boring, especially the chairs.

I love the smooth, professional look of spray painted pieces. This oversized bedroom set was my latest project and it took me only 2 days do finish all pieces!


USING A PAINT SRAYER GUN – VIDEO TUTORIAL
This post contains affiliate links for your convenience – please see full disclosure here
I have read very good reviews on HomeRight Finish Max paint sprayer, and its price seemed reasonable (around $60 on Amazon), so that was my choice. In no time, this guy became my best friend.
You can watch the video before reading my in-depth tutorial below.
HOW TO – 101 GUIDE
WHAT PAINTS TO USE IN YOUR PAINT SPRAYER:
You can use this paint sprayer with any kind of paint, but since I hate the smell and the cleaning process of oil-based products, I only spray water-based paint. My favorites are Benjamin Moore, Valspar and Sherwin Williams, but I’ve used chalk paints too, such as Shabby Paints and Annie Sloan. They all work well as long as you thin them properly.
PREPPING YOUR WORK SPACE
Spraying is great, but it can be messy. You will always get some overspray a few feet around your piece, so it is advisable to cover your floor and walls if you don’t want them to get all dirty with paint dust. On warm days, I spray my pieces outside, or with both garage doors open to get maximum ventilation.
During the winter, I put up my improvised “spray booth” in a corner of my garage and open the windows for ventilation. These are just sheets of plastic attached to PVC tubes and hooked to the ceiling that I can roll up and down as I need.

You can also buy a paint sprayer tent which comes in all different shapes and sizes!
ASSEMBLING YOUR PAINT SPRAYER:
These are the pieces you will have to put together. Assembling is super easy, and the pictures below are self-explanatory.

Ok, now that your sprayer is ready, its on to the painting!
STEP ONE:
This is maybe the most important step of all. You NEED to thin your paint. That means adding water to it until it gets to the right consistency for a nice and continuous flow, with no sudden splashes and intermittent sprays.

How much water you should add will depend on the paint you are using. Some types and brands are thicker than others. Your sprayer comes with a viscosity cup, which is very helpful for beginners. You just need to fill that cup with your thinned paint and time how long it takes for the cup to empty.
If it is taking between 25 and 40 seconds, your paint is good to go. After 4 or 5 projects you will probably be able to tell if your paint is ready just by stirring it. No need for this cup anymore.

STEP TWO:
Filter your paint into the sprayer cup using a paint strainer.

This step is optional. I do it as a precaution since I never know if my paint is totally clean and free of any viscous material that will affect the spray.

STEP THREE
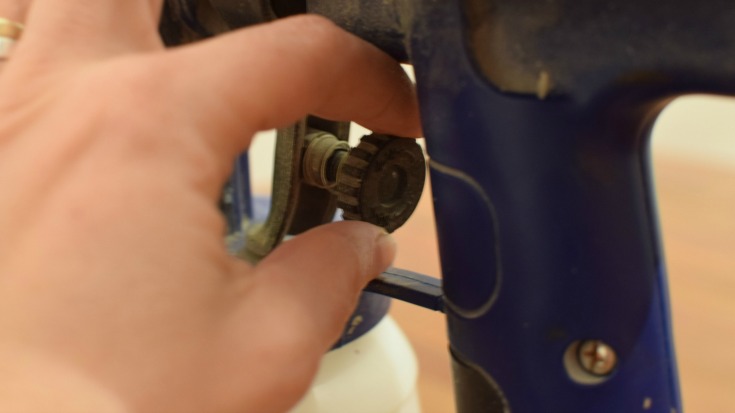
Check if the sprayer nozzle is well tightened. I lost count of how many times I had to interrupt my work because I skipped this step. It makes a huge difference on the
performance of your sprayer.

STEP FOUR:
Test your spray pattern on a piece of wood or cardboard. This is important no matter how much practice you have with your paint sprayer. There are always some adjustments to make before you jump to your actual piece.

STEP FIVE
Use this control knob to adjust the amount of paint that will flow from your sprayer.
STEP SIX:
Put on your respirator mask and go for it! (here a picture if you’re not sure what one looks like)

Always make sure your furniture pieces are prepped before spray painting – the same way you would if you were painting by hand. Work in steady, linear strokes, overlapping each stroke by about 1/2 of the spray pattern. If you start with horizontal strokes, do a second coat with vertical strokes and vice-versa.

Turn the nozzle wings to change spray pattern (horizontal – vertical).

STEP SEVEN:
The last step is as important as the first one. CLEAN your paint sprayer no longer than 2 hours after you used it. You don’t want any paint to dry into solid bits inside its parts. That will affect the performance of the sprayer and eventually break it.
To clean your sprayer, you have to remove all paint from the container, wash it and add some warm soapy water*. Reattach the container and spray that water for about one minute to clean the inside of all parts where the paint flows.
Put your sprayer apart and clean all the pieces separately with warm soapy water. Your sprayer comes with a little brush perfect to clean the little pieces.
Let it air dry.
*For oil-based paints, use mineral spirits for cleaning.
Here are a few more pictures of the spray painted bedroom set.


Have you ever used the Home Right paint sprayer before? Do you have any tips or tricks you can share with us?


Let me know if you have any questions.
Don’t forget to follow me on social media to see all my projects.
PINTEREST / INSTAGRAM / FACEBOOK/ YOUTUBE
Thanks for reading!
Patricia.
IF YOU LIKED THIS POST ON HOW TO USE A PAINT SPRAYER, YOU MIGHT ALSO LIKE SOME OF THESE OTHER POSTS – ALL ABOUT PAINTING !
USING DARK WAX TO ANTIQUE FURNITURE

HOW TO CHALK PANT A PICTURE FRAME


A GUIDE TO CREATING A CHALKBOARD WALL


Home and DIY
Organizing
Cleaning
Crafting
Introduce yourself!


This is amazing really,helpful actually.
Would like to know more.
I’ve just started building furniture 9 months ago
And I’m loving the journey
Thank you for this wonderful post! I’m getting ready to paint a dresser with Fusion mineral paint. Never used it before, it’s similar to chalk paint so I was wondering your thoughts on how I might thin this for using in the sprayer. I’d rather spray them brush. Do you just use water to thin?
Hello, thanks for the tutorial. Which brand and color of paint did you use for this project?
Hi Patricia,
Thank you for this detailed post. Paint sprayers are here to stay. One thing I love about them is the stress they take away while you are painting. And before I forget, they save you time too compared to using a paint brush or roller. And if you usually hire contractors for your home painting jobs, you could potentially save thousands of dollars by using a paint sprayer such as this one.
This is my first time seeing a paint sprayer!!
Pretty interesting, right? This is just one type of spray.
Many furniture painters use spray guns with compressors, which are supposed to be very good too. Since I don’t own a compressor, this electric one was my choice.