A tutorial on how to create a faux built in bookcase wall using basic shelving units (perfect if you rent).

** This post has been sponsored by Argos Home.
A few month ago, I shared my spring living room reveal. As much as I loved it, I always felt like something was missing. Like the room still needed something else to help finish the space.
That feeling of in-completion nagged away at me constantly.
But then it came to me one day, as I sat watching a show on Netflix (I think it was The Gilmore girls). The TV wall…. it was letting the room down in a big way. The wall was quite plain looking which meant the TV itself was becoming the focal point (and you and I both know, that that is not a good thing).
So what did it need?
Wallpaper ? No, I had already done that on another wall.
(Just a reminder – here is how it looked before)

A bookcase wall perhaps?
One that looked built in, but actually really wasn’t? You know, because I rent. And I wanted that great big lump sum of money (aka the deposit) back the day I decide to move on.

The more I thought about this bookcase wall, the more I decided I really liked the idea . . . I was definitely inspired by projects like this one from PMQ for Two

WHY THE ARGOS HOME MAINE RANGE FOR THIS BUILT IN BOOKCASE WALL:
Well why not?
If you’ve been following me for a while, you might remember that I’ve trialed these particular shelves before – in my sons playroom in a previous home! I loved them then, and I love them now. They are deep (thus great storage wise) and very easy to personalise. I even carted them around with me for two house moves after that points for sturdiness too!
But to break it into specifies, here are some other reasons why I chose the Maine shelves
- I know affordability is relative but I do think these bookcases are great value for money! The 5 shelf retails at £37.99 and the 2 shelf £14.99
- They come in a variety of different colours and sizes.
- Easy to assemble
- Adjustable shelving
- And as with most Argos Home Products – you can Fast Track these shelves for either same day or next day delivery or collection (which I’m sure you’ll agree is pretty awesome)
The only downside is that these bookcases don’t have a pre-cut ridge at the bottom which means they can’t fit right up against the wall if there is a skirting board. However for this project, this wasn’t a problem at all.

MATERIALS NEEDED TO MAKE A BUILT IN BOOKCASE WALL:
This post contains affiliate links for your convenience, see full disclosure here
- 4 x 5 shelf Maine bookcases
- 4 x two shelf Maine bookcases
- Valspar paint (Char latte)
- Skirting board (336 cm in length – try and get one similar to your existing one)
- white gloss paint
- Metal Fixing brackets x 7
- MDF or plywood wood (1.8cm 336cm x 27cm). We used 4 x 84cm planks and connected them together
- Wood PSE timber 4.4cm X 4.4cm X 2.4m
- screws
- Optional: Wood mouldings (3.4cm x 0.6cm)
- Wood glue
TOOLS NEEDED:
- Sander
- Foam paint roller and tray
- Circular saw (if you are cutting the wood yourself)
- Electric drill and screwdriver
HOW TO MAKE A RENTER FRIENDLY BUILT IN BOOKCASE WALL
Before I get into the tutorial – I need to give full credit to my husband. I was travelling during the installation part of this project. He stepped in and did everything (with my direction of course ha). So this ones completely on him (not me this time)!
1. Measure the width and height of the entire wall to work out exactly how many MAINE units you will need – and how you are going to display them. We calculated that we could fit 8 shelvings in total on our wall without obstructing doors or windows.

2. Next, assemble the bookshelves using an electric screw driver (to save time). At this stage, you don’t need to nail in the backing as they will needed to be painted. These are how the 2 shelf bookcases look assembled

And these are the 5 shelf units.

3. Use the paint roller to paint at least two coats of paint on the backing . Once dried, nail the backing in place. I chose the colour ‘char latte’ by Valspar (but other brands and colours are available) which was also the colour I intended to paint the wall behind the bookcases

4. Now, it’s time to create the raised platform for the bookshelves to sit on.
The platform needs to be the height of the existing skirting board so that the bookcases fit snugly on to the wall. It also needs to be a 1 – 2cm smaller than the depth of the base of the bookcases (to accommodate the depth of the skirting board).

To achieve the same look we created, your platform needs to be 336 cm in length. You can either cut the wood (either MDF or plywood) to size at the hardware store – or use a circular saw . (We used 4 x 84cm pieces of wood, as that was what we had at the time)
5. To create legs for this platfom, cut the timber wood with a mitre saw to equal lengths of 10cm.

You will need 5 legs per wooden plank. One on each corner and one in the middle

If you have a laminate flooring border, don’t forget to alter what will be the back legs of the platform. You can use a jigsaw to remove a part of the bottom (see below)


6. Secure the wood plank to the feet with wood glue and screws (make sure to pre-drill a whole before inserting the screw). If you are using more than one wooden plank – repeat this step for all of the legs.


Connect each of the 4 planks together using metal anchors (these anchors will come packaged with the Maine Bookcases ) to the underside of the platform. NOTE: If you have young children who might climb on furniture – its always a good idea to anchor bookcases to the wall.

Your platform should end up looking like this.

And the book cases should fit on perfectly as below.

7. Cover the front and sides of the platform with skirting board (you can either use one long board or two smaller ones connected in the middle) . Cut the ends of the new skirting board so it fits closely on to your existing board (again allowing for the laminate floor border if you have one)

8. Secure the skirting board to the sides and front of the platform with wood glue and nails. Paint the visible parts of the platform in white gloss once the glue has dried

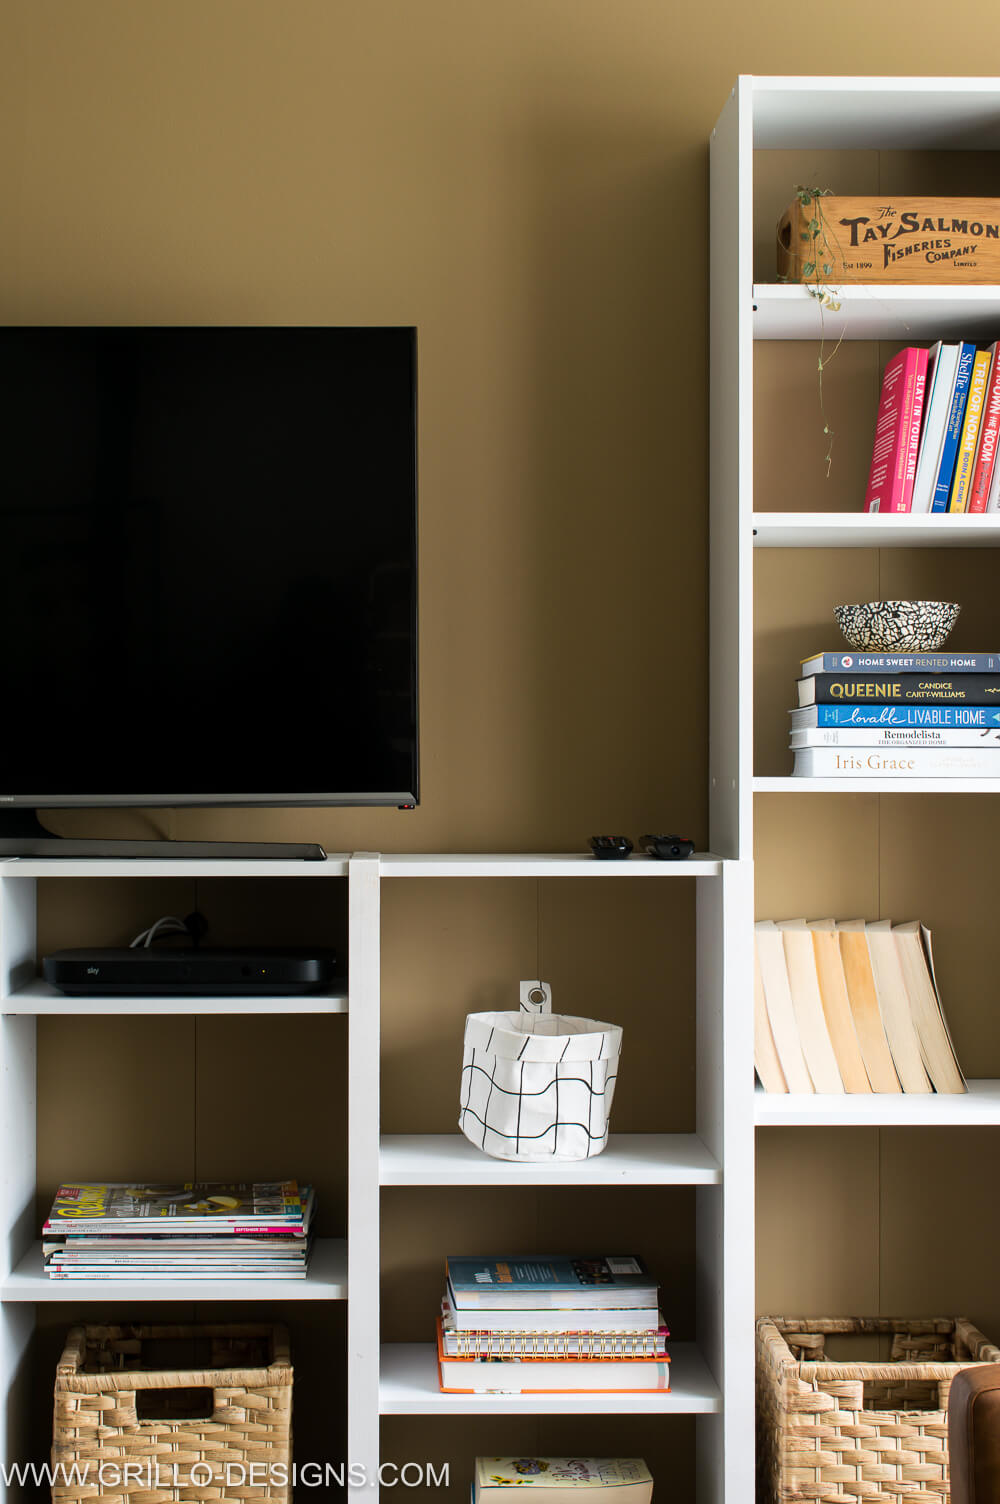
9. Finally, place the bookshelves on the platform.
The smaller bookcases in the middle and the taller shelves on the end.

Connect the bookcases together by screwing in metal brackets to the backing for added stability. Now is also the time to insert a small hole for any cables or wires (if you plan to have a tv on this bookcase wall)

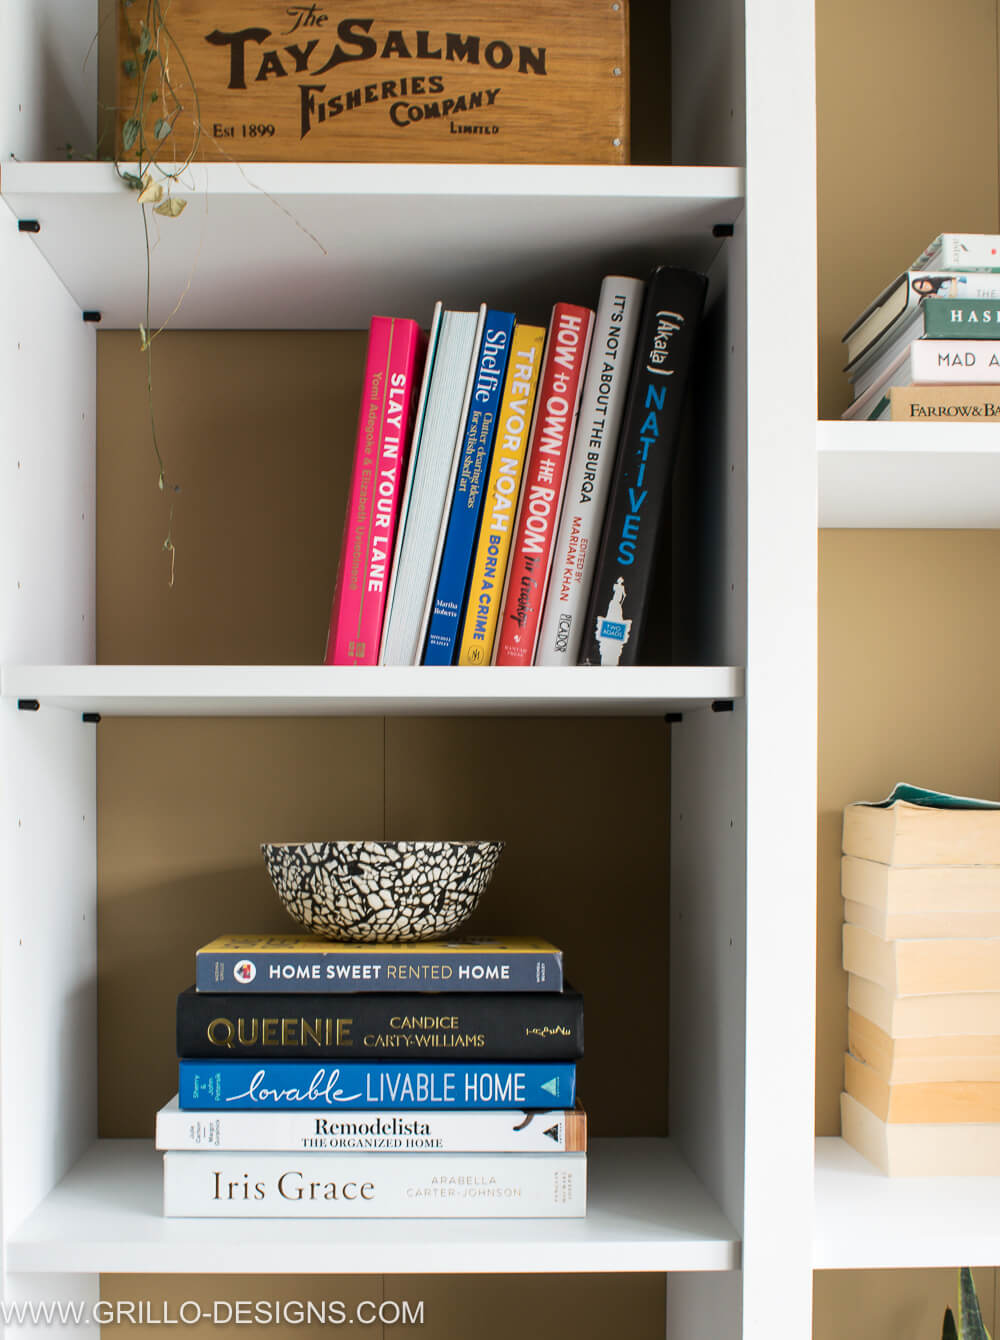
10. Insert the inner shelves. I chose to place mine in at different heights as I liked the idea of asymmetry. Optional, but you can also use white moulding strips to cover the lines where the shelves connect as seen below
And thats’s how we created this built in bookcase wall. You might have also noticed that I painted the wall from white to the same colour as the bookcase backing. I wanted contrast – and I think this wall colour really helped to achieve that!

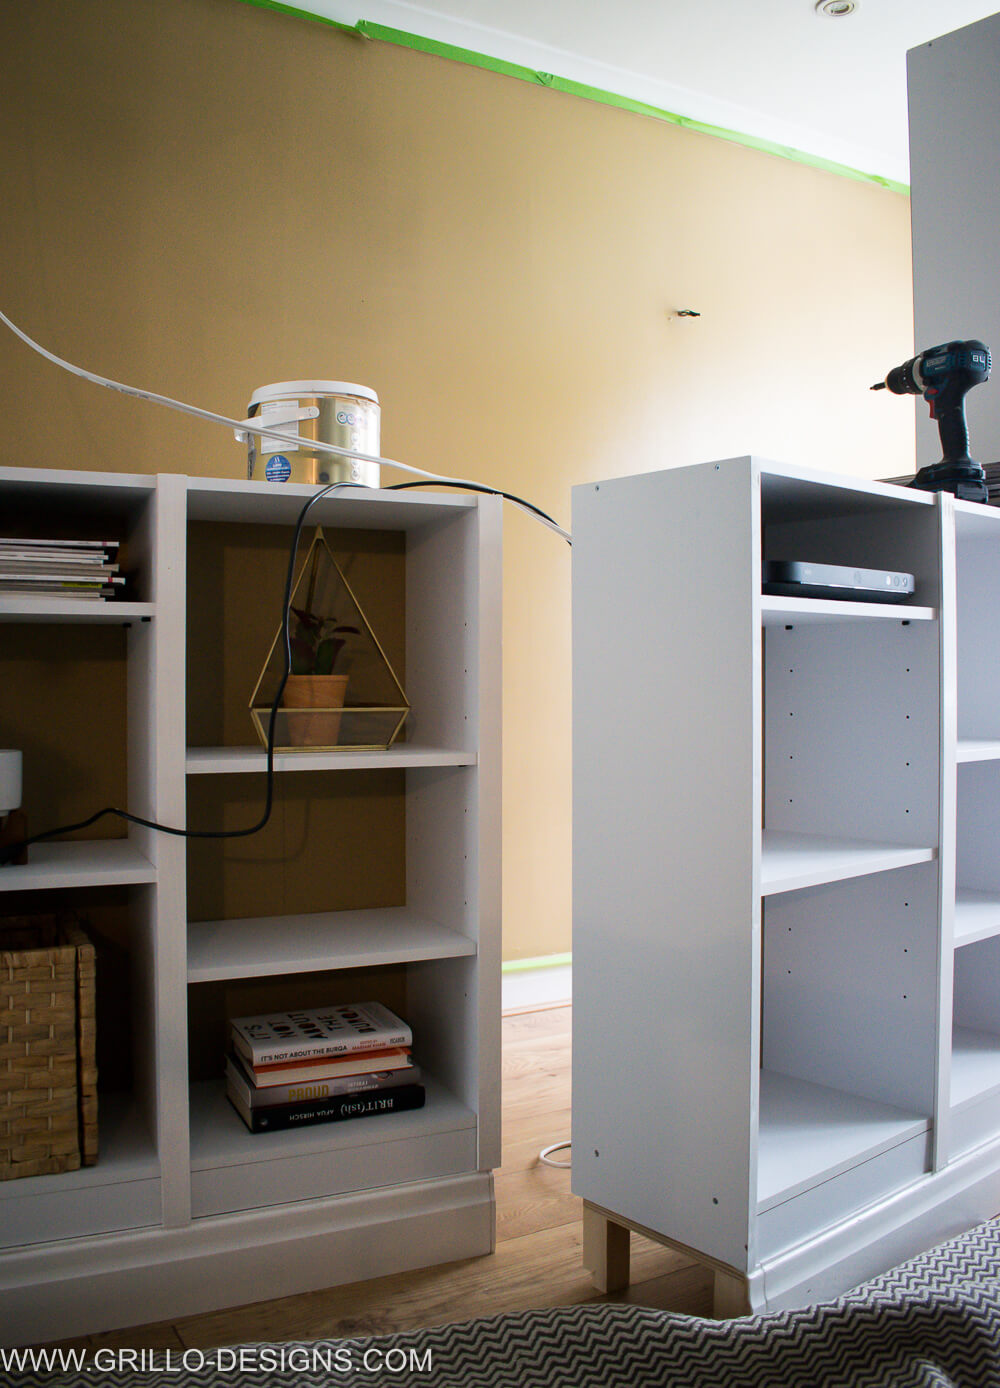
l love that even though this bookcase wall might seem like its part of the wall – it’s not.

If we were to move again, we would just need to separate the shelves and move the platform as nothing is permanent about this design (See below – where we moved the shelves back to paint the wall ). NOTE: If you have young children – its always a good idea to anchor bookcases to the wall.

I’m a huge fan of these wicker baskets from Argos Home. I’ve added them in mainly to store my sons everyday toys that he often likes to play with in the living room. They slot perfectly into the Maine Bookcases.

So what do you think of this renter friendly built in bookcase idea? Do you think it’s something you might attempt in you own home?
***This post was sponsored by Argos home. I received products and payment for my time creating this post. I only partner with brands I LOVE and think you will LOVE too! All ideas, photos and opinions are 100% my own.


I liked the concept and the bookcase. One word – stunning!!
Luv this-I just moved into a rental and there is this wasted 10 x 10 area that I was planning on putting a fireplace mantel but I think I will add the bookshelves as well 😍
Thanks for reading 🙂
Amazing! Love your style! Where’s the plant pot/stand with the snake plant in from? Beautiful ❤️
Thats from Argos Ive linked it in the post 🙂