Hi there. Join Grillo Designs on Instagram and Pinterest to keep up with our latest posts and ideas. If you’re on Facebook, why not join our Home decorating, Upcycling and DIY group too – inspiration is guaranteed!
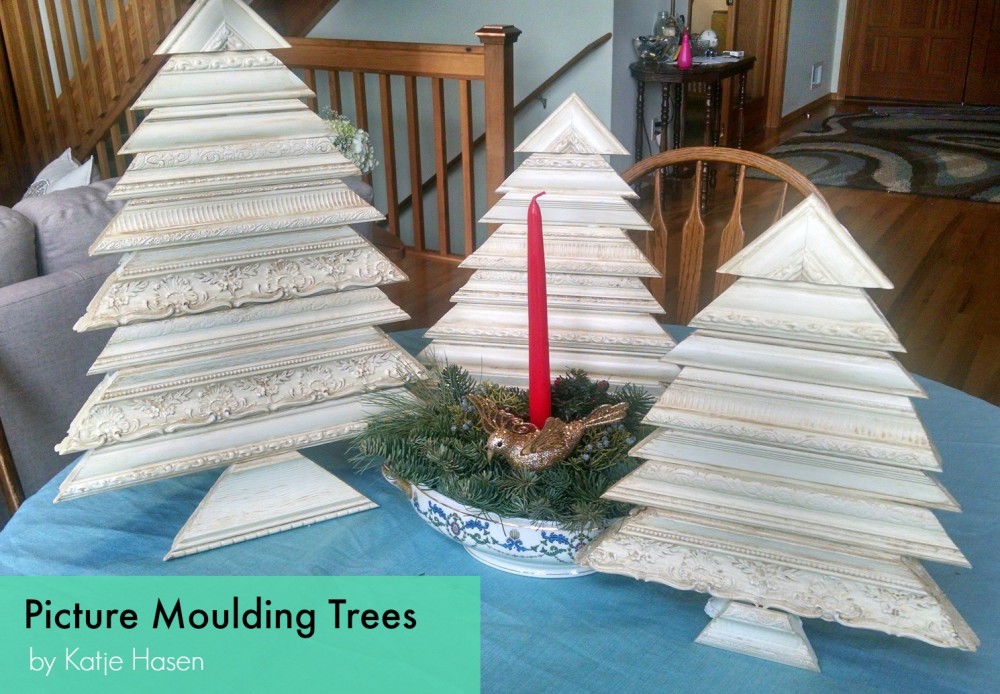
Submitted by: Katje Hansen
Member of: Grillo Designs Home Decorating and Upcycling Group
Materials used:
Old picture frames with interesting designs
3/8″ plywood
1/2″ or smaller dowel
Gorilla glue
chop saw or miter saw
jig saw
drill
safety goggles

How I dit it:
Read all instructions before beginning your project, as various methods are given to achieve the end result. When in doubt, go with what pleases your eye. Always wear protective eye wear when using power tools.
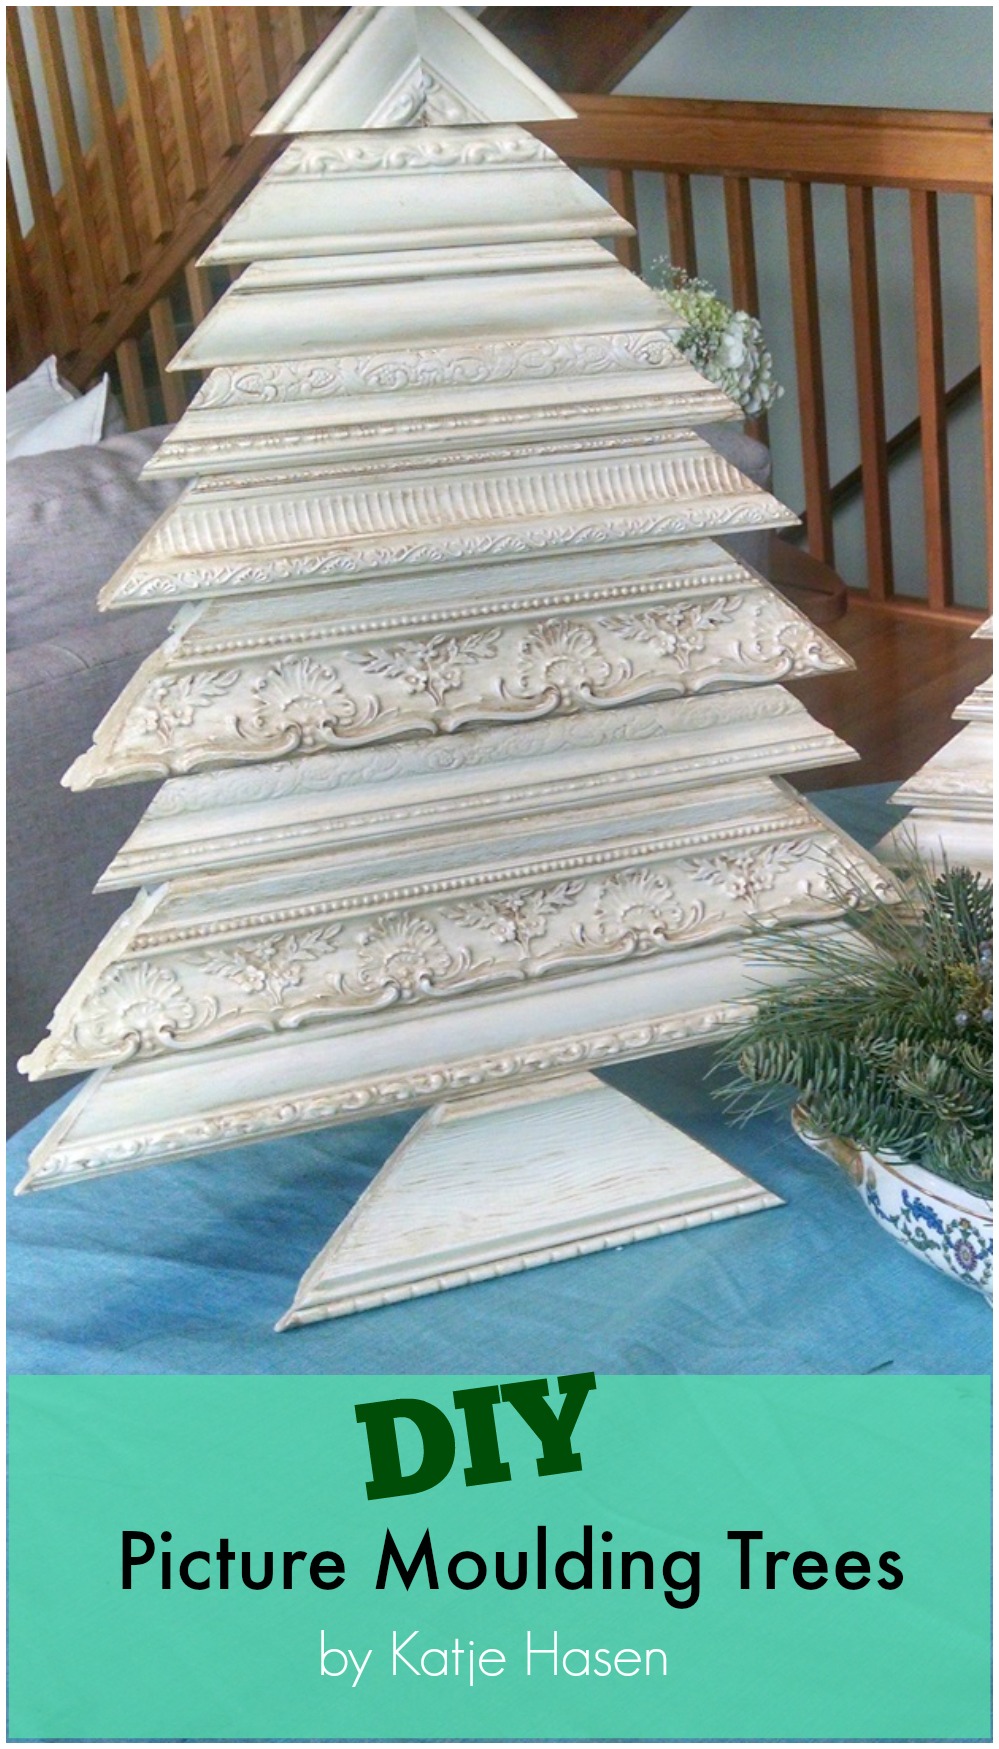
1. Choose a frame that has corners that will make a suitable “tree top” and set it aside. The height of the corner molding will determine the length of the next tier below the tree top, so stay between 1½’ to 2” or your tree will be very wide overall. *(See diagram in photos). Disassemble your other frames, removing any metal biscuits used to hold corners together.
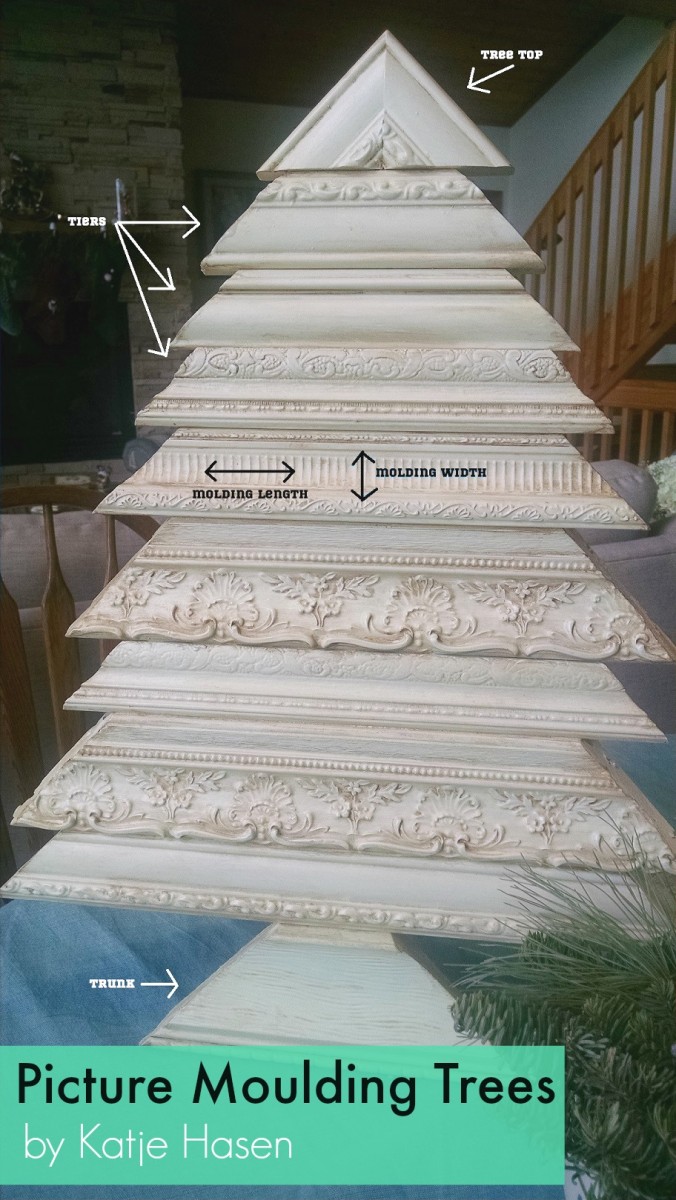
2. I used a chop saw and swung the blade left and right for each tiers’ cuts so that I would not have to place the irregular side of the molding down, but you could use a miter saw or table saw. For the top, being careful to avoid metal biscuits used to hold frames together, cut the corners of the frame to form the top tiers using a 45 degree cut, (this will allow the top pieces to have a flat bottom). Use the remainder of the frame to make tiers. Set chop saw at an angle you are happy with (I went with 55 degrees) and note the degree mark, as you will use the same number of degrees from center on both sides of each tier, and cut frame into graduating lengths, making the bottom of each tier about ¾”-1¼”wider on each side than the top of the tier that will sit below it. Cut a “trunk” using the same angle.
3.Once you have the desired amount of tiers cut, lay them out in a “dry run”, exchanging pieces between the trees until you are happy with the design mix.
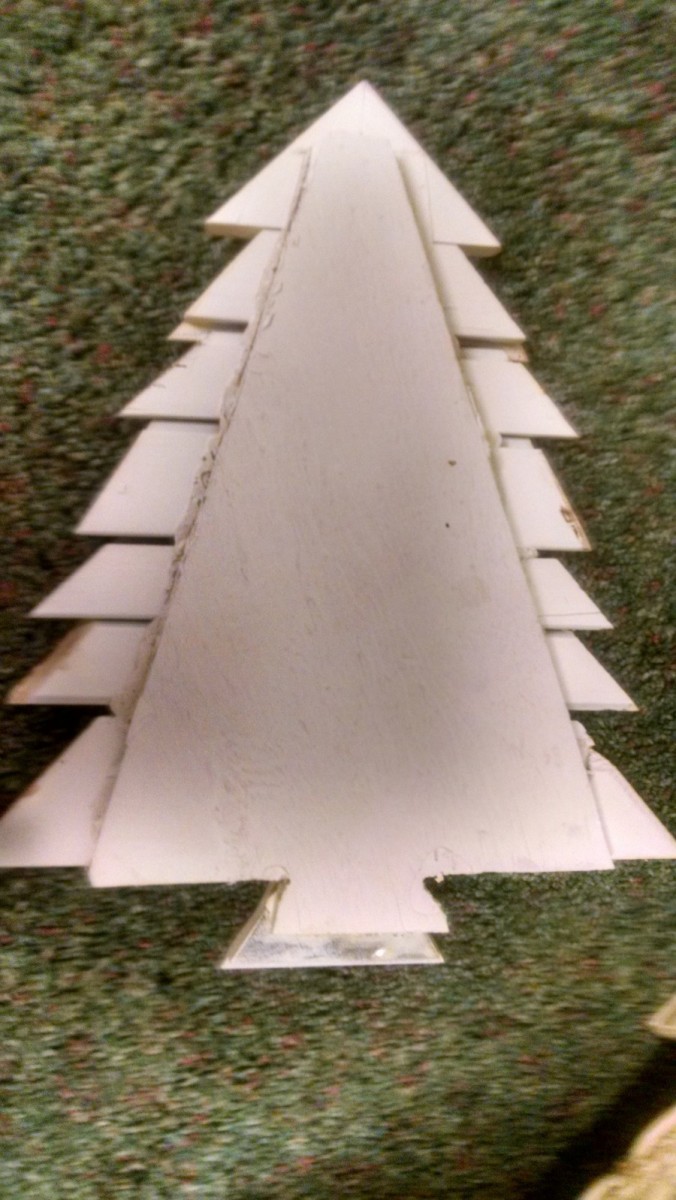
4. To make the back, measure across the top of the bottom tier, this will be the widest width of the back piece. Measure from the bottom of the bottom tier to the very top of your “dry run” and subtract 1/2″, this will be the height of the back not counting a “tongue” for the tree trunk. The pattern width must include only the body of the tree, so that it is not visible on the sides through the “branches” or tiers.
Using the method you find easiest, make a pattern on plywood for the back including a tongue for the trunk to be attached to, making the tongue slightly narrower than the width of the top of the trunk and slightly shorter than the actual height of the trunk (to allow for the angle at which the tree will stand once the dowel is inserted. I made the pattern on cardboard first and traced around it onto the plywood.
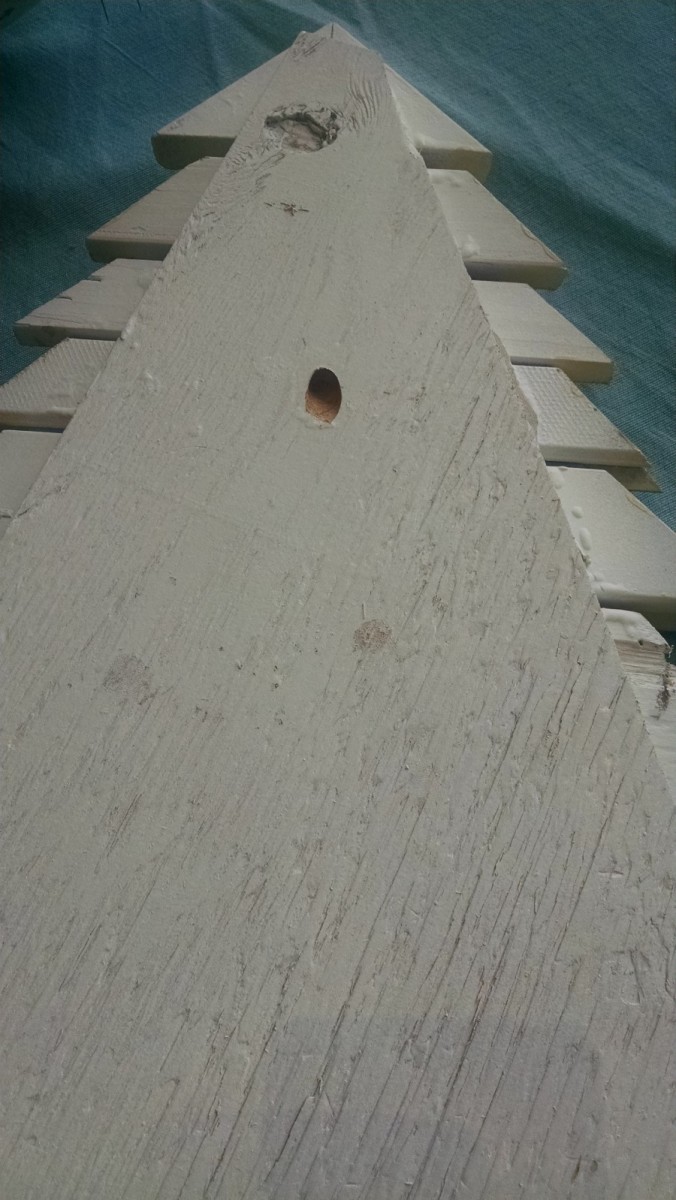
5. I decided to go with a dowel stand, but would also recommend a rectangular base from 3/4″ wood. Using a jig saw or your saw of choice, cut the back out of plywood, . Using your drill, equipped with bit equal to your dowel, drill a centered hole at a steep angle upward about 2/3 of the way up the total height of the back.
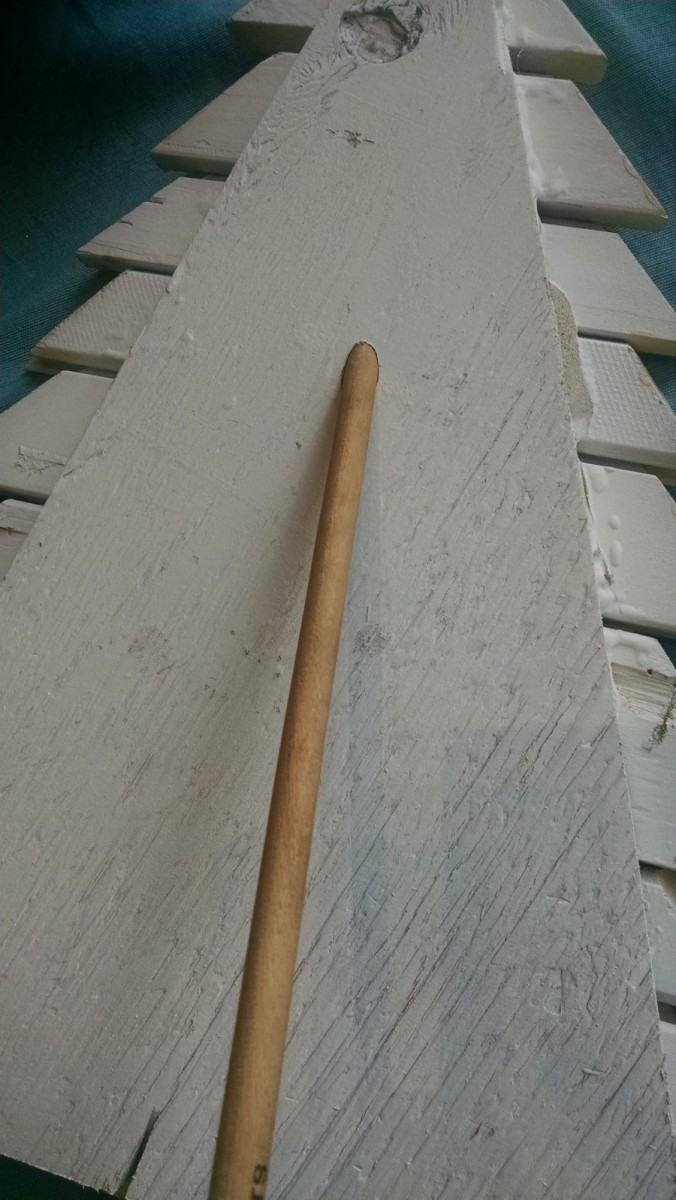
6. Turn the back over and block the hole with a small piece of tape, and following the instructions carefully, glue the tiers to the back. I chose to use Gorilla glue, as picture mould varies in shape and Gorilla glue expands, filling open spaces. I feared staples or brads would either miss the mark or crack the wood. If you are using gorilla glue, be sparing with it, as it expands exponentially. Clamp or weight until glue is dry. do not glue dowel as it will be removable for storage purposes. Trim excess glue with exacto knife or razor blade.
7. Decide at what angle you would like them to stand and cut your dowel accordingly …measure twice cut once!
Katje Hasen image
I am a retired customer service agent recently relocated to the Pacific Northwest, USA. I love to use natural materials and upcycle items in my crafts. I can often be found on the beach, with a bag of shells, driftwood and other items for my projects, hoping for a glimpse of a seal, whale, porpoise or other mysterious sea creature.
If you have any questions for Katje or would like to share your thoughts on this project, please leave a comment below!


Interesting idea! i love seeing all the different interpretations craft bloggers come up with 😉