If you lack space for a separate nursery in your home, here are 5 tips for making a nursery work in your bedroom.
Finding the perfect place for your baby’s cot whilst still having a space that is calm yet functional might sound like a tall order, but hopefully by sharing my space and top tips with you, you’ll feel inspired and ready to tackle this transition.
Lets start off with the most important . . the sleeping arrangements!
1. Choose The Right Cot For Your Space
Babies don’t take up a lot of space at all, so for the first few months a small moses basket will do just fine. Once they’re over 6 months, you can start looking into more longer term options. Alternatively there are options that adjust and adapt as baby grows or cots that attach to the side of your bed, which can be suitable from newborn until toddlerhood.
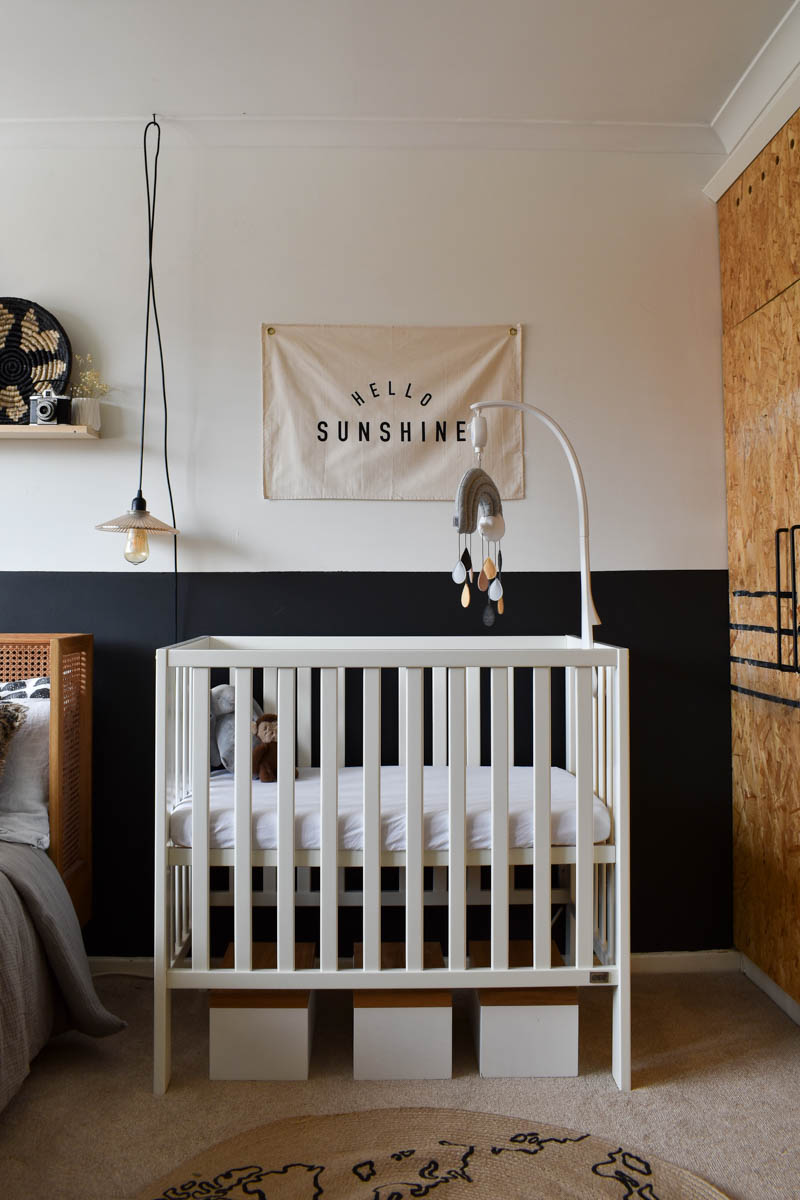
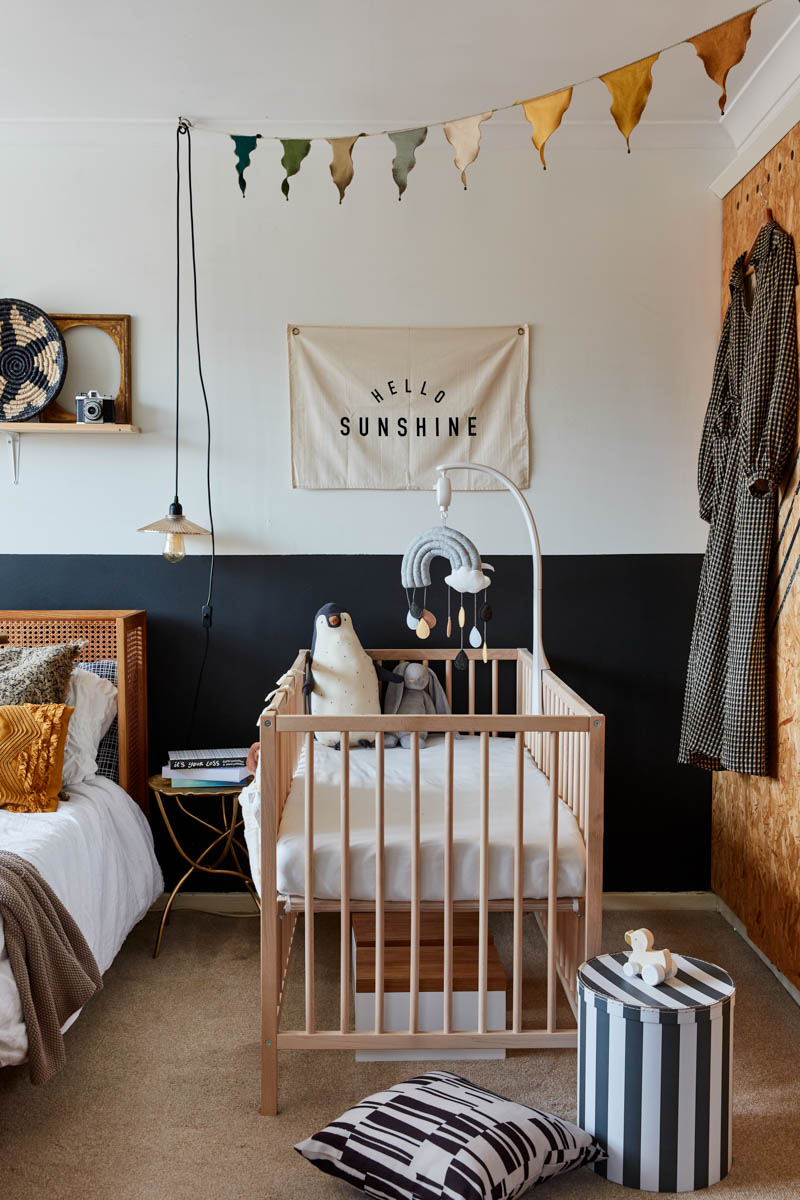
This Mamas and Papas cot was the one I initially used (gifted) and then I graduated to a bigger IKEA cot, which is still very compact (I think its the smallest cot out there on the market).
Here are some other compact cots you might like:
Wayfair, Space Saver Mini Cot
La Redoute, Jimi Colourful Cot
Snuzpod, Snuzpod Cot
Stokke , Mini Baby sleeper
Our current IKEA cot sits in front of the closet, and even though its much bigger than the previous one, we still have plenty of space to be able to get in and out of it when we need to.
Finding the right spot has to work for all of you because your room still needs to function and you need to be able to get to the things you need on a daily basis. So consider access and really try to picture how the space will be used in the chaos that is parenthood.
2. Keep Decor Simple and Neutral to Match Your Space
If and when you have a separate nursery for your baby, you can decorate it any way you want.
I mean that’s part of the fun of having a room that will be your baby’s bedroom right? But if you’re sharing your room with your baby, well…that’s a whole different story. It’s best to keep decor neutral and/or match it to your existing decor because its still your bedroom after all. You still want a space that feels like your sanctuary and reflects your style even if you are sharing it with a tiny human – especially as you’ll be spending so much time in it in the first few months!
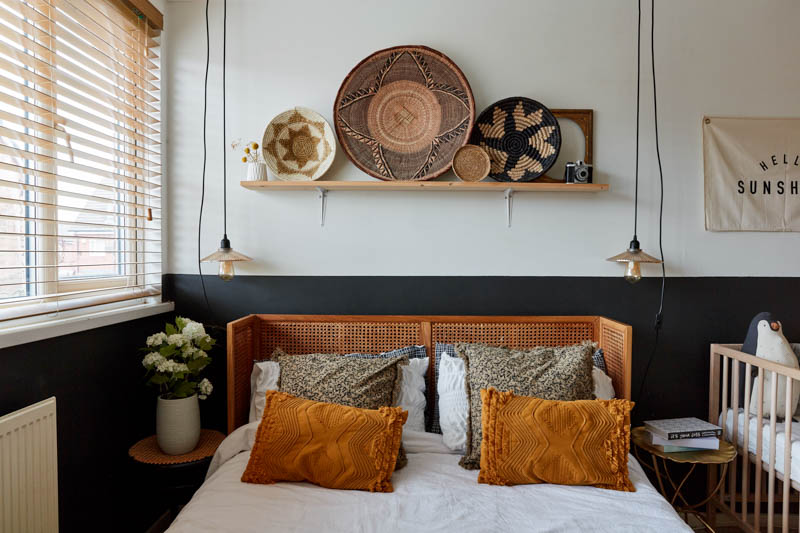
We did a bit of rearranging (even downsized to a smaller bed, you might remember a previous bed from this bedroom makeover) , but I stuck to my design style of earthy tones and texture. Don’t worry, my husband still has plenty of room to get in and out of bed over there by the window. And the hanging lights were easy to move since they aren’t wired, just plugged in and hung with hooks.
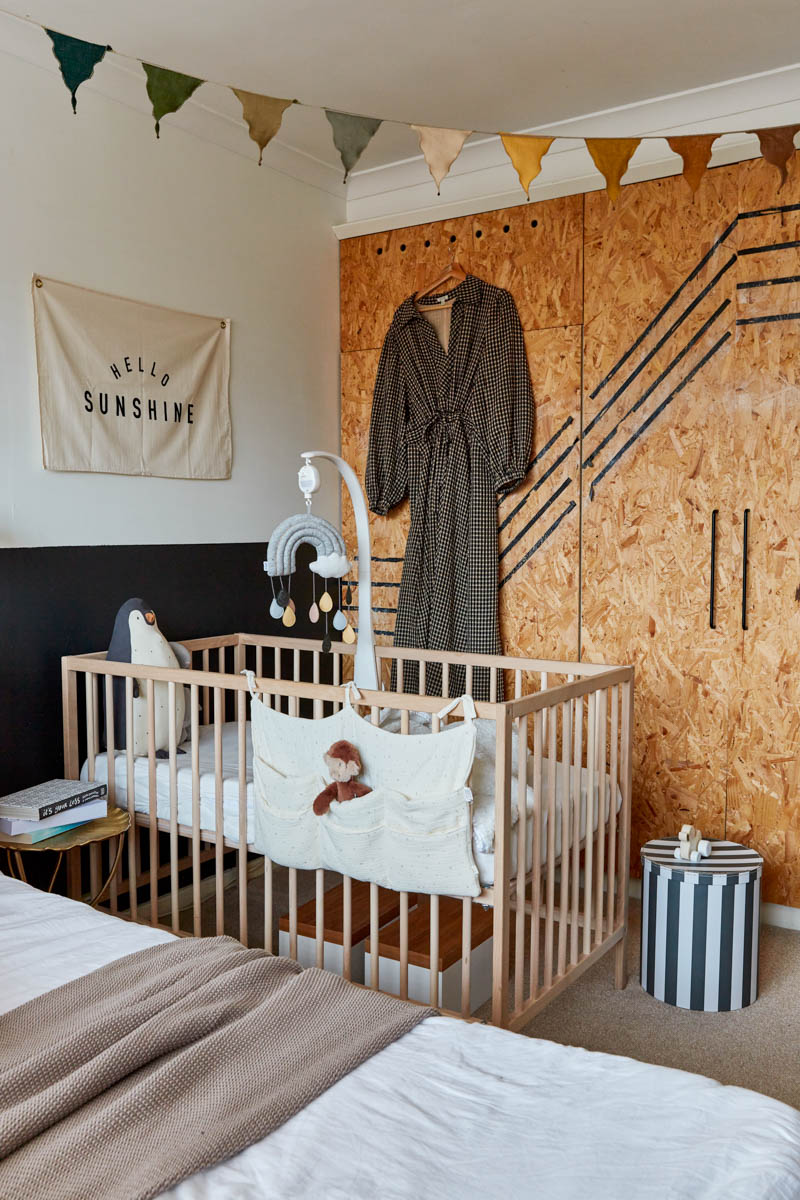
I also kept the baby decor to a minimum to avoid clutter and help manage the space with extra stuff in it. I added a cute bunting that drapes over the crib and this fun, neutral Hello Sunshine canvas wall hanging to define the space.
Cot, IKEA / Mobile (gifted), Mamas and Papas/ Hello Sunshine Flag, Kitty Makes/ Striped Box, Monpote / Linen Bunting, Etsy,
3. Create a Baby Corner
You’re going to need an area in your bedroom to keep all the baby necessities. Clothes, nappies, etc. Consider using a corner of the room or even an alcove if you have one.
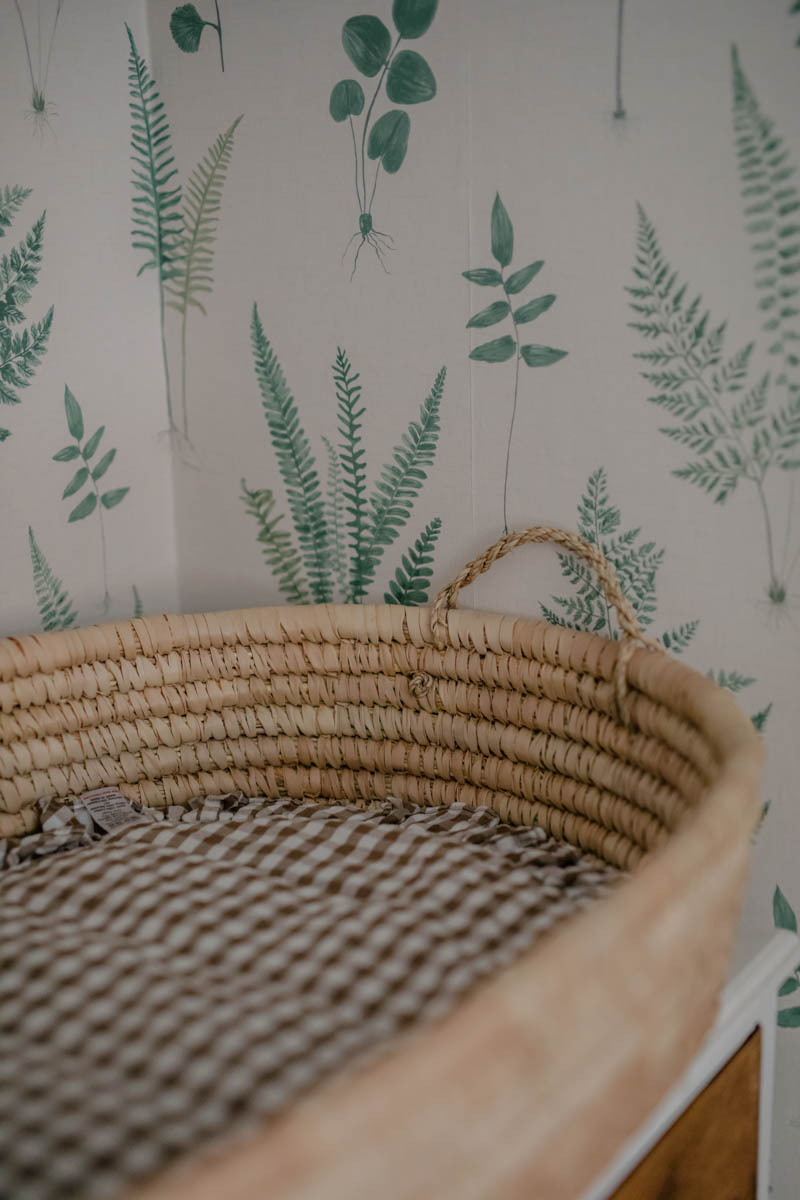
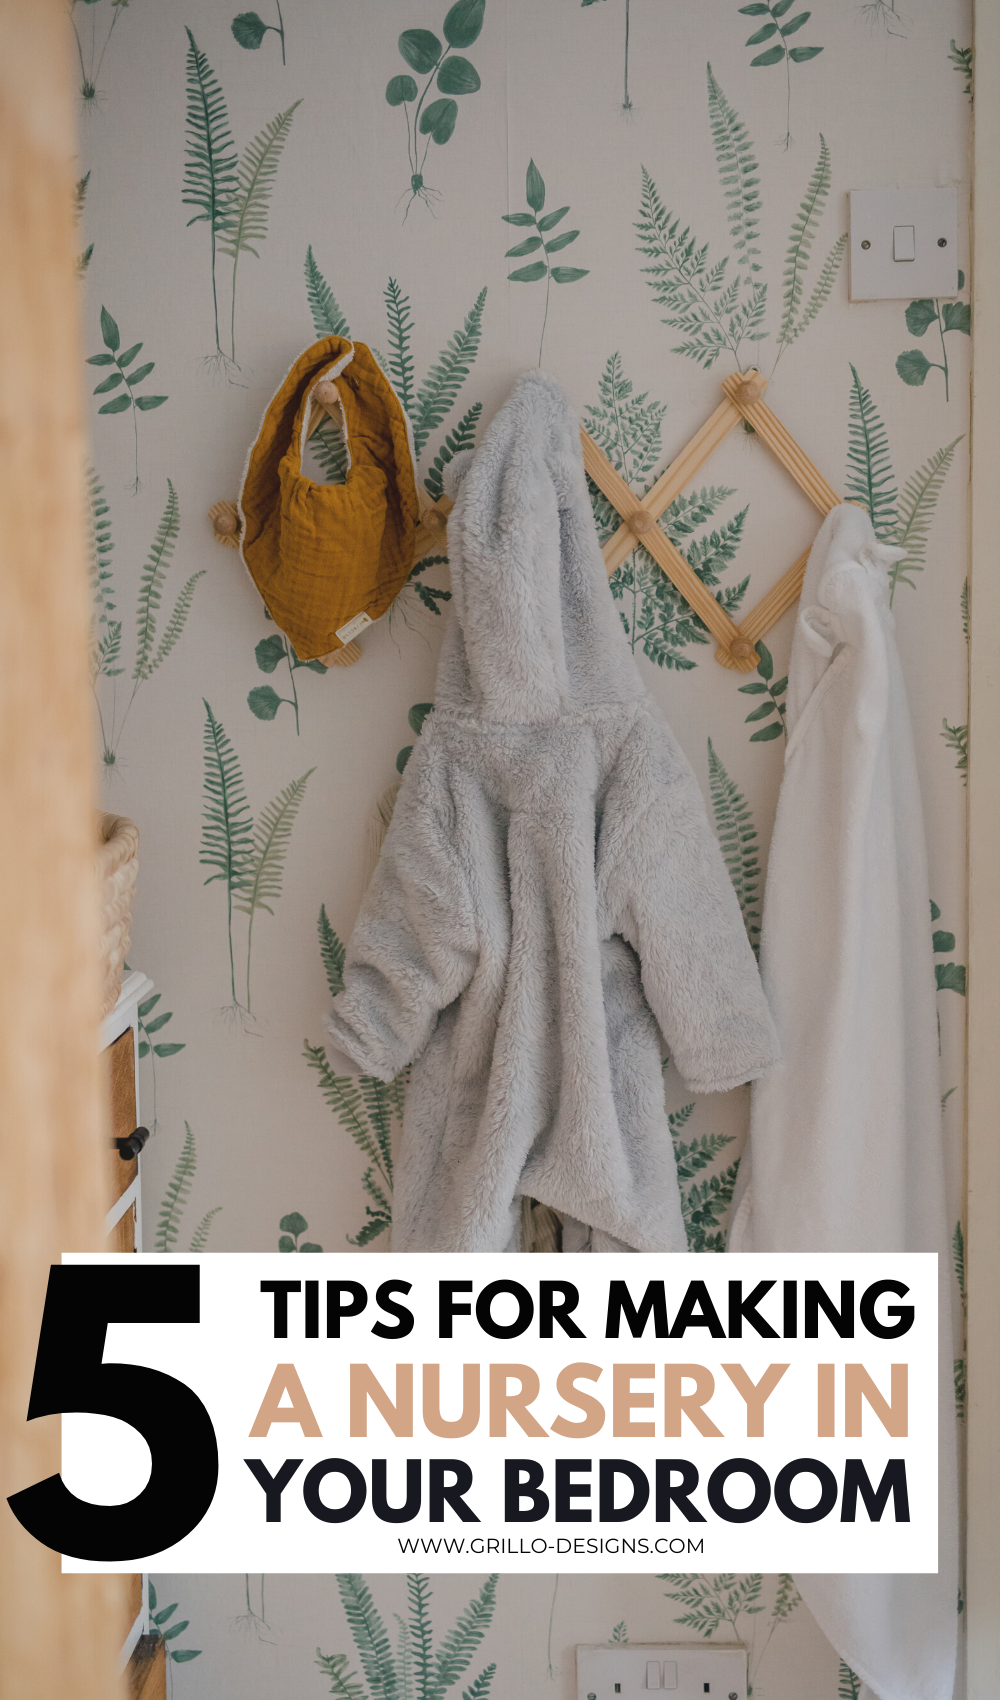
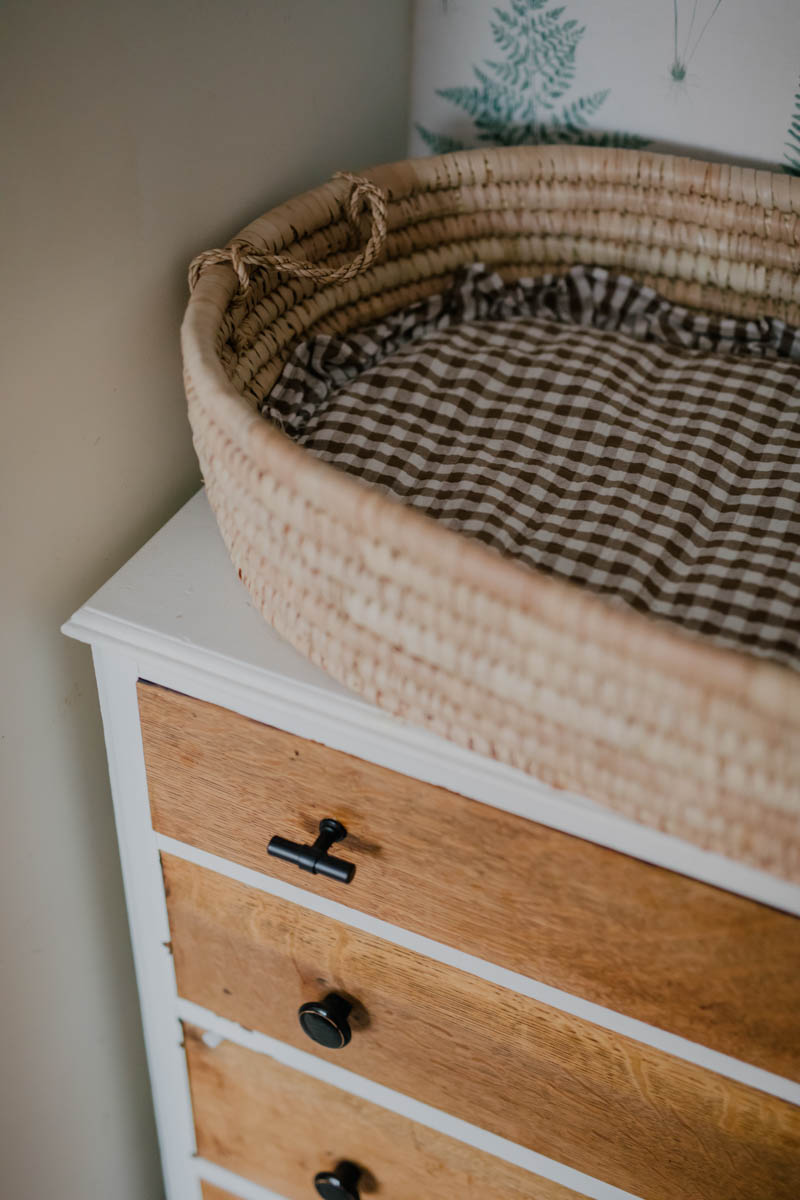
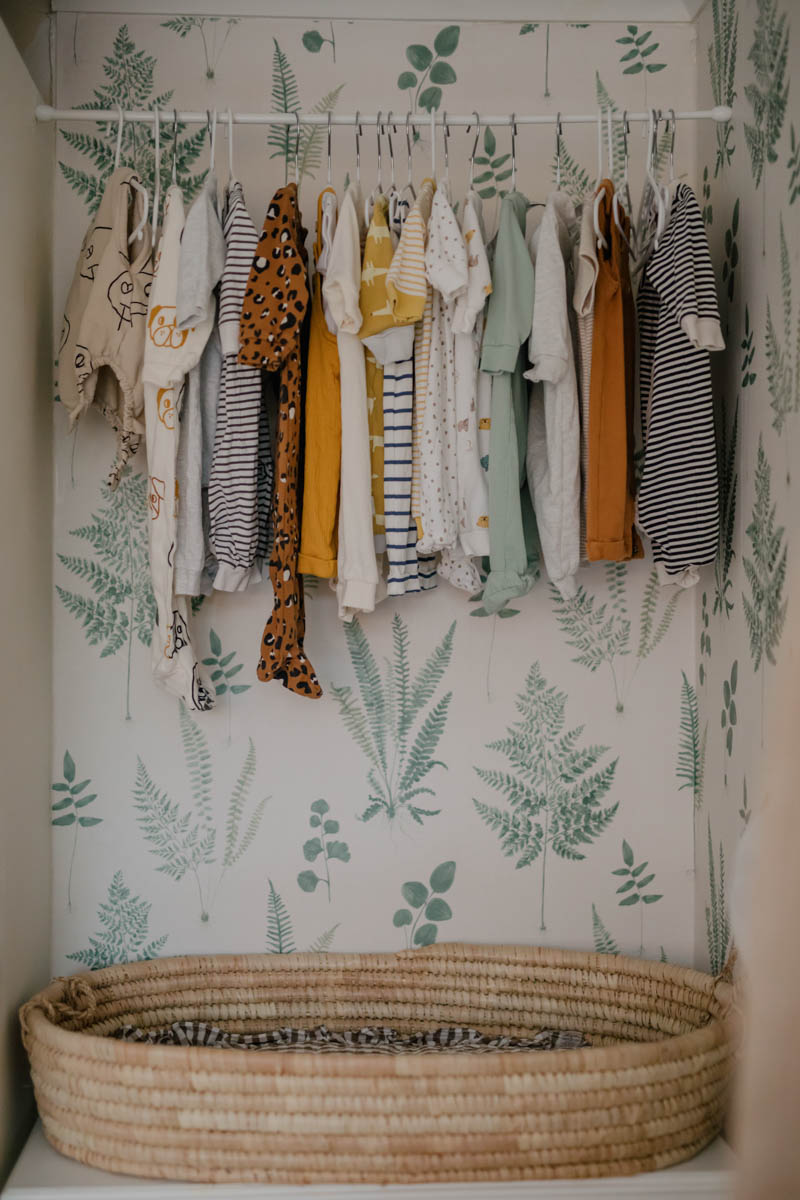
We wallpapered our alcove with this botanical wallpaper. It fits with our decor but creates a definitive area for all things baby. There are great peel and stick wallpaper options , which are both renter friendly and also give you a non-permanent decorative license to create a cute nook for baby. You can simply remove once baby moves out of your shared space.
4. Repurpose Existing Furniture
Instead of adding extra furniture especially for baby, see what you already have and consider how you could use it as a multifunctional piece. For example, adding more furniture wasn’t an option in our small bedroom, so we decided to use our dresser as a changing table.
It was as easy as adding a changing basket that we used as a changing pad. This one is from Our Lovely Goods, a wonderful indie brand (they also make the most amazing smelling candles!) but I do think they have sold out. I always recommend signing up to small shops’ newsletters as they always will be notify you via there first when stock is updated!
The colour and texture of the basket fit in with the rest of our decor and I just love the look of it. I’m going to have to find another use for it when our little guy outgrows it.
5. Get Creative with Storage Solutions
Even though baby clothes are small, they do need a fair amount of them (someone say pooplosion?) Storage can be tricky at the best of times, so you have to get extra creative when creating a multipurpose shared space. So going vertical with storage solutions or using the space under the bed, like a pull out drawer, will save you space as you won’t need extra furniture for clothing. A cute but renter friendly way of using a tension rod as a clothing rail really made me smile when I saw all his sweet little clothes hanging up! But was practical as I had outfit options to hand.
Underneath the baby cot is also a great space to use for extra storage. I added simple boxes where we can keep extra nappies, toys, and all things baby in and out of the way. It also made it a lot easier having things stored nearby rather than in other areas of the house, which is a relief during those blurry, sleep deprived moments!
Hopefully with these tips on how to make a nursery work in your bedroom, you’ll be able to find space for your little one and be able to keep everything organised and manageable whilst you’re sharing your space! Know that this situation won’t be forever. Your baby will be old enough at some point to share a room with their sibling (like ours will) and you will get your bedroom back.
Children grow up so fast, enjoy this time while you can.
Photography by Kasia Fiszer and AMVIO.


IKEA TROFAST HACKS FOR THE BEDROOM


