Are you ready for this?
Because it’s going to be a long one.
Go put the kettle on… make yourself a cup of tea.
Or coffee. I dunno, whatever you tend to drink when you want to relax.
No, not wine . . . put that glass down. It’s far too early for that and I need your full attention please.
This post may contain affiliate links. It is a way for this site to earn fees by advertising or linking to certain products and/or services. Please read my full disclosure here.
All photos were taken by the brilliant Photographer Kasia Fiszer .
Is this a renter friendly kitchen makeover?
The key is in the title really, but I’ll start off by saying no, this isn’t your classic renter friendly kitchen makeover ( I say classic, because it really depends on how you look at it). A makeover like this can only be done if you have one of those chilled easy going landlords I’ve spoken about before in my book. I won’t be changing anything I’ve done here back to what it was before I leave because this was all done with prior permission from our landlord .
If that puts you off because you’ve come here looking for something a little less intrusive that won’t cost you your deposit, check out phase 1 of my rented kitchen makeover.
And now that that disclaimer (of sorts) is out of the way – it’s story time!
Why I decided to makeover my rented kitchen (again).
Because I wanted to.
The end.
Just kidding
(sort of). . .
Here’s the unabridged version.
Truthfully, I just didn’t like my kitchen.
Picture attached below to jog your memory . . this is how it looked when we first moved in.
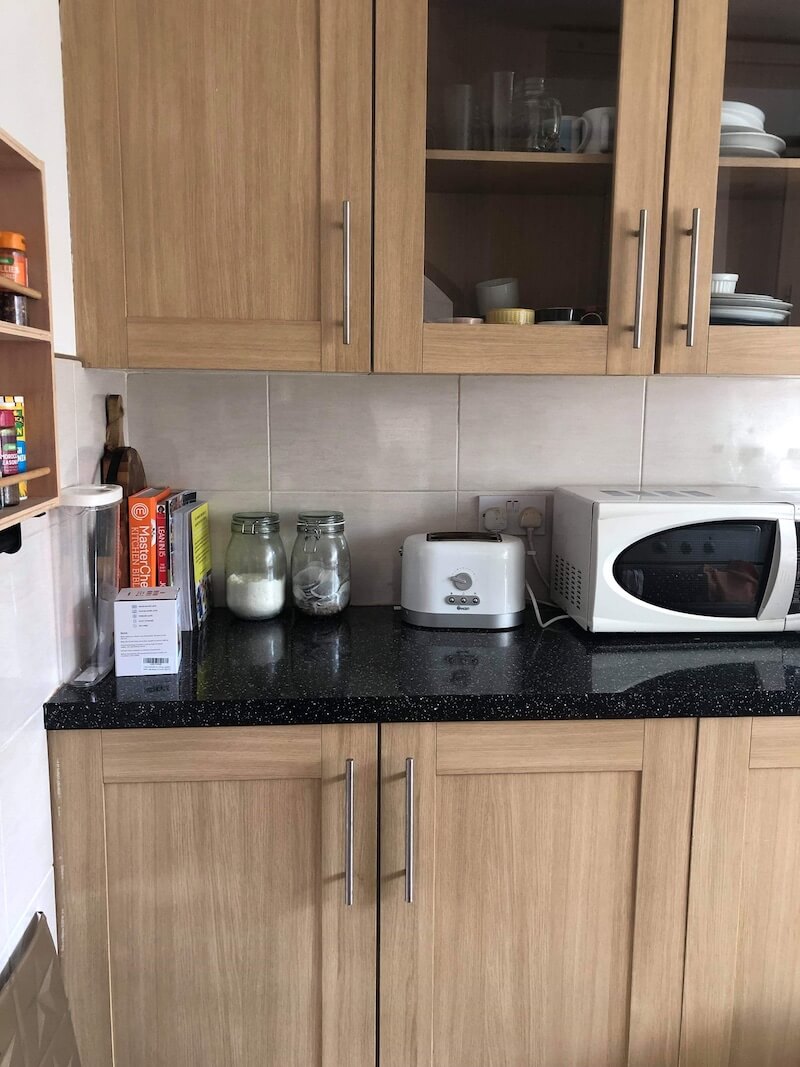
But it’s not even that bad . . I bet you’re thinking.
Well you know what they say about pictures, they aren’t always what they seem. And trust me, I’m in the business of taking pictures so I should know.
But back to story time, after a few years of trying my best to avoid spending any time in my kitchen (which is kind of difficult when you’ve got a family to feed), I decided enough was enough and that I needed to decorate it somehow. My child and husband were in desperate need of nutrients. . . nutrients that only a home cooked meal could bring them. And in order to do that, I needed to like being in my kitchen
Side note : I hope by now you’ve realised that my sense of humour is a little dry. But just in case, I’ll clarify. My family weren’t starving. Just Eat Take-away delivery was around at that time.
So I painted cabinets, removed doors, changed the hardware and applied peel and stick wallpaper (you know all the basic renter friendly stuff I talk about in my book) . The end result looked pretty chic actually. And for once, being in my kitchen didn’t feel as suffocating.
Then the pandemic hit in 2020, and we, along with most of the world (not including our party going Prime Minister), went into quarantine (or Lockdown as us Brits called it) and were told to stay at home.
(And even when they did eventually lift the Lockdown , I still was at home quite a lot to be honest. Anyone else develop a little bit of pandemic induced agoraphobia ?)
That old feeling of not liking my kitchen despite it looking much better started to creep in again. Being at home 24/7 meant it was difficult to ignore all the things about my kitchen that I hated. The lack of light, the waters soaked counter tops, the peeling cabinet doors, the outdated tiles, the overbearing wall cabinets. Basically all of the things I hid really well in my photos but still had to live with.
(Like I said, that’s the thing about pictures)
So yeah you guessed it. I had another one of those ‘enough is enough’ moments.
We messaged the landlord (well alright I got my husband to message because I was too chicken) and asked for permission to make bigger non permanent changes. The landlord replied that that was OK, but that he would be unable to help with costs this time ( he has contributed to improvements in the past) as he had recently lost his job. I was fine with that. I didn’t see myself spending too much money.
We started this renter friendly kitchen makeover project in April and have only just finished early January (Slow and steady wins the race and all that) . I say finished but is a room ever really finished? There are still a few things I need to source .. like a ceiling light and blinds for the window.
At the time of this makeover, I was very very pregnant with my second child, so the parts that I would have usually diy-ed myself, I didn’t. Then my son was born and both my husband and I just had zero time to do anything. We got a trades person in for some of the big jobs like the tiling, installing the countertops, and plastering and my husband and I did all the other cosmetic stuff when we could.
We’ve never gotten in external help before for DIY stuff so this was truly an eye opening experience. It’s not something I’ll rush into doing in the future either because some of the quotes we were getting were ridiculous and finding anyone with availability that year was almost impossible ) You can check out all the progress videos below.
View this post on Instagram
View this post on Instagram
We’re the dream team… the husband and I. When we’re not arguing about whose DIY method will work that is.
But respect to him. Have I mentioned before that he’s the one who taught me all I know about DIY right (aside from YouTube)? And that he himself is completely self taught?
I think I have , but just in case you didn’t know, now you do.
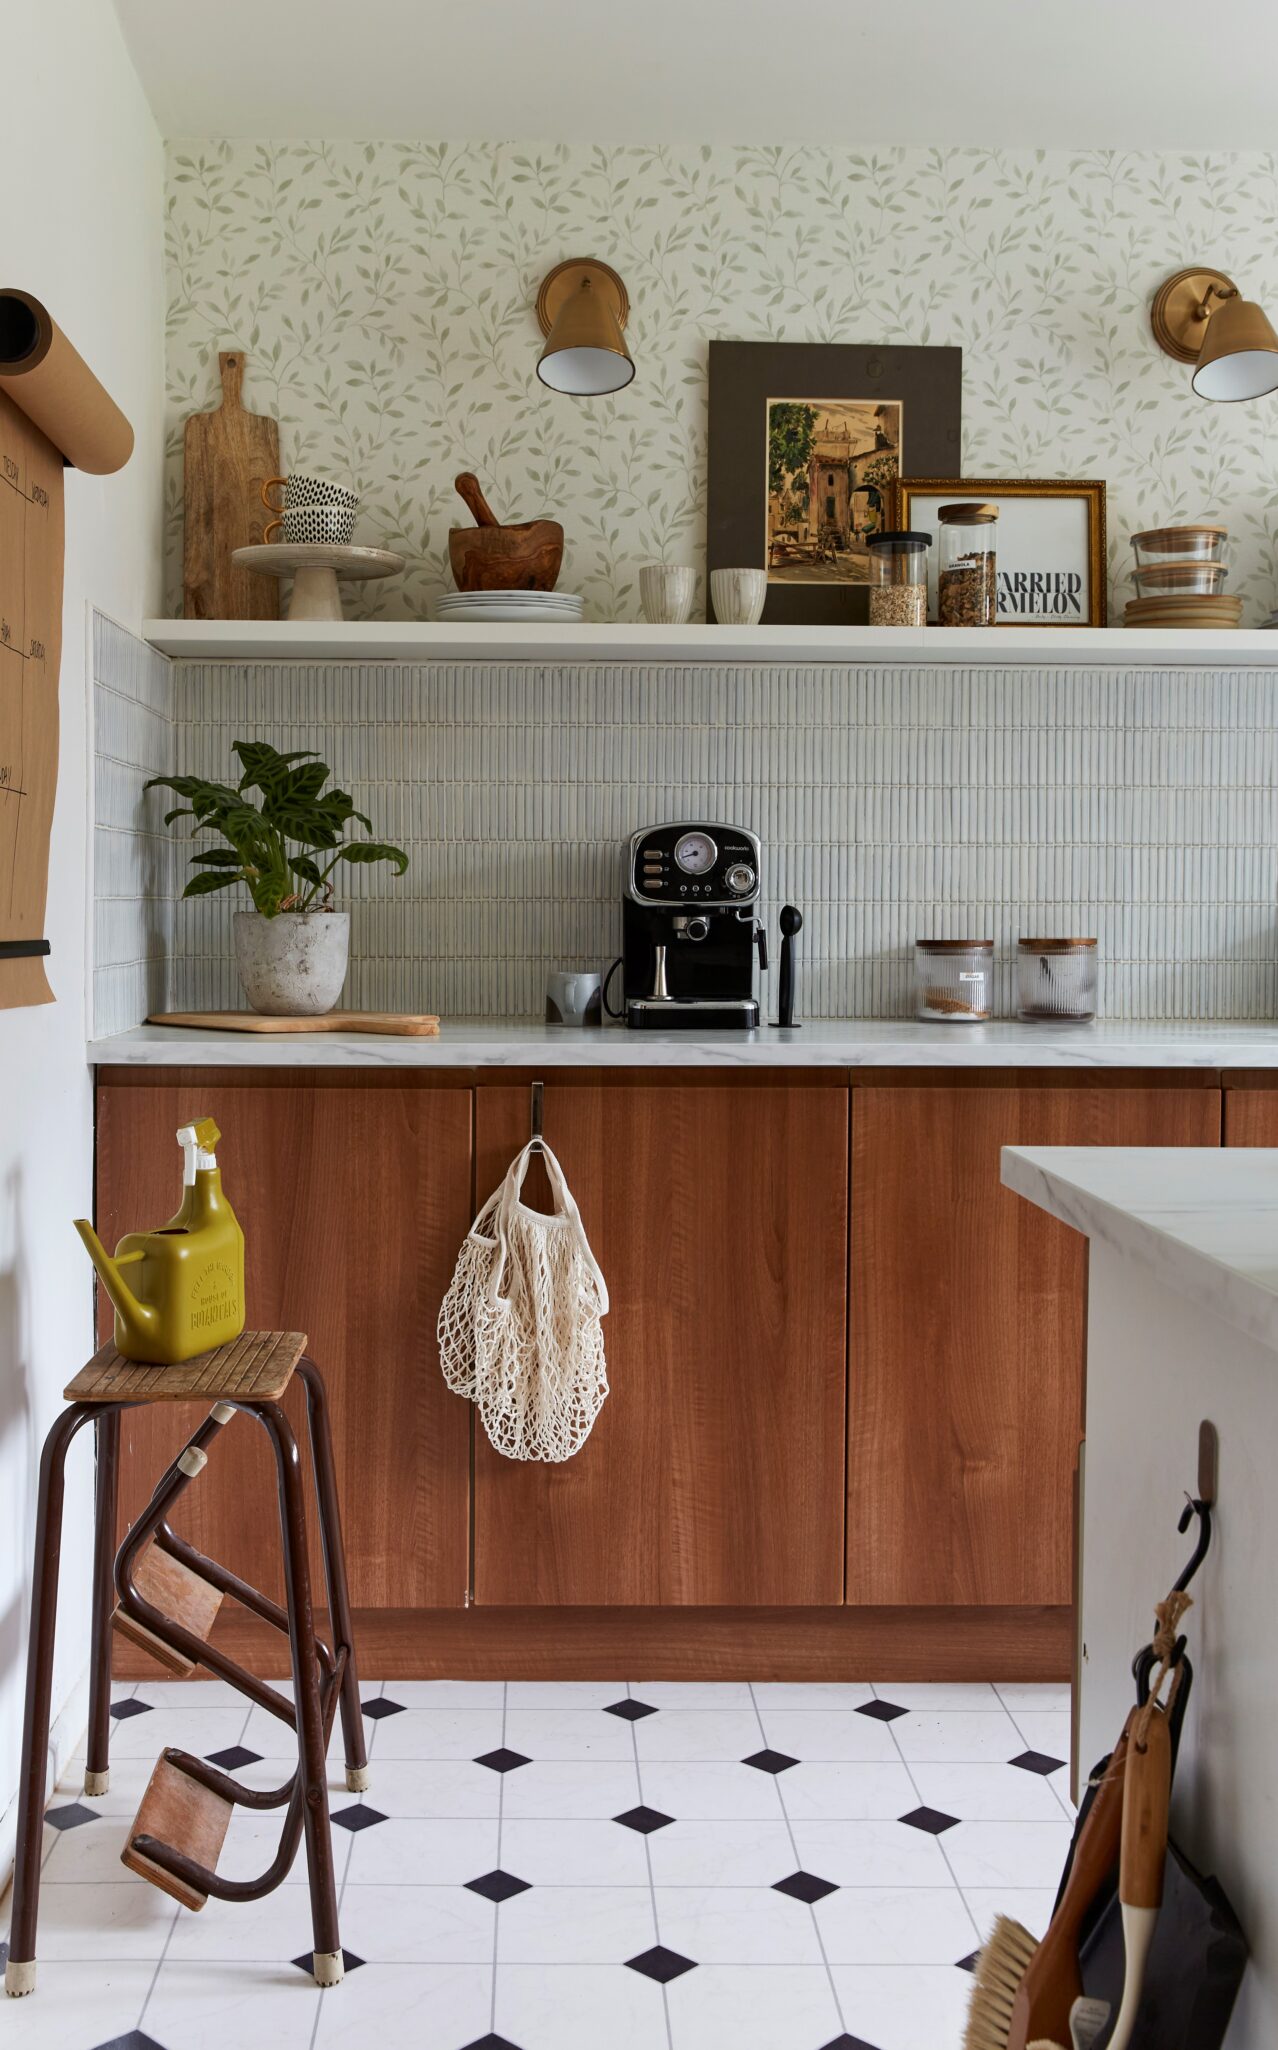
What I changed in my renter friendly kitchen this time around
The tiles, bottom cabinet doors, flooring, countertops, and top cabinets…
Yup I think that’s everything.
COUNTERTOPS:
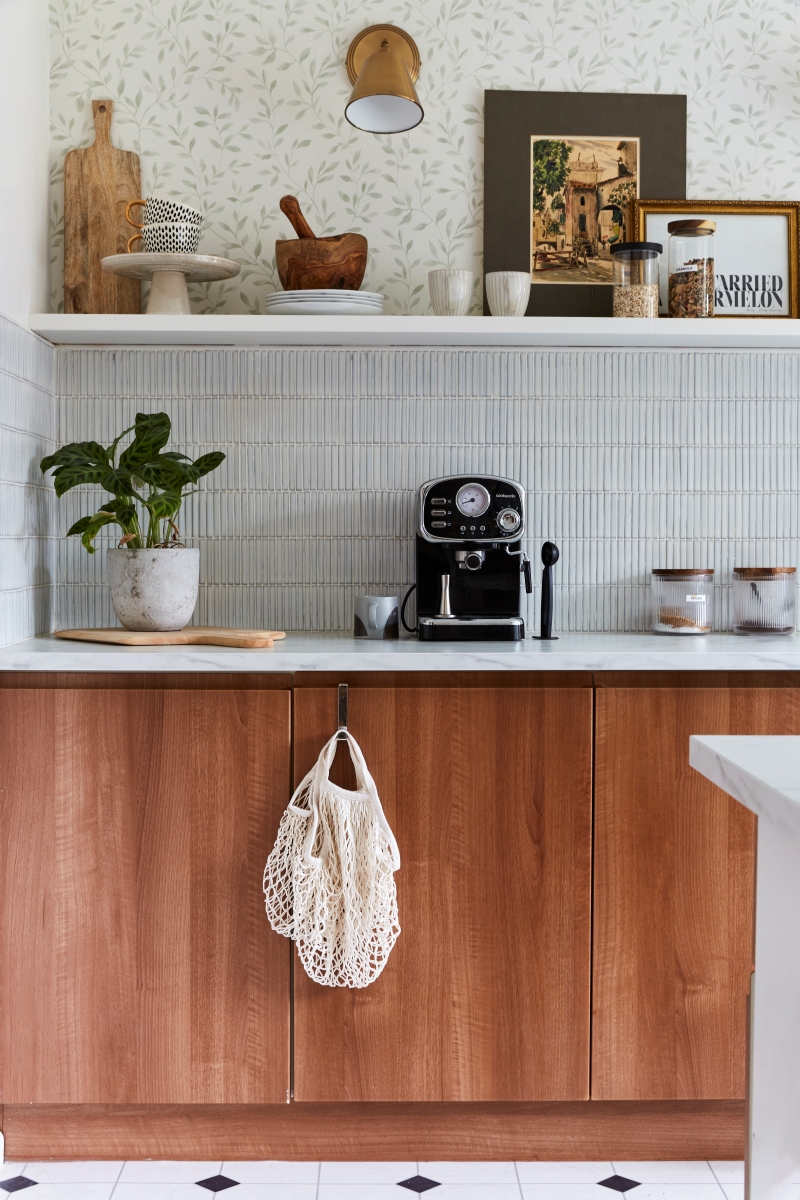
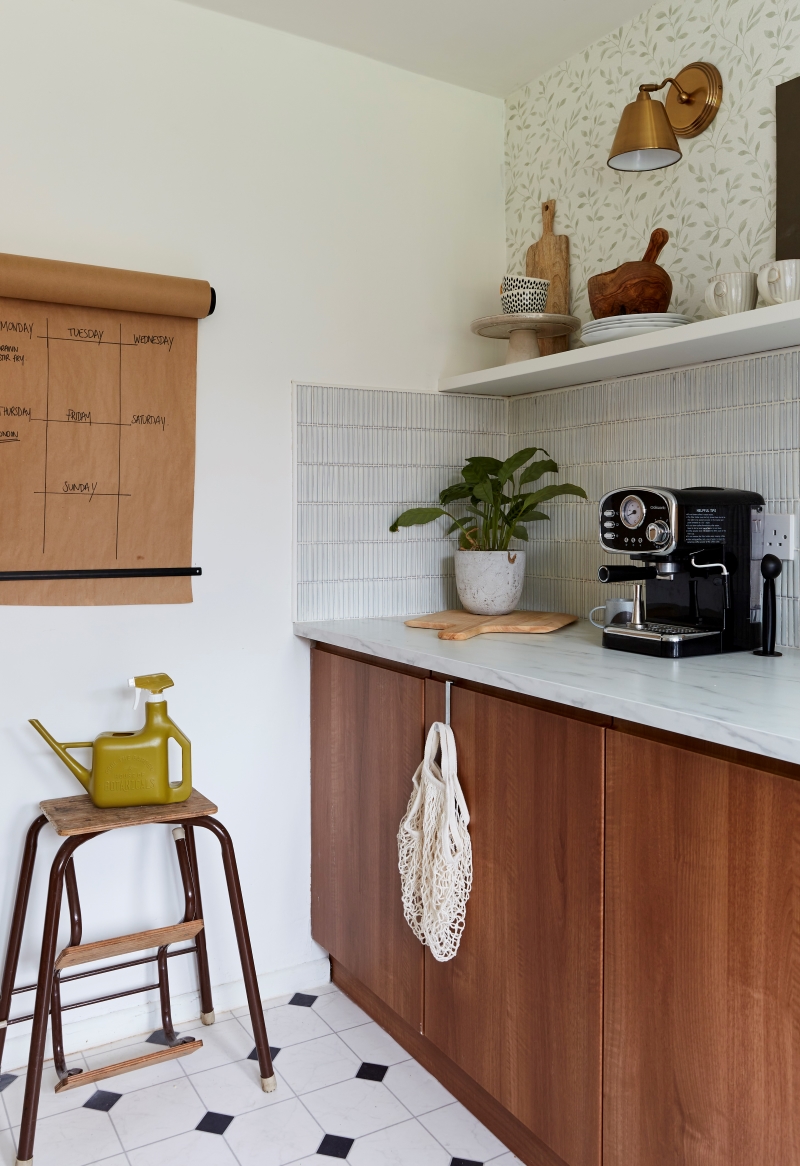
We replaced the darker laminate countertops with these lighter laminate marble ones (Full disclosure these were gifted from IKEA which was a huge help cost-wise). I was in two minds about them initially, but having used them for over 8 months I quite like them. For general upkeep, I found cleaning up any stains when they happen and using chopping boards when cooking helped to keep them looking good!
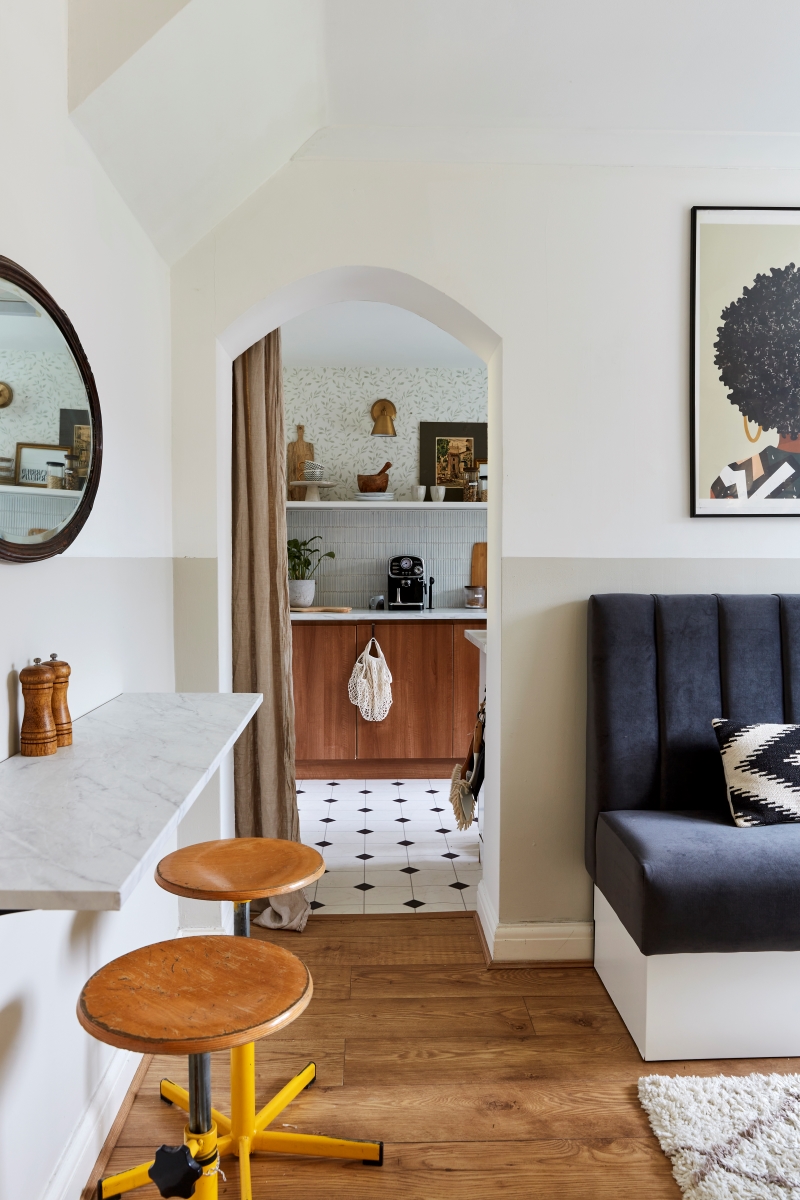
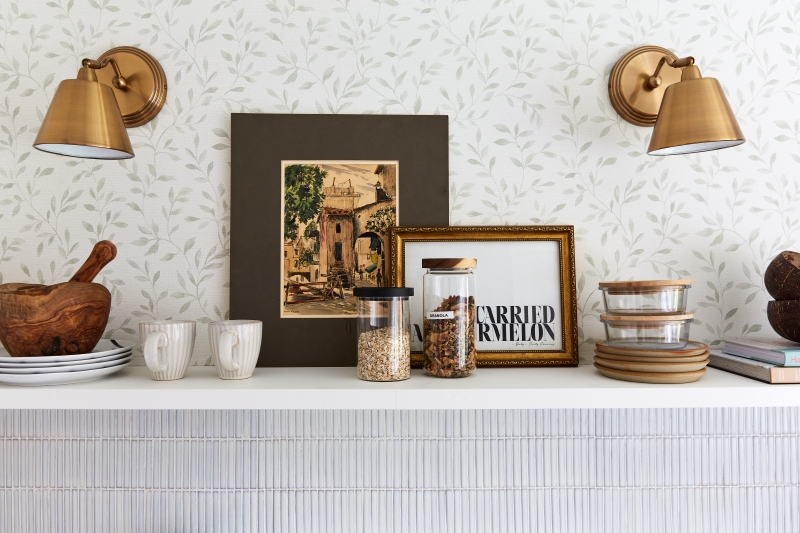
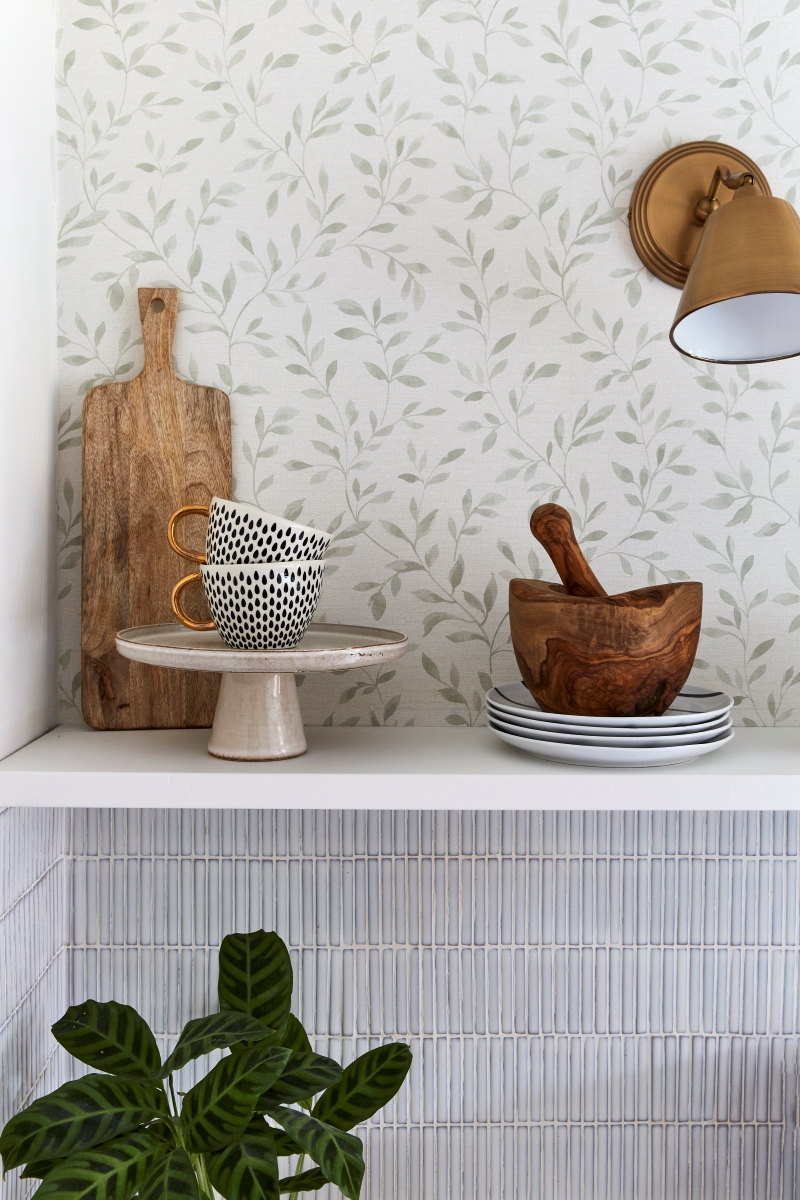
OPEN SHELVING.
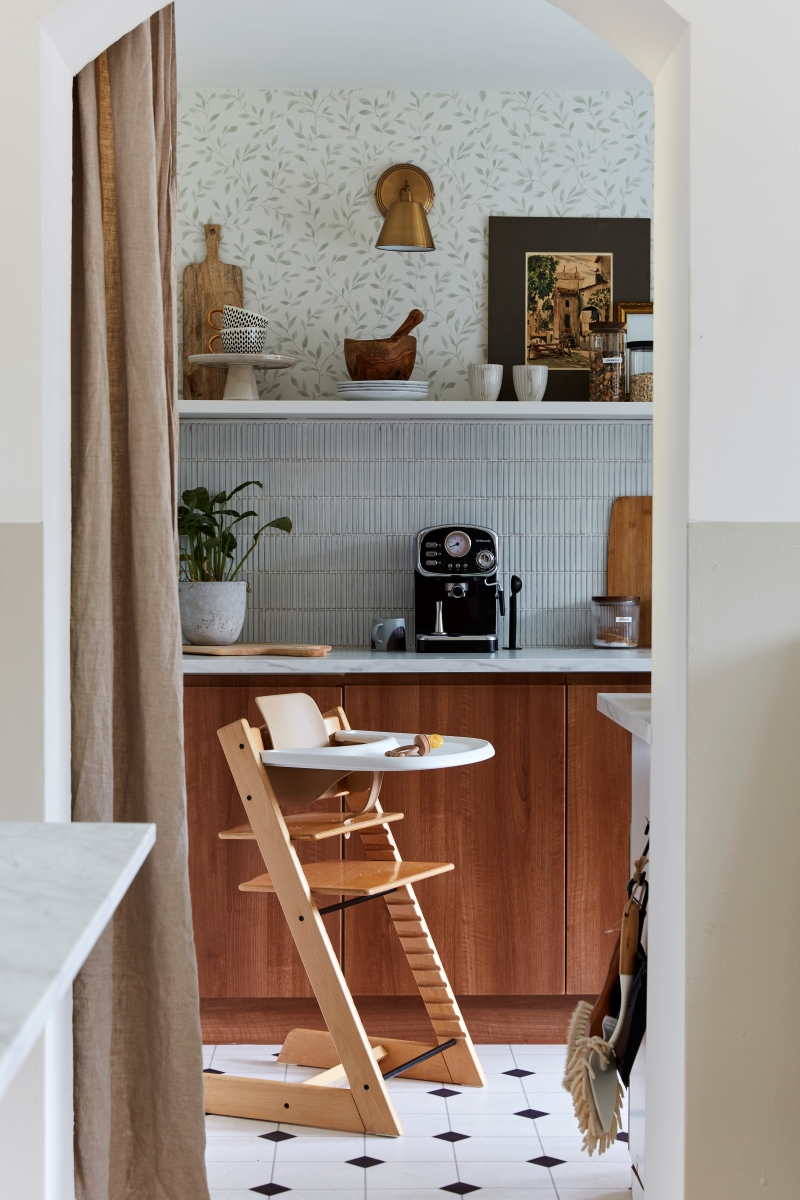
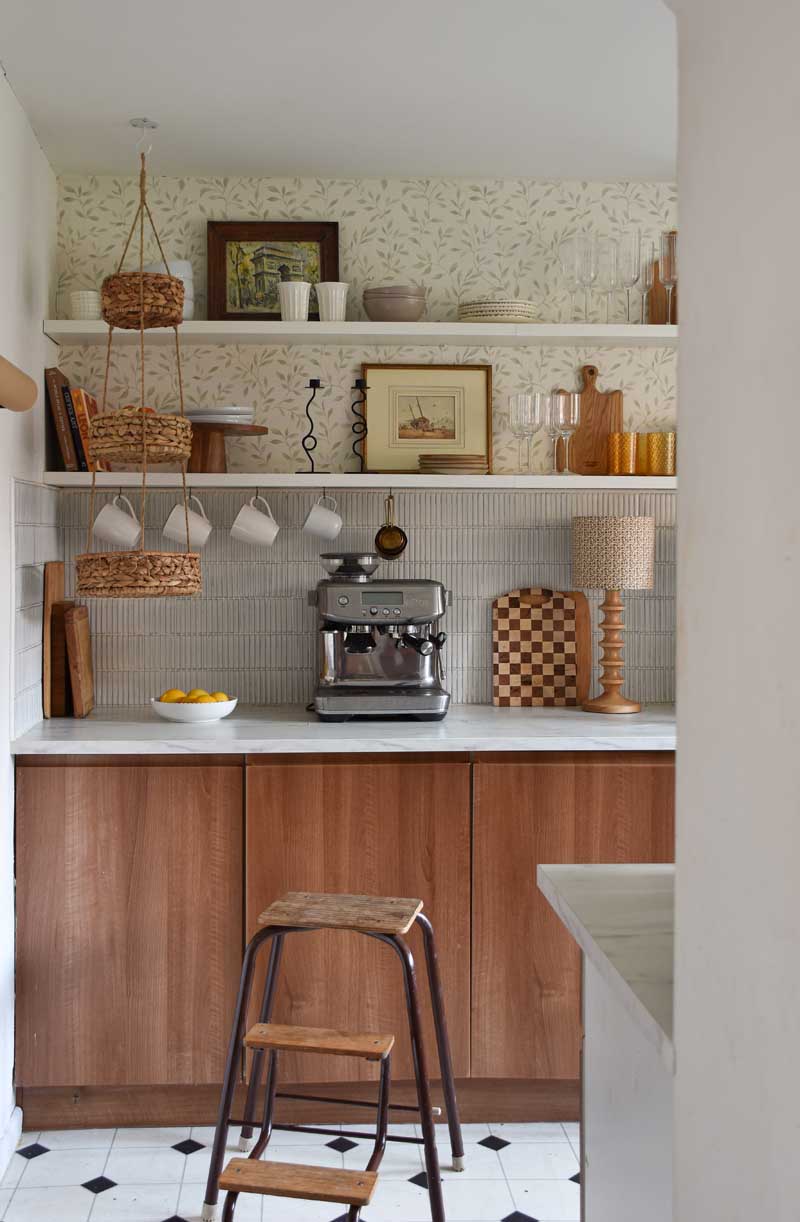
We removed the top cabinets to open the whole space out a little. It’s a narrow room and tended to get dark fairly quickly. The shelves are custom ones from shelf bar. I painted them white with Valspar to match the walls.
TILES
Aren’t they a beauty?
They’re called Kit Kat tiles, and I absolutely love them. If I’m being honest, waiting for the tiles to arrive was one of the reasons why this renter friendly kitchen makeover took so long. I originally ordered them from Period House store, but as they weren’t in stock and the delivery date kept getting pushed back, I had to cancel my order. In the end, I found similar from Tiles Direct.
It wasn’t apparent from the sample I ordered, but once they were up I noticed the tiles had a very slight blue-ish tinge to them depending on how the light hits them (just a heads up). It annoyed me initially. I’ve gotten used to it now.
CUPBOARD DOORS
We kept the bottom cabinet frames as they were in adequate condition and just changed the doors for these walnut ones. I won’t be sharing the company as I wasn’t entirely happy with them. A story for another time …
Replacing cabinets was quite easy and we opted for doors without pre-cut holes to keep costs down. I’ll do a post about it later.

FLOORING
We hadn’t planned on getting new flooring. I loved the previous checkered lino we had put down in our renter friendly kitchen a few years ago … however it got damaged a little in the makeover process. So when I saw that this flooring was on sale, I bought it. Cheap, cheerful and does the job.
The flooring underneath the old Lino was level so the installation was quite simple.
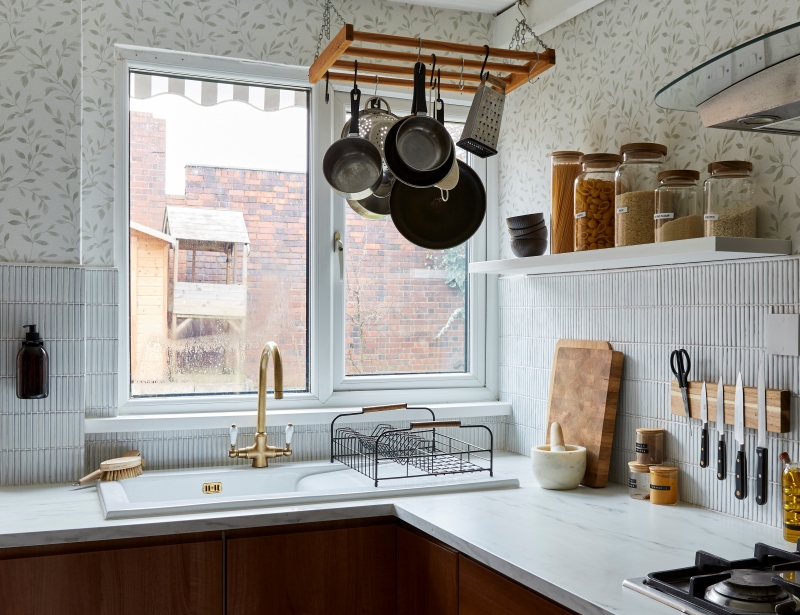
THE SINK
I ditched the steel one for this beautiful ceramic one which I can’t for the life of me remember where I got it from. I remember being hooked by some targeted ad on Facebook, seeing 15 % off, and buying it immediately. Pictures don’t do it justice … its seriously beautiful. Be warned though, if you’re not careful a ceramic sink will chip your dishware.
The taps are from Wayfair, and the dish rack Next Home.
WALL LIGHTS
They aren’t actually wired in. I used this hack (that I’ve since learned originated from Nesting with Grace) which means I didn’t have to. Lights are from here . . . and they are on sale again!
WALLPAPER
I don’t care how outdated it might seem. I honestly love the idea of wallpaper in the kitchen. I bought mine from B& Q home using a gift card (it’s the same one I used in my pantry)
I do love it … but I’m not sure if I’m in love with it. It definitely warms up the kitchen and makes it feel more homely. But I feel like it would have worked better if my ceilings had been a little bit taller.
Do I see myself removing it in the future?
Possibly. Your gal’s toxic trait is indecisiveness.

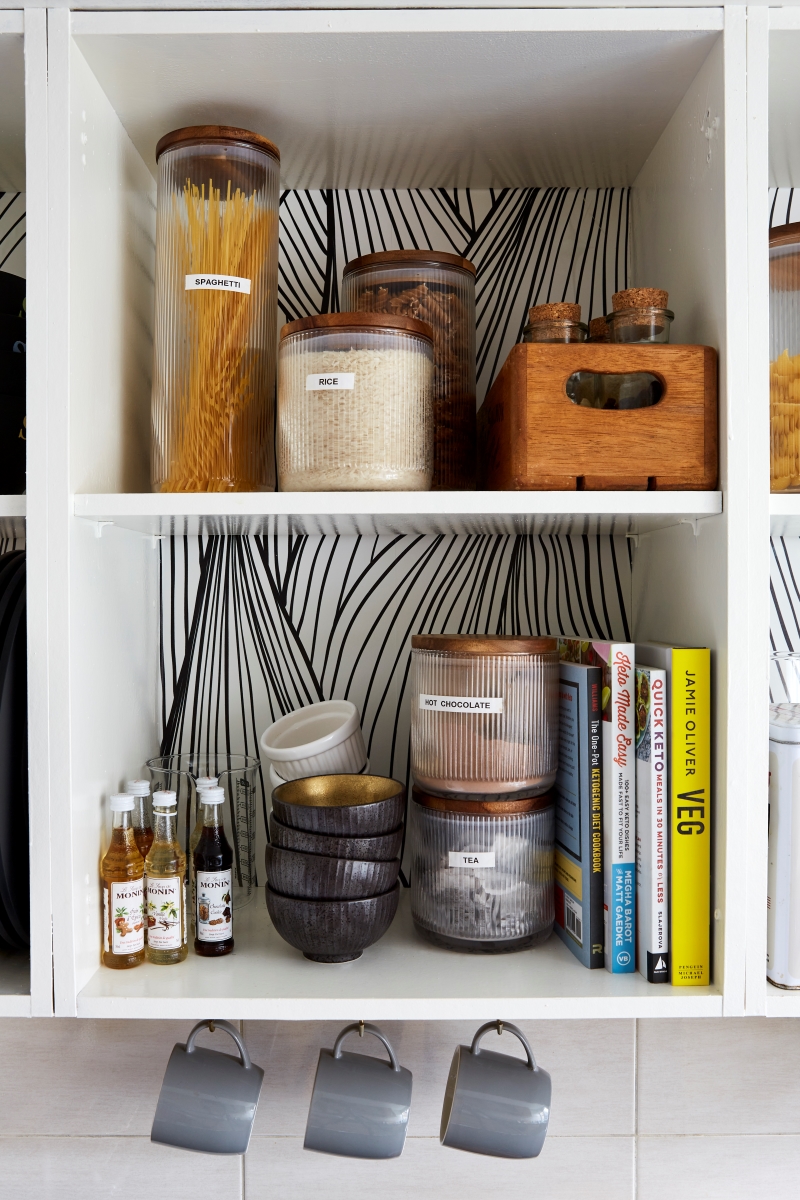
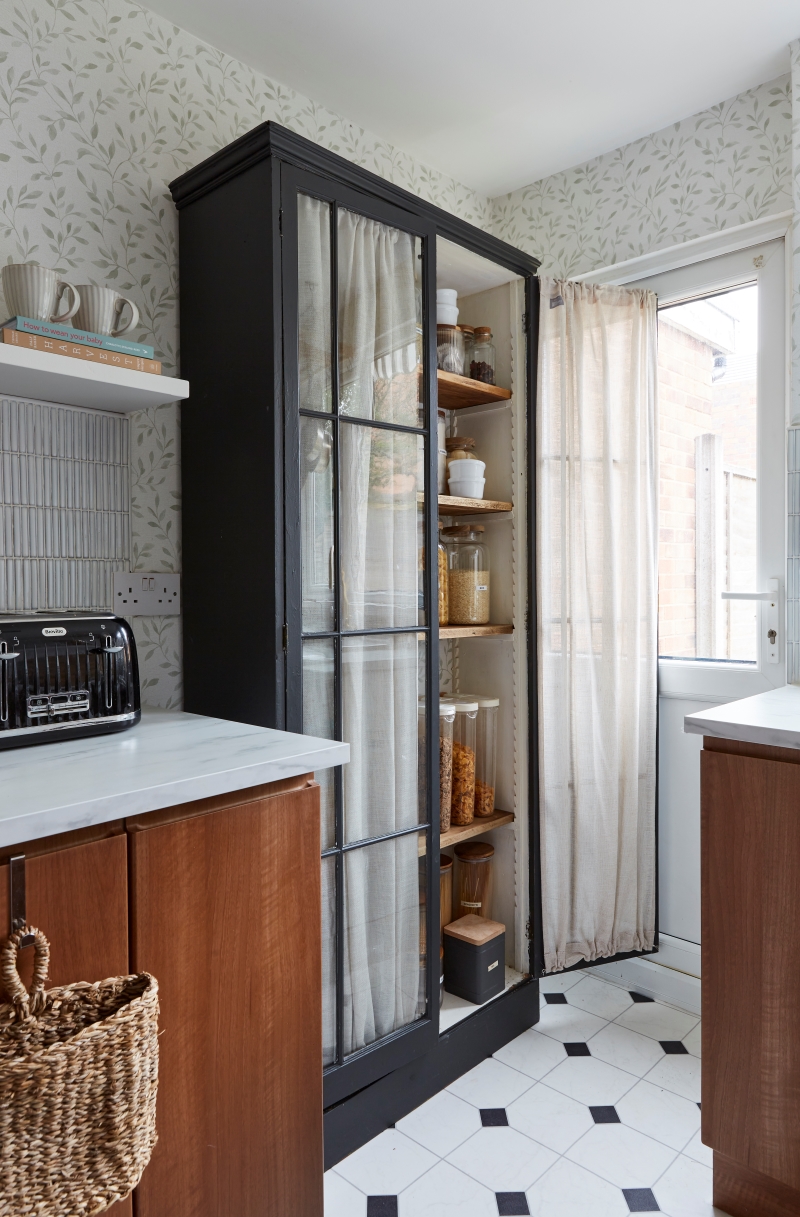
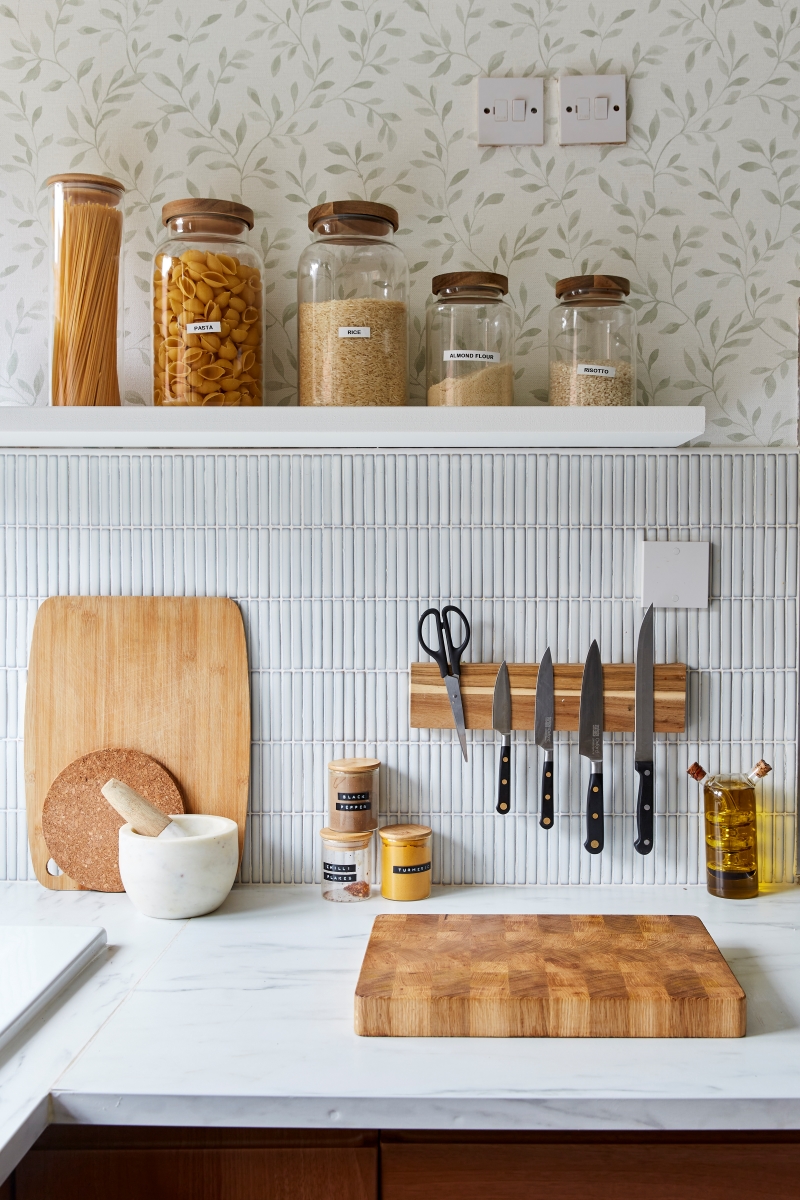
Storage in this renter friendly kitchen.
Because we removed all the top cabinets and replaced them with open shelving, we did lose some storage space . . . which wasn’t necessarily a bad thing actually. It prompted me to do a massive declutter of all the useless junk we’d accumulated in the top cabinets over the years. It’s easy to hoard when you can just close the door on all the ‘stuff’ you know? I think that’s probably why a lot of people prefer closed cabinets to open ones.
Our fridge now lives in the garage/utility room (it’s just off the kitchen) and in its place, I put a pantry cabinet that stores all our dried food. You can see that makeover here.
Everything is labeled with my trusted DYMO label maker.
The glass jars are from here

A second hand hanging pot rack I got off eBay also freed up space in the pot cupboard.
And a knife rack to hold our knives – tutorial here
I’ll probably do a more detailed post on this in the future. I’m still implementing lots of little organisational systems to my renter friendly kitchen.
The cost of it all.
You’re probably wondering how how much it all cost right?
Honestly if I owned this home, I’d have no problem sharing those details with you because I always find it helpful when other bloggers do that. Spending money on decorating a home is certainly a privilege so it’s nice when that’s acknowledged rather than lots of dancing around what things actually cost.
However, I rent my home and on that basis alone, I’m not willing to share what my budget actually was . I’m aware that I’ve opened myself up to enough criticism already just by sharing that I’ve decorated my rented kitchen.
I can picture a few of you who might be new here shaking your heads in disbelief (the few that might take offence at how other people spend their money perhaps? )
That’s ok. Now can you picture me rolling my eyes?
I’ve been renting for over 12 years, and have been blogging about interiors for about 6 of them. In that time I can’t tell you the amount of times I’ve been told I’m wasting my money. Its one of the reasons why I started the #howirent series, to provide a safe space for others like myself who wanted to decorate their rented homes without judgement.
Investing in my home will never be a waste.
Scratch that.
Creating a beautiful home for my family (especially my children) will never be a waste.
And no, the money I spent here couldn’t have been put toward a deposit because that would imply that the end goal would be to get a mortgage.
Not everyone wants or can get a mortgage. That can be for religious, financial or personal reasons. I’ll leave it at that.
Is she being defensive or is she just setting a boundary?
Food for thought.
Final thoughts on our renter friendly kitchen.
This whole process has definitely been a huge learning experience.
I started this makeover with one of my friends Charlotte Jacklin (an early guest on the howirent series) who was also decorating her kitchen. It was great having someone to chat to who was in a similar position and in a way it kind of motivated me to get things done (I have a problem with starting things and never finishing them). We’ll be doing a Live on Instagram next week to chat all things kitchen!
In the mean time you can check OUT HER RENTED KITCHEN MAKEOVER HERE.
Let me know what you think of my new kitchen in the comments below.


Assalamu alaikum
Absolutely love your style and to be comfortable in you own home. 😍
I been on the hunt for the bread bin link on your page/blog etcbut cant find it.
Please help sis.
Kind regards,
love the entire reno, but have to know where that paper holder is from 😍
Thank you! Its from Etsy!
Just discovered your blog and think your style and what you are doing is simply fabulous. Creating a home that you and your family love and inspiring others to do the same is truly wonderful. You’ve given me some energy to make some changes in our home so thank you 🙂
Love the makeover! Thank you for mentioning that someone might have religious reasons for not wanting a mortgage. I hadn’t heard of that, so looked it up and learned something new!
Hello,
I am in love with your tile, was it easy to install, How would you cut it is you need cut outs for outlets. I am excite d to copy
you if it is ok.Stand strong and let words bounce off you seam to be a very caring person no one can hurt you with words unless
you let them Shrug and keep going, you have a lot of us behind you and beside you. Proud of your
.
That’s a wonderful kitchen makeover you did right there. Vibrant yet homie, organized, simple, and great overall! Great job!
Thank you so mucch
Hello: I found your “rented” kitchen makeover to be bright, customized beautifully and tastefully. I love everything you did and thank you for a few ideas that I might steal. Don’t let the haters get to you, they are mainly jealous and just do it because they can. Sad. Enjoy your beautiful apartment and keep sharing your ideas. There are many more of us who love what you do than those that don’t.
Trish
Thanks so much!
Well done! It is lovely!
Thanks!
Looks great. I’ve been procrastinating about my hated kitchen (mortgaged) and am impressed you achieved this with a newborn baby in the home. Hear you about the trades – what happened to the prices and availability?
As to the cost, I know people in rentals who HP lux cars; others who take amazing holidays regularly. That’s their priority.
For some of us home is where the heart is and making it “ours” is essential for our physical and mental wellbeing.
This has clearly made you and your family happy so worth every penny.
Happiness is priceless.
Love, love, love the pantry cabinet! The entire space screams comfortable and classy. You did an absolutely wonderful job. Please enjoy your new space with your family.
OMG! So happy to read this post. I LOVE
all your posts BTW 😁.
I am about to embark in a huge reno (not ao renter-friendly) of my kitchen. I hate my kitchen. I have been here since 2019 and planning to stay here another 3 years before buying something. So I NEED to have a place that represents me 🤣
I already bought the sink tap and fan 😂 But I will ask my landlord before replacing the cupboards and countertops. I will be budget conscious but it also won’t be the typical rental DIY’
So THANK YOU for your post 🙏🏾
BTW did you source your tiles on your backsplash? Not sure I saw the info.
Best regards,
Cassandre
Ahhh so happy to hear this! And good luck!! Wishing you all the best with your makeover
Ahh gorgeous! I hate our tiny rented kitchen, but I’m so intimidated to make any changes. This is so inspiring!
The flooring she used is a sheet vinyl, not laminate. Some people use the terms vinyl and laminate interchangeably but they are not the same thing. Laminate usually refers to a HDF board that is clicked together and not secured to the floor. You definitely do not want to install another layer over this type of floor.
Vinyl, which is usually glued directly to the subfloor, you can install over top of as long it’s 1) only one layer installing over top of and 2) the layer isn’t a cushion backed vinyl.
Now onto your kitchen tiles. If your tiles are well-adhered to the subfloor you can install a sheet vinyl over top with some preparation. Check to see if you have any hollow or loose tiles. If you don’t, your next step is to cover the tiles with a patching compound that will fill in the grout lines and create a completely flat surface for the vinyl install.
Good luck!
Wish I’d found you whilst I was living in ugly London rentals! My partner and I have since moved to Europe and the mental shift towards wanting to rent long term rather than buying has been huge. Hardly anyone buys here, and everyone does DIY on their rentals, and as long as you’ve not made it worse you always get your deposit back. It’s really made us realise that the UK’s obsession with homeowning is just adding so much unnecessary societal pressure. Would be nice if they did something about the insanely expensive rising prices too! Keep up the good work, love it!
Hello! I love your kitchen – it’s just beautiful. Great job! I am dreaming of wooden cabinets for ours but have so far found the choice to be extremely limited. Did you find this to be the case? Or in your search did you come across any alternatives that you would be happy to share the details of? Thank you in advance.
It’s beautiful and I completely agree with you that no matter if you own the place or not, end of the day it’s your home at present and your home should be your happy place so why not make it however you want to! I really love it, you are a well talented woman, just shine, don’t let negativity get anywhere near you.🥰🥰
Thank you so much. I really appreciate that 🙂
It’s beautiful. Inspirational to a current home owner but also really wish I had found you for the 12+ years we rented! It didn’t even occur to me to change stuff in our rental flats, I just stewed and stared at the ugliness 🤣
Great post, thanks for going through it all
Thank you for reading Laura!
Everything you’ve decided on made such a big difference! And a big thank you for sharing #howirent with the world. I’m a renter and plan to stay that way, and it is a bit tough to take sometimes when renting is looked down on in some societies. My home is my home, it doesn’t matter to me that I don’t own the building! I’m not much of a decorator myself, buy it’s so great to see renting as a viable option for long term living. So thank you again, and enjoy your new space!
Thank You!
Love the reno! Is absolutely awesome. I have a question, it can seem a bit stupid.. Sorry. I’m looking for a new coffee machine, and I’ve just seem yours is one of my possible winner. Are you happy with it?? Thanks a lot!
Not stupid at all. Its a good machine – more for espresso sized coffee though. Here is the link
https://www.ebay.co.uk/itm/194498512924?chn=ps&norover=1&mkevt=1&mkrid=7101533165274578&mkcid=2&itemid=194498512924&targetid=4584826055637462&device=c&mktype=&googleloc=&poi=&campaignid=412354546&mkgroupid=1299623041023876&rlsatarget=pla-4584826055637462&abcId=9300541&merchantid=87779&msclkid=a90dc45ec75d16210a0aa65c205e76aa
I love your kitchen, the tiles are beautiful. Also the light hack – wow! Will be using in my daughters room make over which we’re just about to start.
Thank You! Hope all goes well.
Hi Medina!
I love the result of your renovation. I have my own flat and even your process is for renters, is so inspirational and plein of good ideas. I’would do some renovations in our kitchen without crash our bank account, thanks for the inspiration.
By the way, I love your sense of humor.
Sorry for my english, I’m catalan living in Catalonia.
Thank You So Much!
Love how it all turned out – well worth the wait it seems!
I can’t believe people make comments on how you rent?! As you’ve said, not everyone even wants to buy! And that doesn’t mean you shouldn’t make your house feel like a home. And anyway most people buy and sell their homes – do they leave it as they bought it until they have their “forever” home? Of course not! Anyway you already made it clear that’s ridiculous! I’m just ranting for myself now.
I also love the way you’ve decorated. I’ve been using reused pasta jars and such for a more eclectic (and much cheaper to suit my own budge!) look but think I’ll spray paint the lids black or gold to make them a bit more cohesive because I love the look of your shelves.
I was also wanting to get a magnetic knife shelf but worried as we have an open plan kitchen / living room and I have a newborn at home. I’m sure she’ll soon be climbing. Saying that, I can enjoy it for a few months so maybe I should get it sooner rather than later!
I took your advice, made a cup of tea, and settled in to enjoy this blog post. Loved it, love the pictures, huge admiration for your work. I also really admire your explanation of your boundaries regarding information you don’t need to share. You’ve made me think about small things to do in our home. Just very much hampered by lack of skills!
Ahh thank you so much for taking the time to read. I really appreciate it, and I’m glad its inspired you in some way.
hi where is your refrigerator? looks great btw
Its in my utility room
Hey! I’d love to know a little more about laying the flooring as the product page says OT shouldn’t be laid onto laminate, tiles or floorboards… I’d love to use it over our existing hideous and damaged kitchen tiles if at all possible! Thanks
Oh we laid this Floor over old laminate and It’s fine! I didn’t even notice that in the product details
Wow! I love it. I’ve been wanting to make some changes in my small kitchen and seeing this has given me the motivation to go for it! Also, I really appreciate you speaking to being a renter and spending money to make it your home. Never a waste of money to enhance your space in a way that speaks to you and your family. There’s the value right there.
Thank You!
Beautiful space! Love that sink and how the open shelving makes the space feel lighter 🙂
Thank you so much
Absolutely beautiful. And I love your honest writing style. Thank you for sharing.
Thank you for taking the time to read!
I love how it turned out, kitchen of dreams!
Thank you !
It looks amazing and inspires me to do more with our rented home (specifically the kitchen). Thank you for creating a community for those that rent and invest in where they live.
Thank you so much.