*This ‘How to paint Tin Tiles Tutorial’ has been sponsored by Rockett St George.

I’m a huge fan of tiled feature walls – especially colourful middle eastern inspired ones that make me feel like I’m in a Morrocan Riad. Or even better, like I’m at a Turkish spa/bath, and I’m about to receive the back massage of a life time.
Ahhh!
Can you tell I need a holiday?
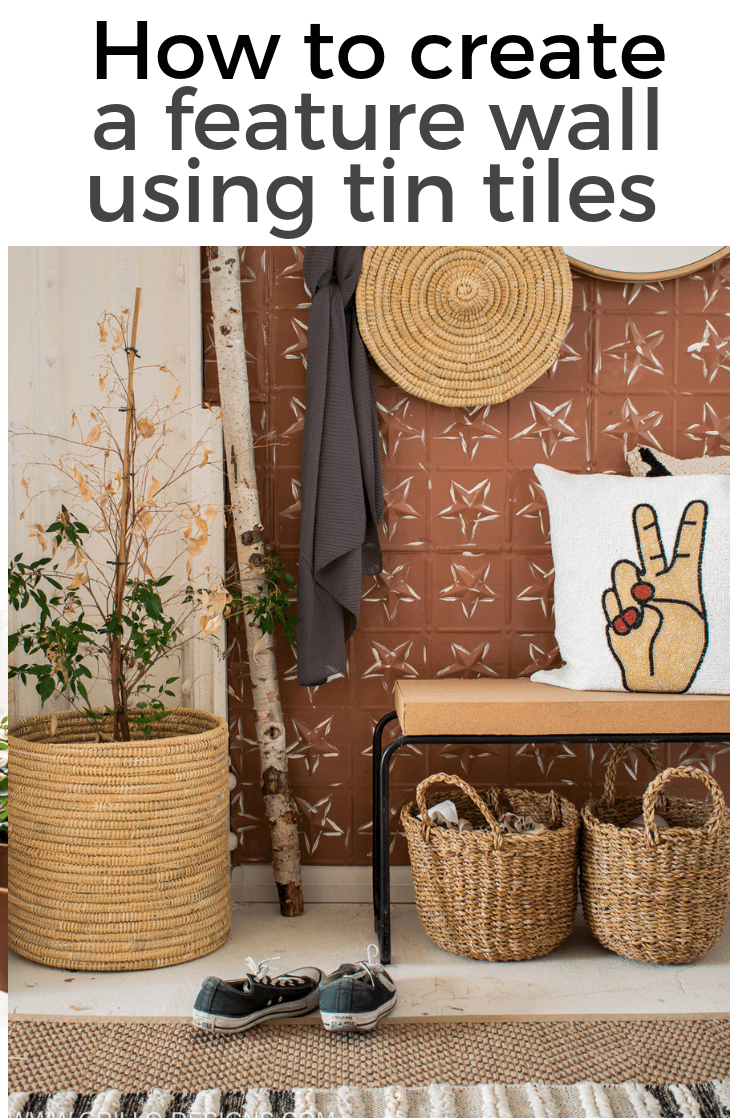
OK, so I know this project isn’t exactly the real thing, but it comes pretty close I think (or am I reaching here?). I created a faux tiled feature wall in my studio entrance using tin tin panels from Rocket St George.
Here’s the before:

And then the after. Not bad considering right?

(If you have never heard of this brand before, let me introduce you. Rockett St George is an interiors brand, started by two women, that stocks and sells really quirky, one of a kind products for the home).
I updated the tin tiles with paint from their paint collection which I think fits into my style a lot better than the original metallic shiny look. Keep scrolling for the full tutorial!

MATERIALS NEEDED TO PAINT TIN TILES:
This post may contain affiliate links. Please see my disclosure page here
– Gloss or Matt paint (I used the Emanuella and Craftmans White paint from Rockett St George)
– 6 x Five point Star Tin tile (and there are lots more other styles here)
– Foam Brush
– Paint tray
– Primer paint (white)
– Fine grit sanding block
– Nails
– Hammer
– Garden gloves for safety reasons (optional)
– Clear varnish (optional)
HOW TO PAINT TIN TILES
What I love about these tin tile panels, is that they are really light and thin making them super easier to customise and install.
PLEASE NORE: The corners of these tiles are quite sharp. It’s advisable to wear gloves when handling them (i.e cutting etc) .
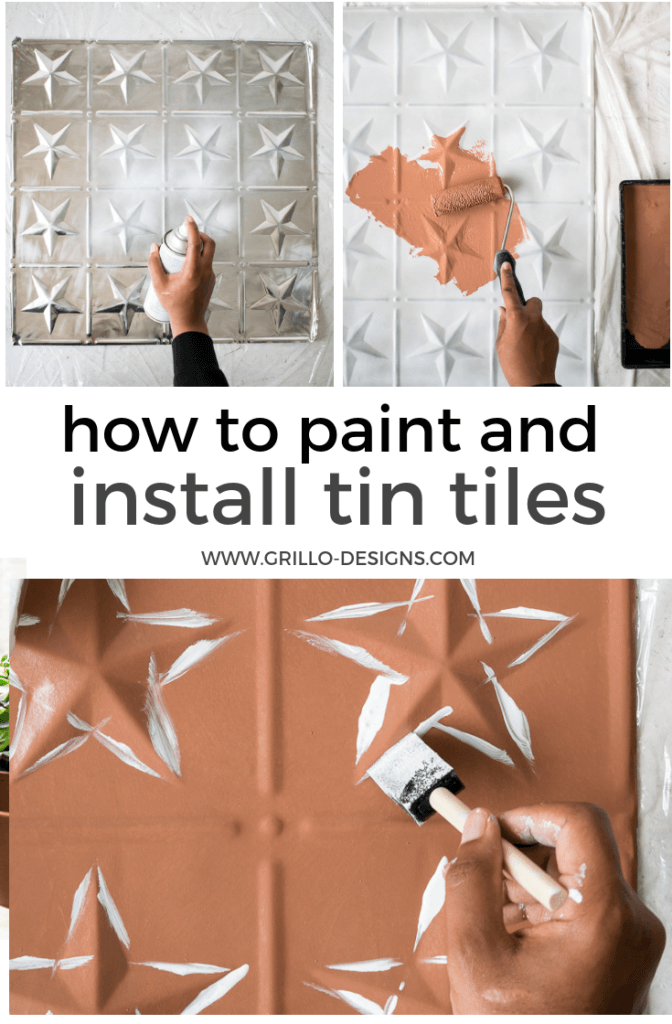
1. Place the tin tile panels on a flat surface – preferably on an old sheet or dust cloth to avoid spillage.

2. Lightly sand the panels with the sanding block. This will dull the shiny surface of the tin tiles and help future paint to adhere. Clean away any residue or dust with a damp rag. Give the tiles time to dry completely before moving on to the next step.

3. Apply one coat of primer paint. I found using spray paint for this step much easier (not to mention quicker) Make sure to spray in a well-ventilated area or outdoors even to avoid breathing in the fumes.


4. Once the primer is dry to touch, apply a top coat of paint.
I chose to use the colours Emanuella and Craftmans White from the Rockett St George paint line for the final finish.

Apply the paint with a foam roller, until the tile is completely covered.


You will need to apply at least two coats to ensure a smooth and professional finish. Don’t forget to leave the paint to dry in between each coat.

5. Next, add some interest . I know most people tend to go for the aged look when painting these kind of tiles, but I wanted something that looked a little more modern.

6. To do this, I brushed white paint to the outlines of each of the pressed ‘stars’ on the tile using Craftmans white paint.

It doesn’t need to look perfect, the key here is the imperfection of each brush stroke.

7. Once the top coat is dry , its time to install the tin tile panels to the wall. You can use either a glue adhesive (if you want something more permanent and would rather not make any holes) or a hammer and nails.
8. This step is completely optional. Seal the tin tiles with a clear non yellowing varnish.
9. Create the feature wall.I hammered in nails to the corner of each of the panels, using a level to ensure everything was straight. The tin tile is very thin and can be cut to size with a sharp pair of scissors to fit into smaller areas. However gloves are needed for this step to avoid cutting yourself.


And here is the final wall – styled with some of the gorgeous products from Rockett St George


Rockett St George have created an in-depth guide on handling and safety as well as how to create other finishes in the Metal Tin Tile Guide
Let me know what you think of this painted tin tiles project in the comment below. Have you ever worked with these style of tin panels before?

If you liked this painted tin tile tutorial, click the images below to save it to Pinterest!
***This post was sponsored by Rockett St George. I was loaned products and received payment for my time creating (and styling) this post. I only partner with brands I LOVE and think you will LOVE too! All ideas, photos and opinions are 100% my own.


Very nice makeover, I love it!
How clever…happy nesting!
Thanks for Sharing such a useful post.Love it and subscribed so i will never miss your post.