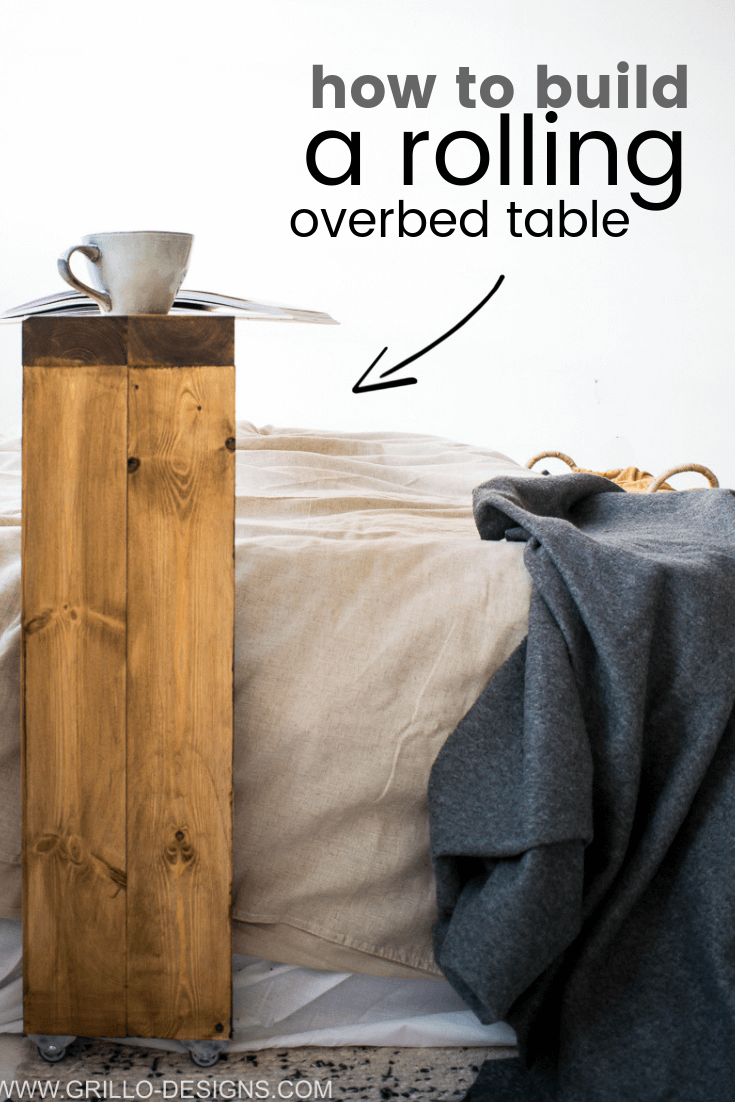
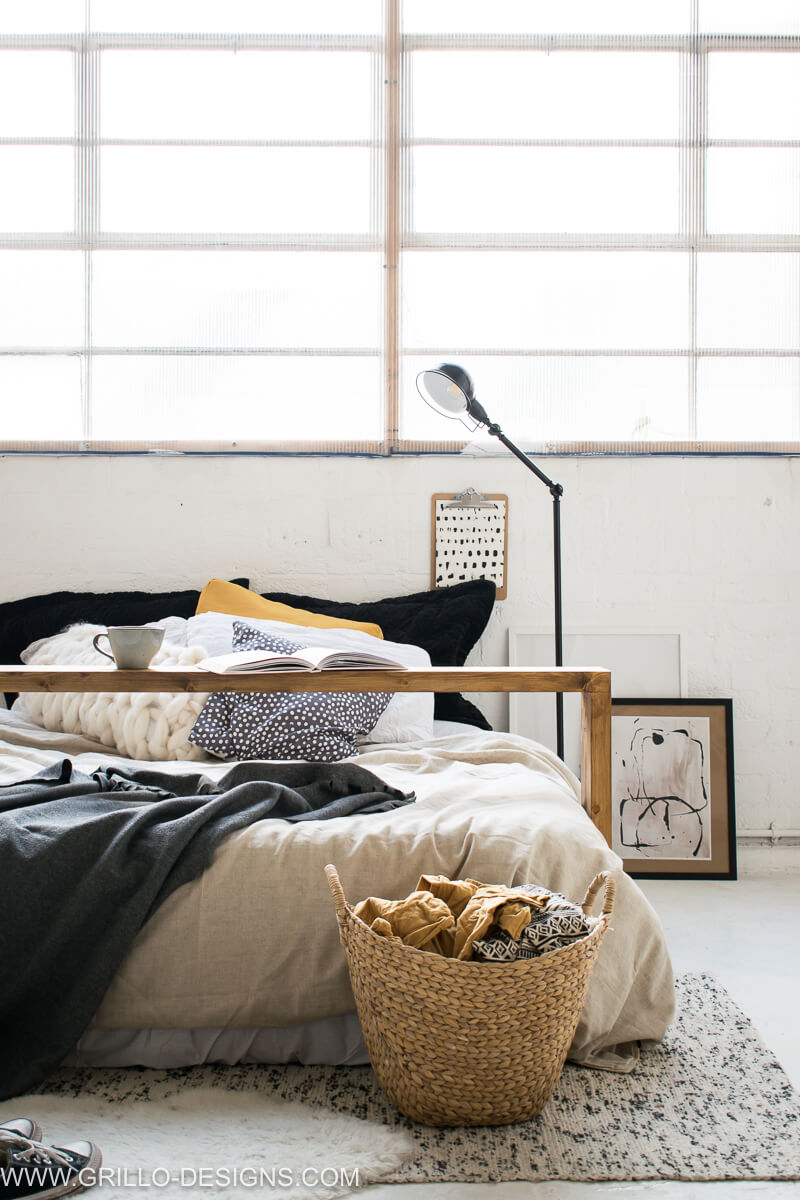
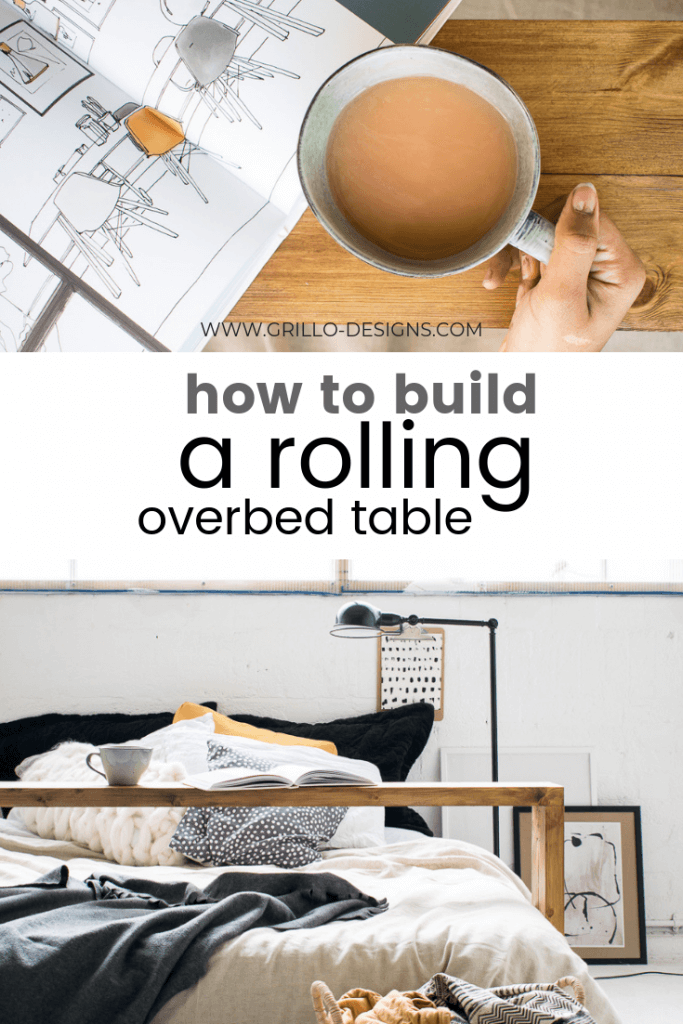
Wether the size of your bedroom is the equivalent of Harry Potter’s cupboard room under the stairs or borders on the expansive dimensions of A Real Housewife’s style home, we could all do with one of these rolling tables! In this tutorial, I’ll show how to build an overbed table of your own!
**This post has been sponsored by Ronseal
This overbed table kind of looks like a bath shelf.
A bath shelf that decided it wanted legs.
Then wheels too, on each of those legs.
You know, so it could roll.
Not that I believe (or care for) Darwin’s Theory of evolution. However I’m open to the idea that this process is perhaps how most rolling overbed tables are ‘ born’. Just a thought really.
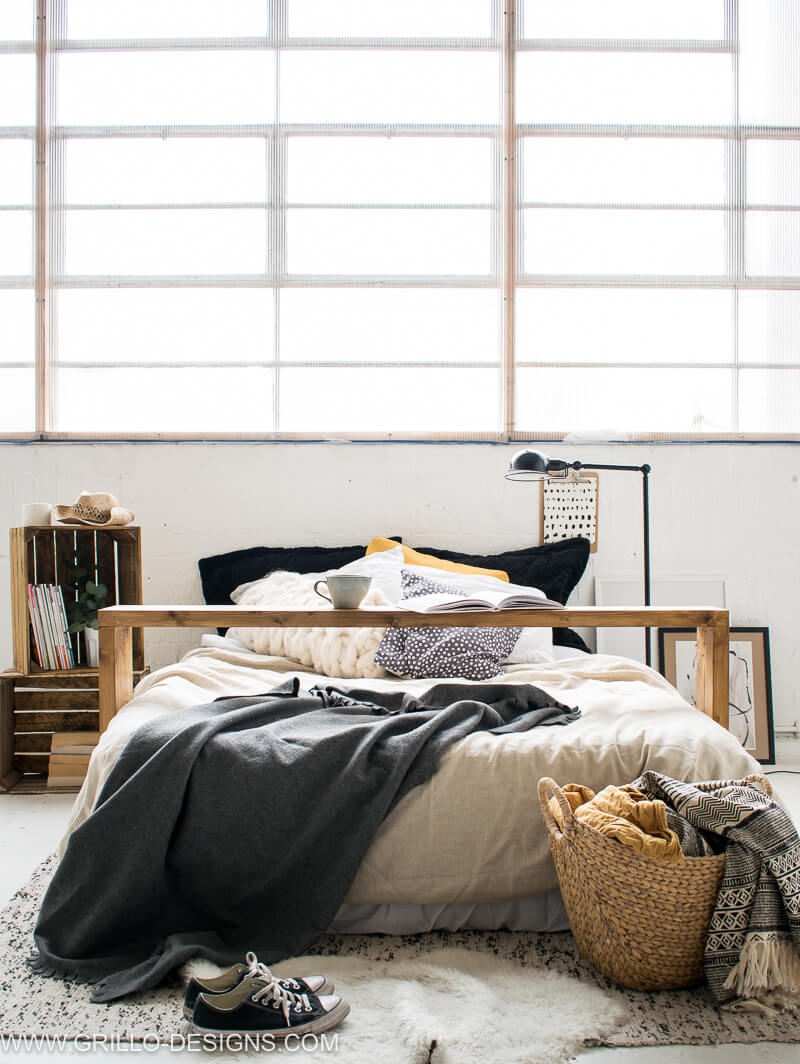
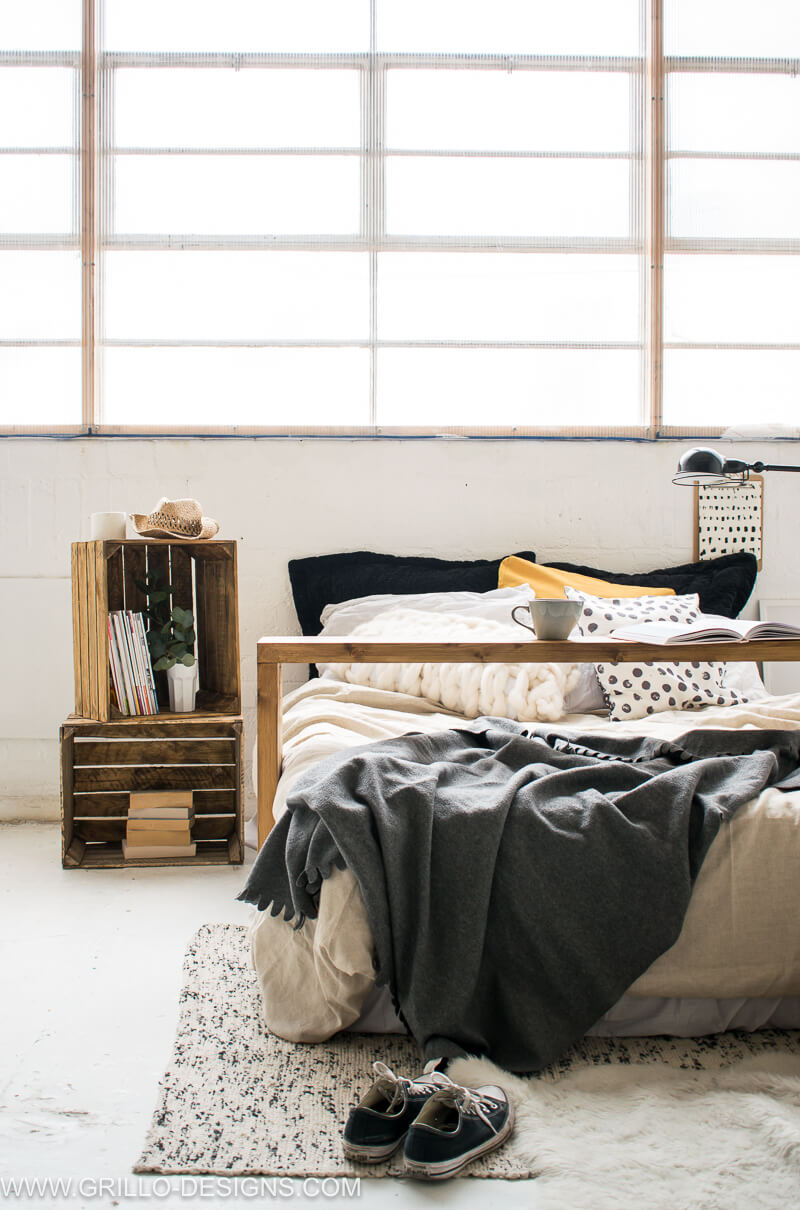
I decided to shoot the photos for this project in my new studio (I’ll be sharing more details on that space soon), just because my bedroom is too small to get decent shots of this rolling table. And I want you to see it in all its glory.
This overbed table is perfect for ALL spaces. And its not just limited to over your bed , you can use it in a narrow entryway as a side table or as a shelf behind a sofa. Just remember to skip the casters. Now this project is as easy as the DIY hair pin bench tutorial many of you know and love!
Scouts honour!
WHY RONSEAL?
In case you missed the disclaimer above – this post has been sponsored by Ronseal.
. . . Can I get a moment of silence please?
It’s been a long time coming right?
I mean, when do I ever NOT use Ronseal products in my DIY projects ? (A totally rhetorical question of course – I don’t expect you to go digging in my blog archives for the answer). Just take my word for it. I use this brand a lot
Especially their indoor varnish (for all the Americans reading this, that’s polyurethane to you)
Here’s why I like to use Ronseal Indoor Varnishes;
- Their varnish is both a stain and a sealant. Which basically means you are killing two birds with one stone here (gross phrase, but apt)
- Their varnishes are touch dry in 20 mins!
- They have a large selection of different colour shades to choose from.
- And the shades – well they come out looking as pictured which in a world where glue is used to portray milk in food adverts, that is everything
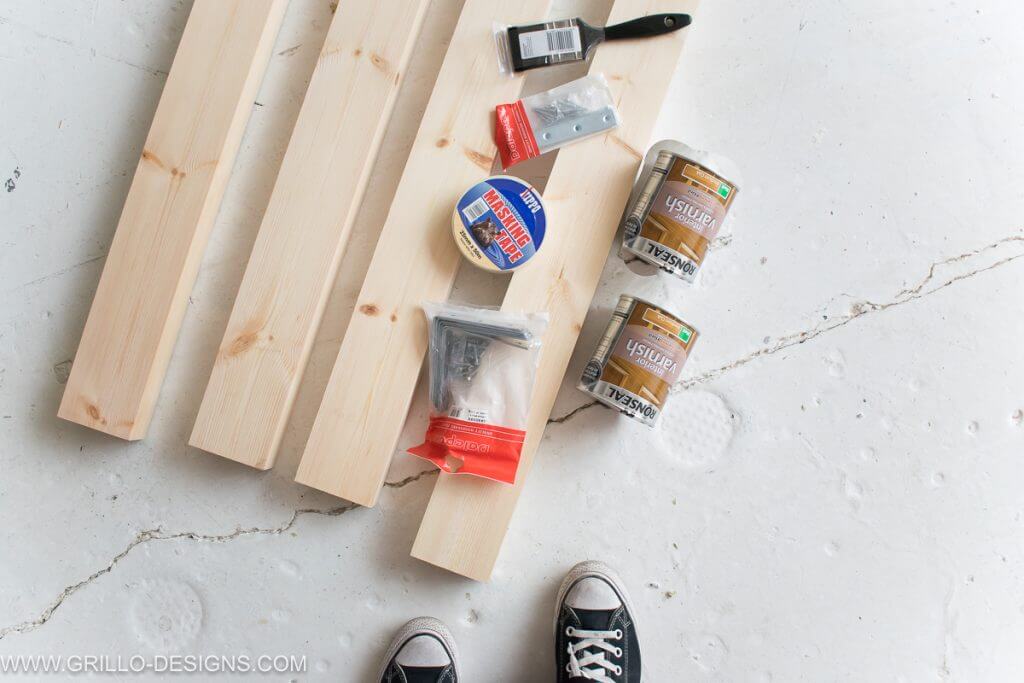
MATERIALS NEEDED TO MAKE AN OVERBED TABLE
This post may contain affiliate links. Please see my disclosure page here
- 4 x softwood 1800mm x 100mm x 50mm
- 8″ screws
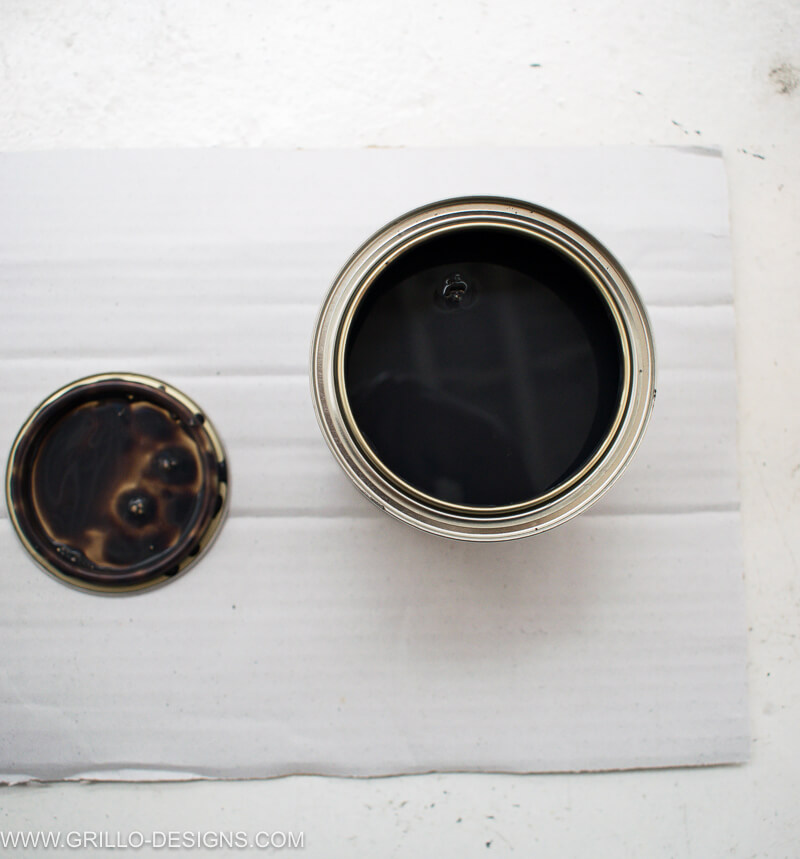
- Ronseal indoor Walnut Varnish
- Ronseal indoor Medium Oak Varnish
- Non swivel wheels
- cloth
- Paint brush (optional)
- Straight brace Brackets x 4
- 4 x corner brackets (optional)
- Wood glue
TOOLS NEEDED:
- Combi power drill (or a drill and screwdriver)
- Sanding machine
- Clamps
- Mitre saw
HOW TO BUILD A ROLLING OVERBED TABLE:
1 . Please note this bed was made for a king size mattress without a base. The exact measurement are shown below.
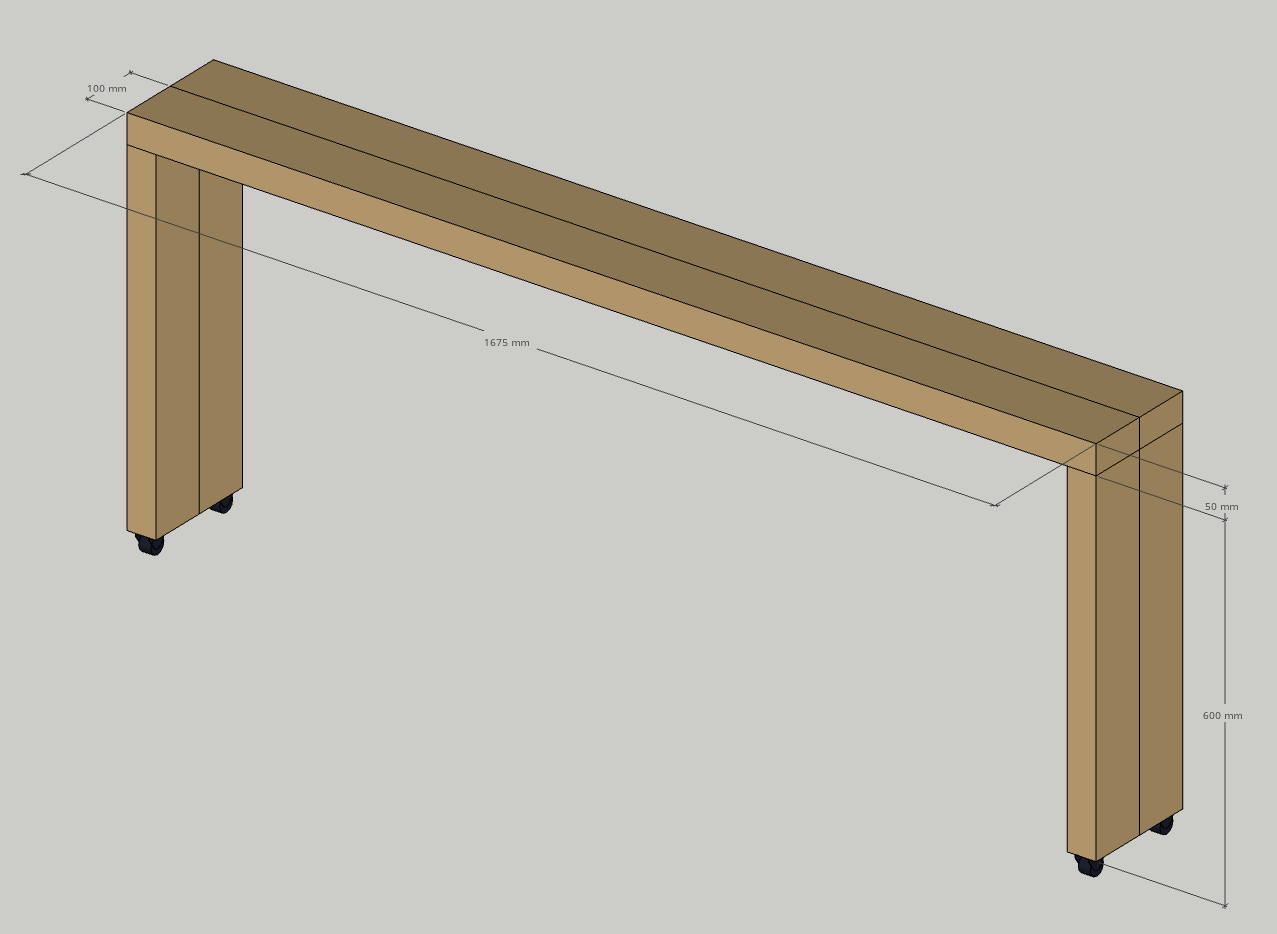
When making your own overbed table, you will need to measure the width of your bed so that the table is wide enough to fit over comfortably. You will also need to measure the height of the bed – factoring in how far off the ground it would be for you (or anyone else) when sitting up.
Based on those measurements cut your wood to size The easiest way to do this is with a mitre saw.
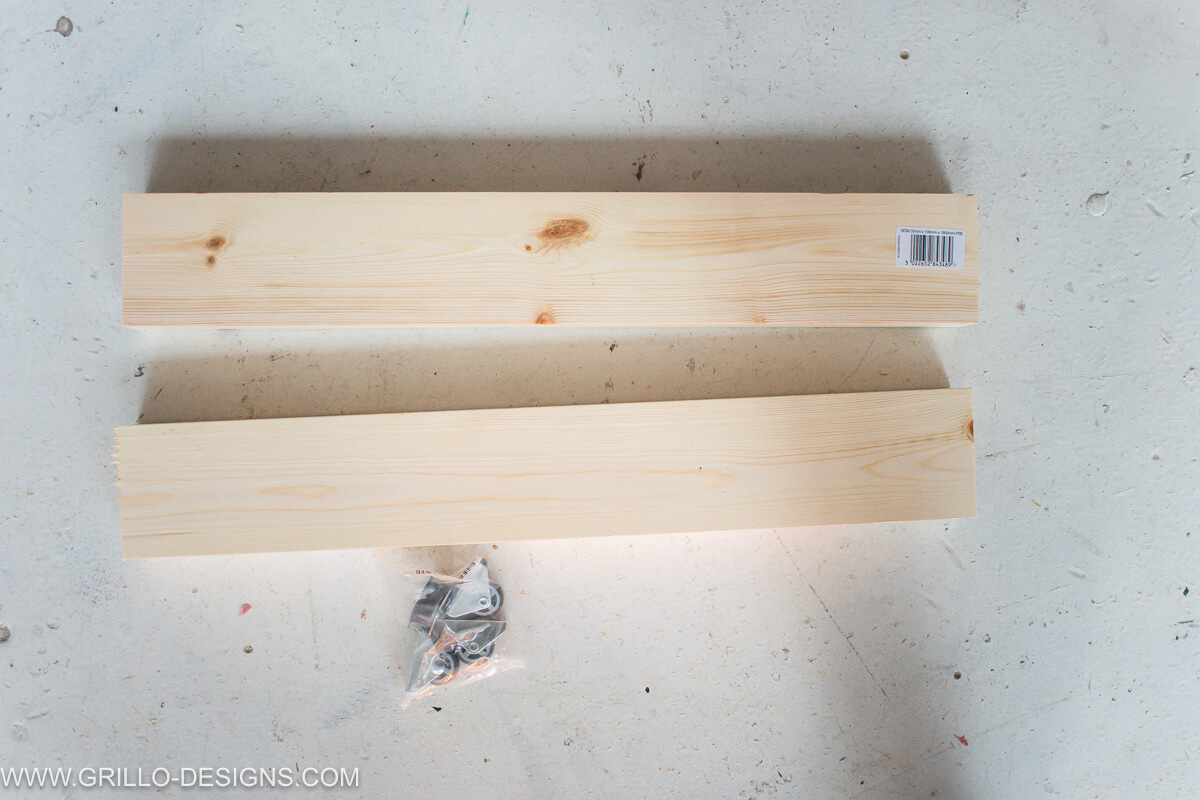
2. Cut two of the wood planks equal length to create the table top (always use protective goggles when cutting wood). And the remaining two pieces of wood, will need to be halved into equal sets of two to make the sides of the overbed table.
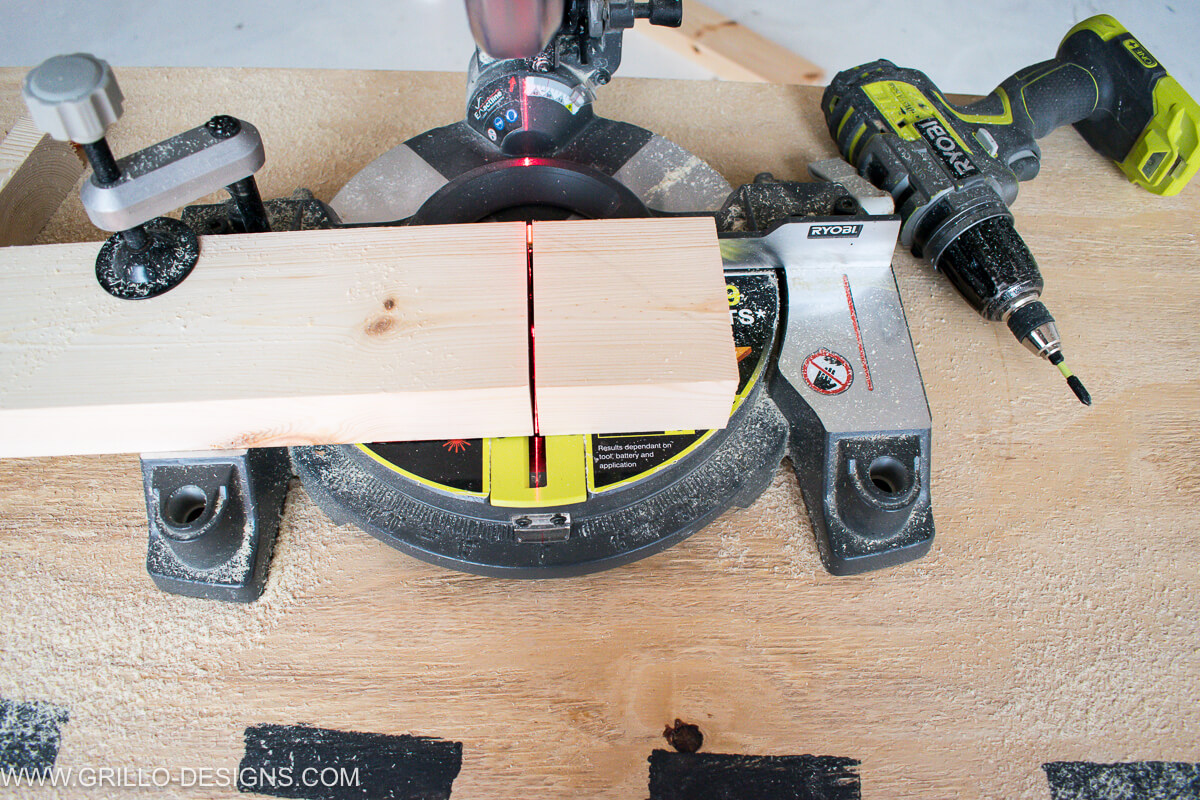
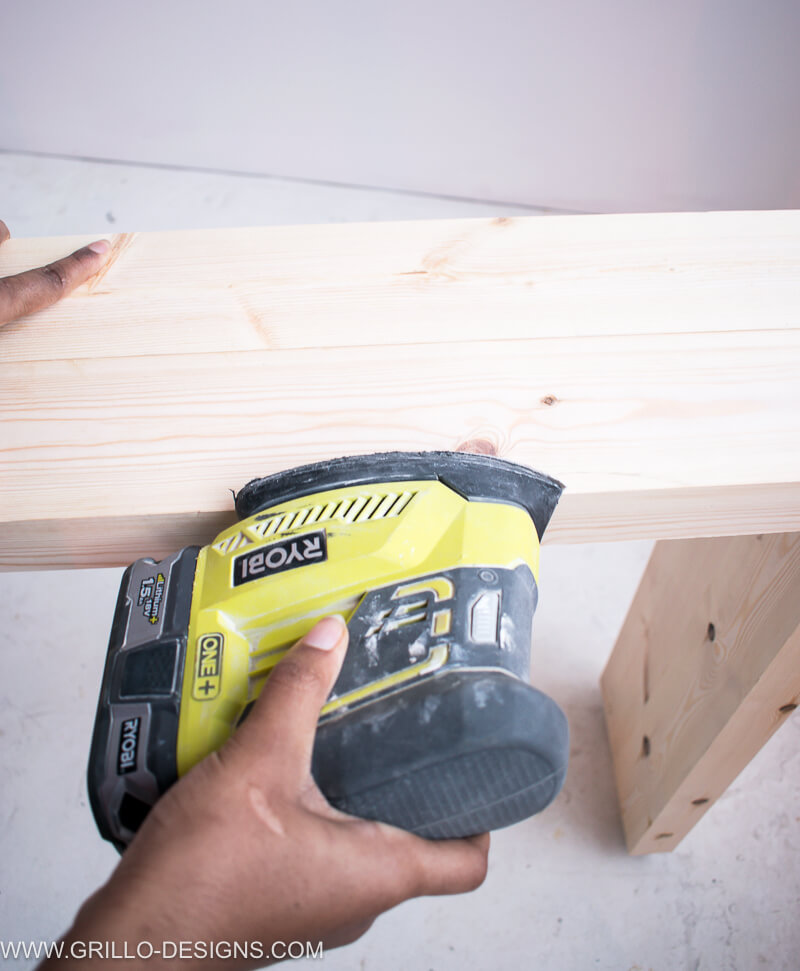
Once cut, sand the edges and sides of the wood (when sanding always remember to wear a suitable face mask to prevent you from breathing in any of the sawdust)..
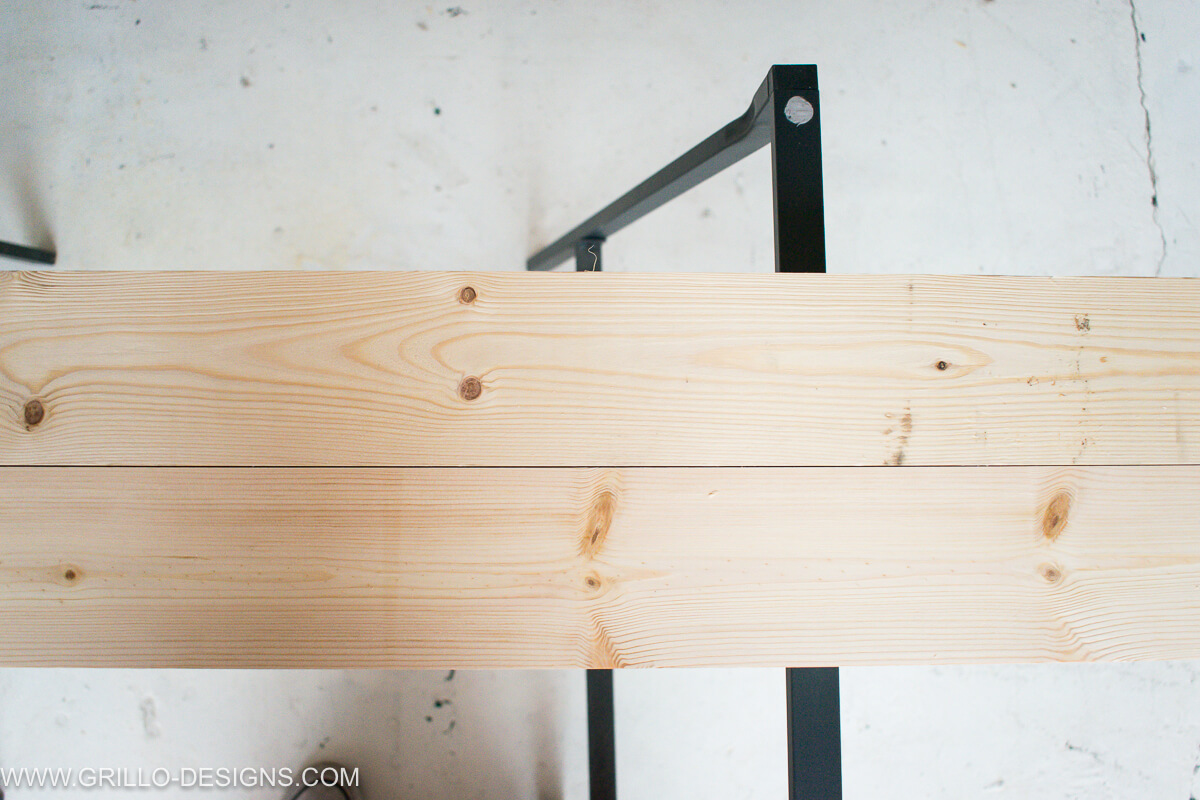
3. Place two of the longest wooden planks together. Apply wood glue to one side of a wooden plank for adherence
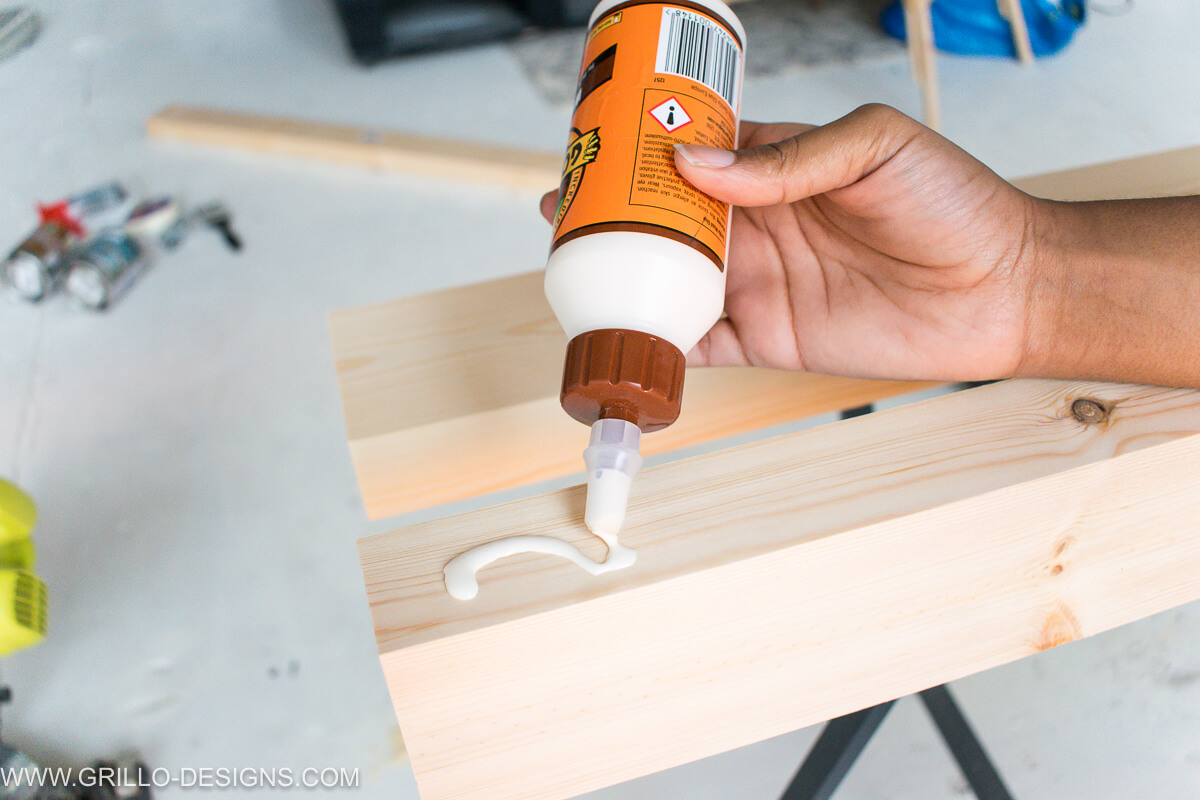
Clamps are advised at this point to help the wood adhere together better – however I did not have any to hand at the time and so went without.
4. While the glue is drying, add on the straight brackets to what will be the underside of the table. Space the brackets out evenly as seen below
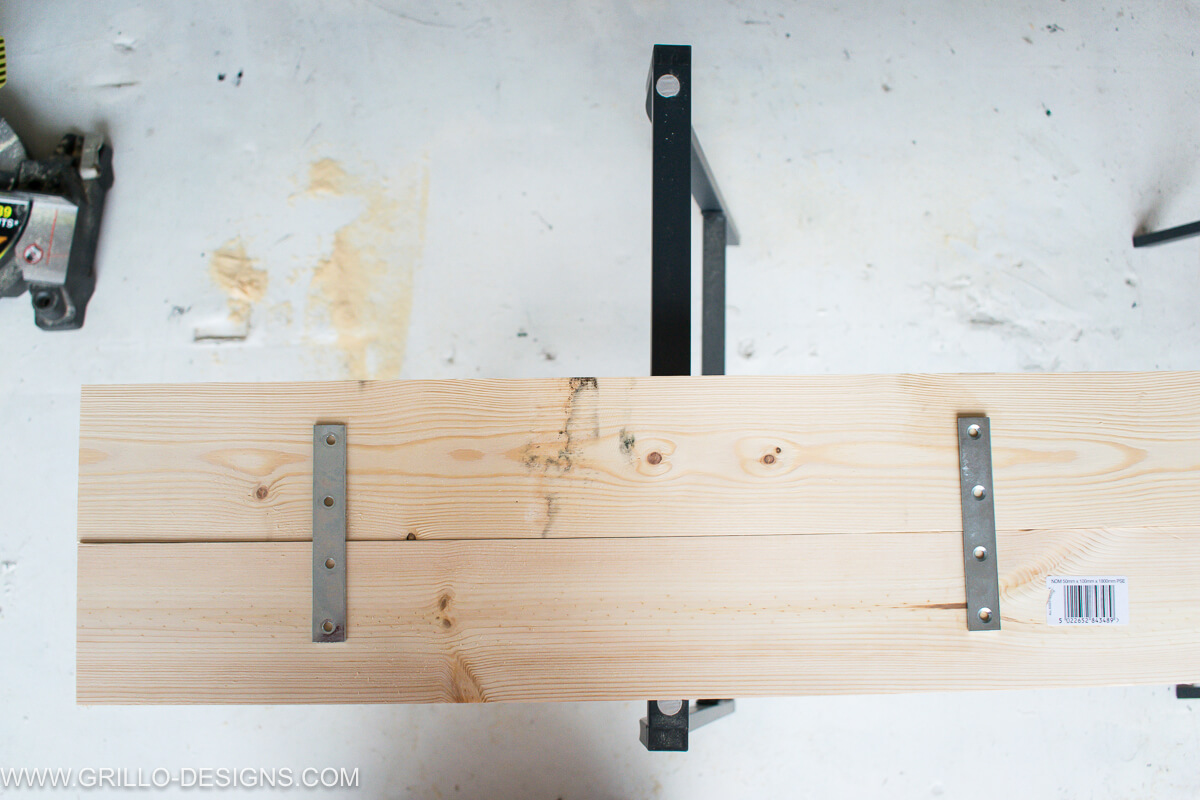
5. Secure the brackets in place with screws provided.

6. Now to make the sides of the table.
Attach two pieces of wood together with wood glue (in the same way you did to make the table top above), clamp and leave to dry the recommended amount of time. The sides will be much shorter than the top of the table so enforcement with brackets is not needed for this step .
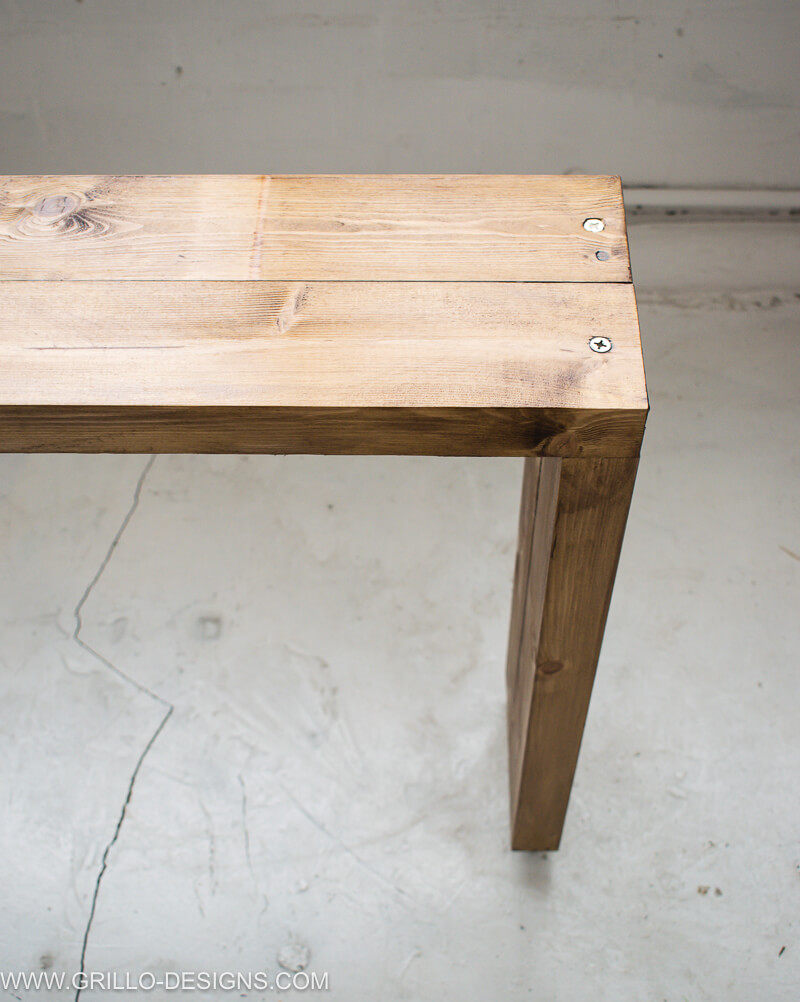
7. Place the top of the table and the sides at a right angle.
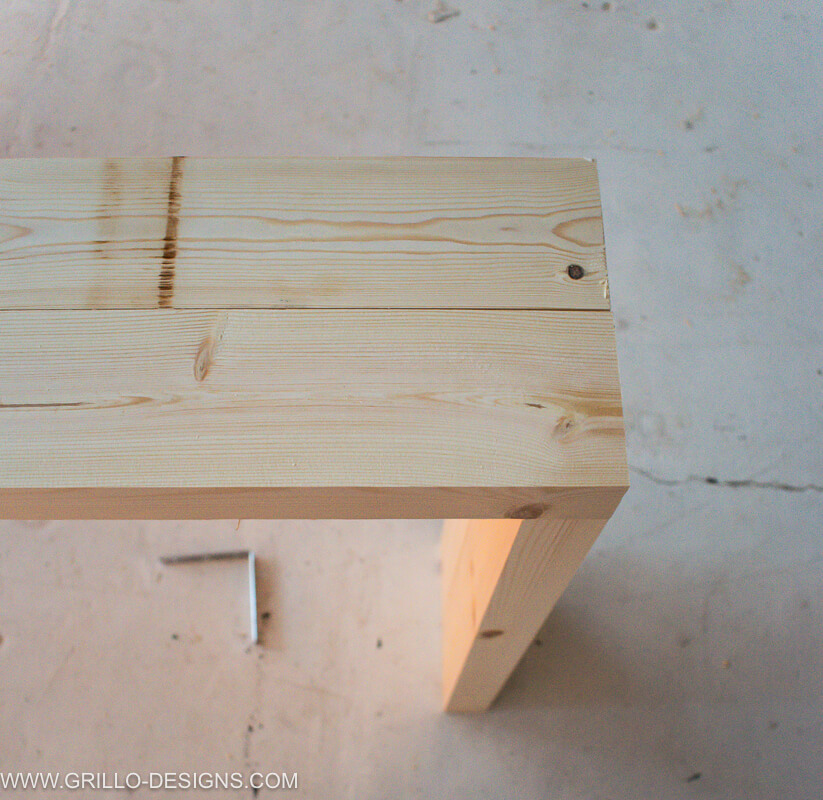
Pre drill two holes with a drill piece (smaller than the size of the screws) through the top of the wood and into the sides. (this will prevent the wood from cracking)

Screw in the screws .
Repeat this step for the other side of the overbed table.
Alternatively you can use L shape brackets – two for each of the sides.
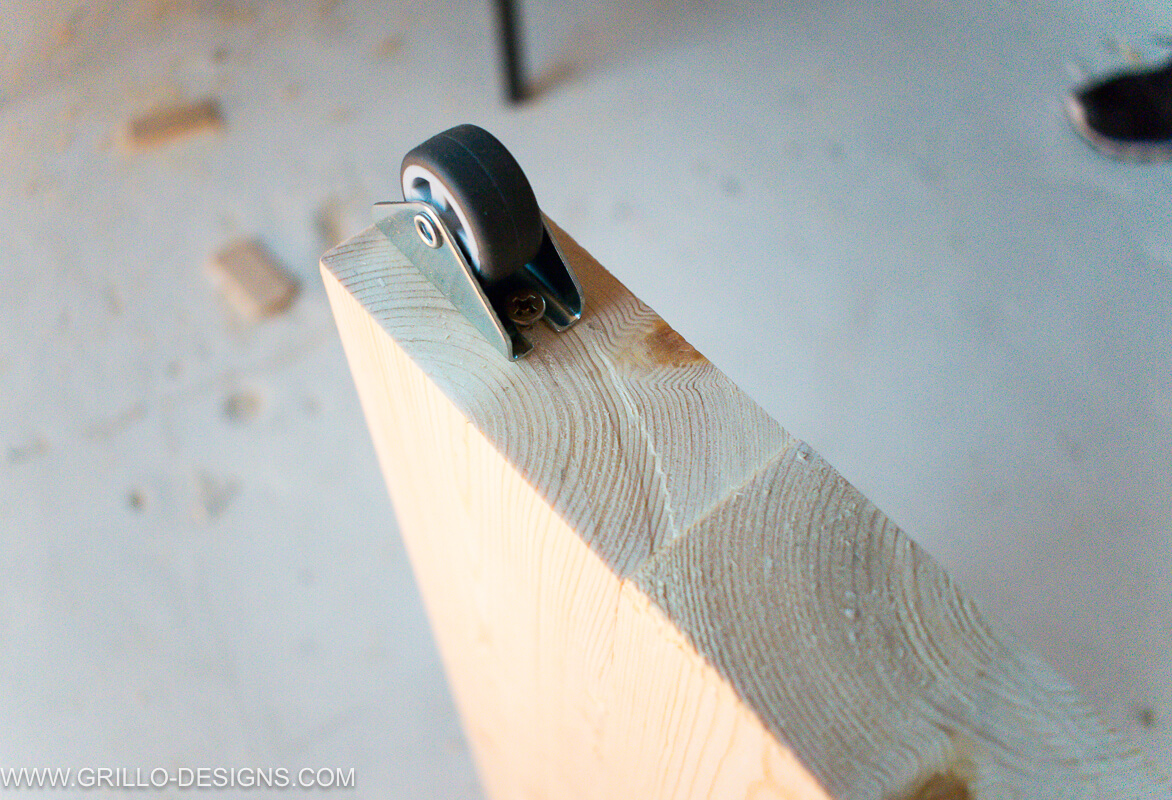
8. Screw on the non swivel casters to the bottom of both the sides. These will allow the table to slide back and forth over your bed in a straight line and not sideways, as opposed to using swivel ones
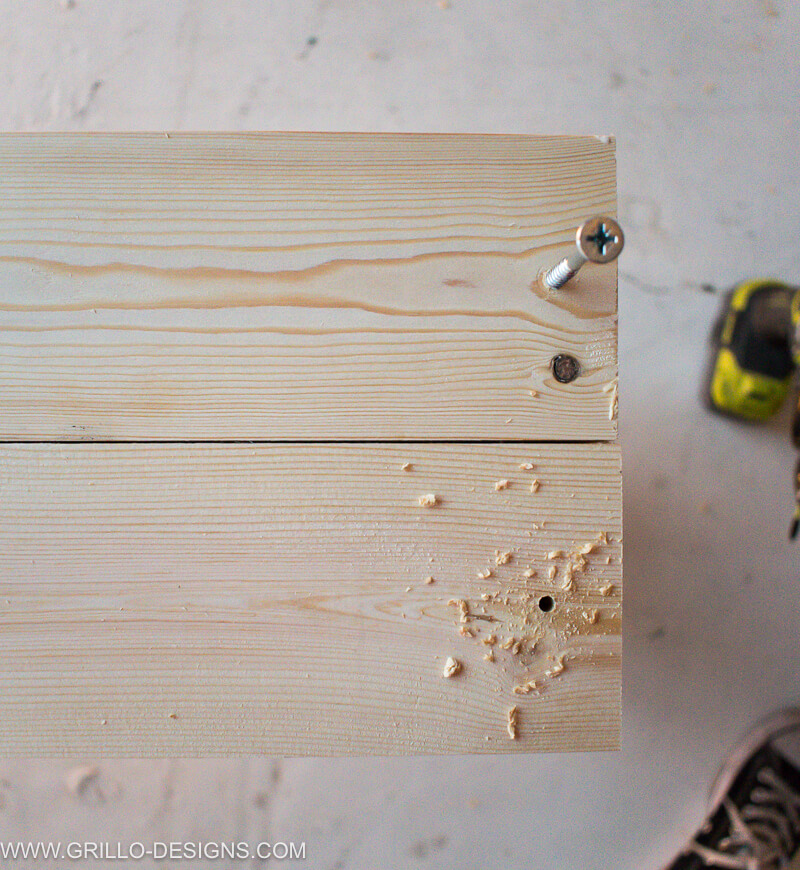
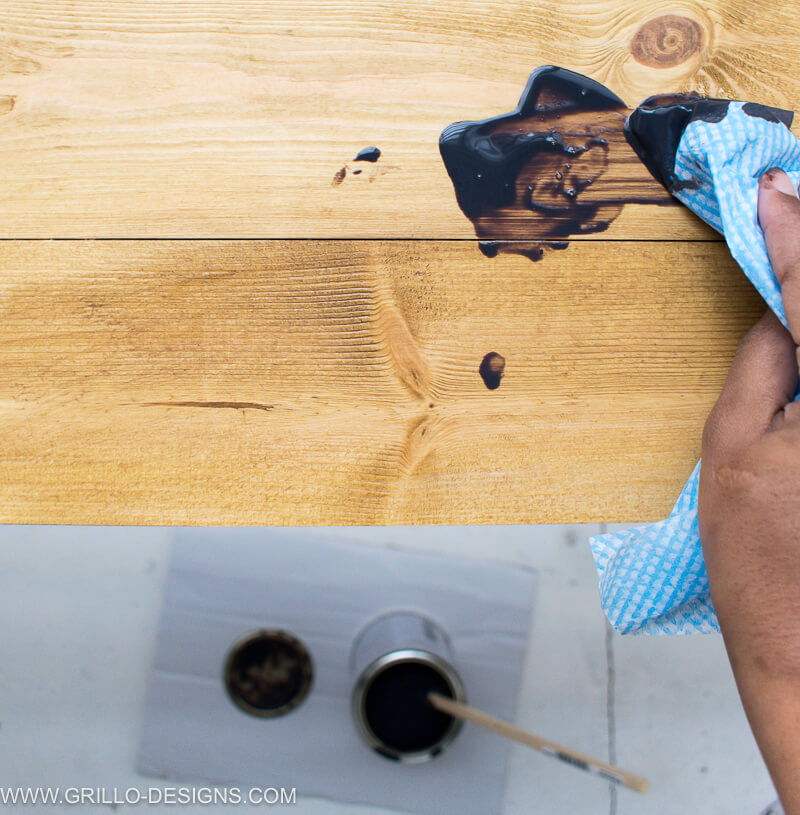
9. Lightly sand the surface of the overbed table – this will help the varnish to stick Wipe away dust or residue
10. Now for the varnishing part. Ronseal advises applying varnish with a brush but I find using a cloth just as effective. Stir the varnish well once opened . Then wipe it on in the direction of the wood grain. Gloves are advised!
I started off with the Medium Oak varnish. I applied about two coats – sanding in between.
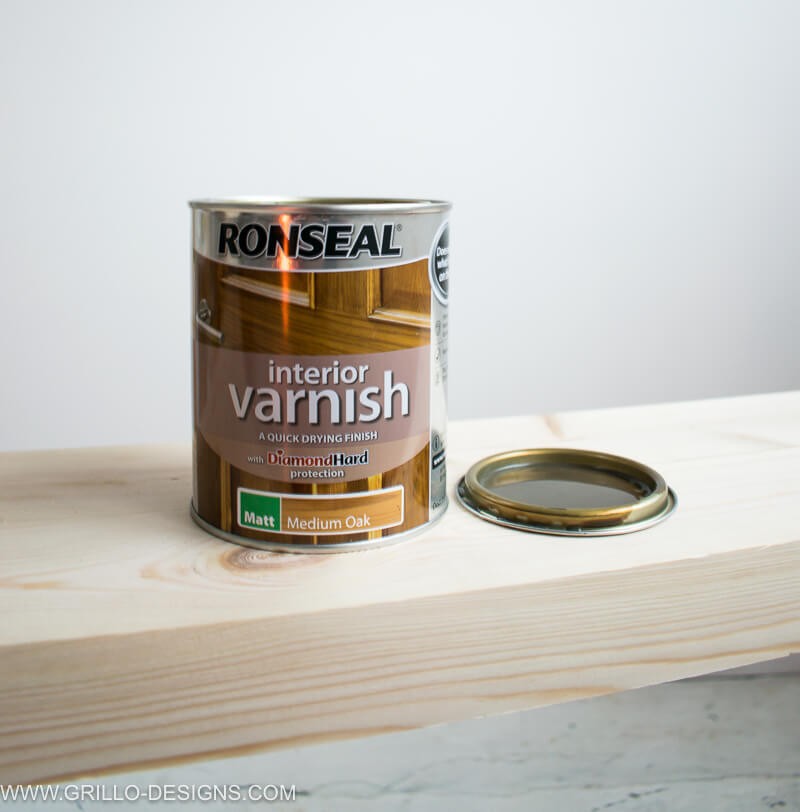

The finished result was rather yellow-ish

So I decided to apply another darker shade of varnish to get a more rustic look. I chose the Ronseal Indoor Walnut varnish
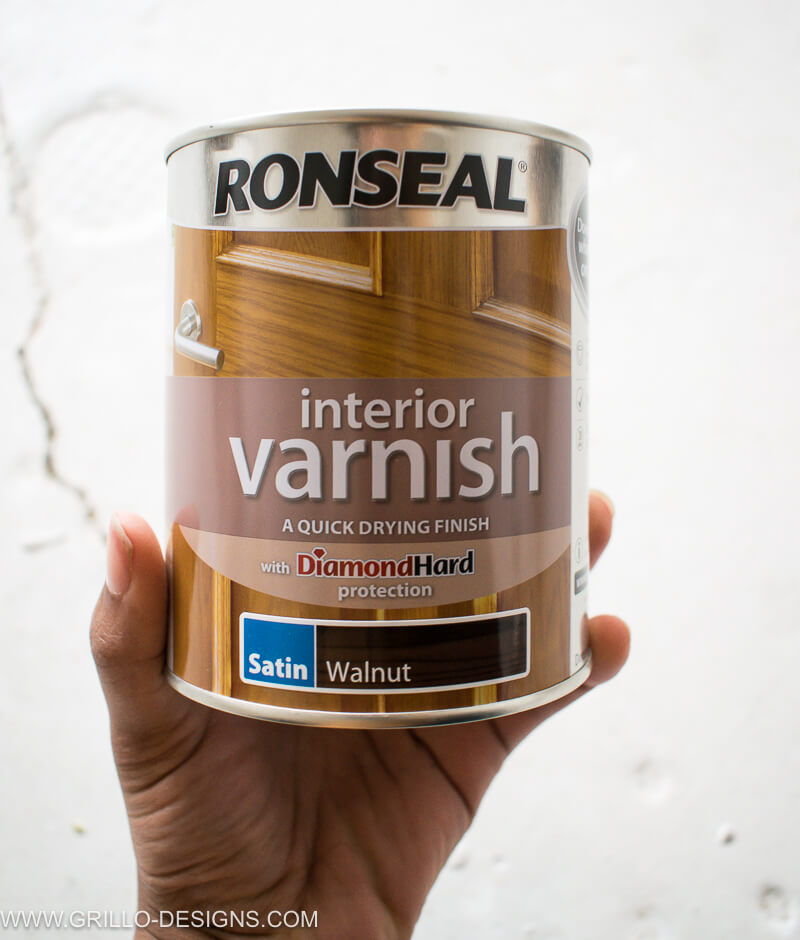
One coat of the walnut varnish was enough to achieve the effect I wanted
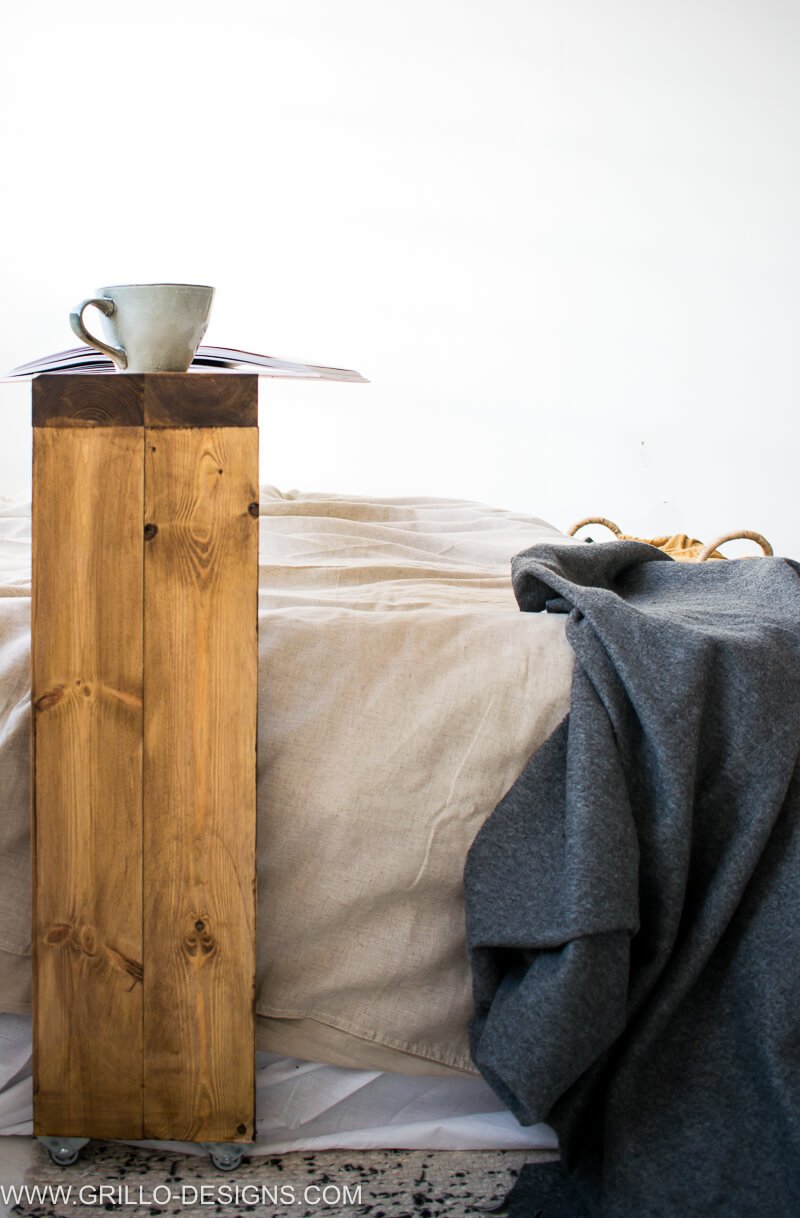
And that’s it.
Now roll the table over your bed and enjoy! FYI , this floor lamp can be bought here
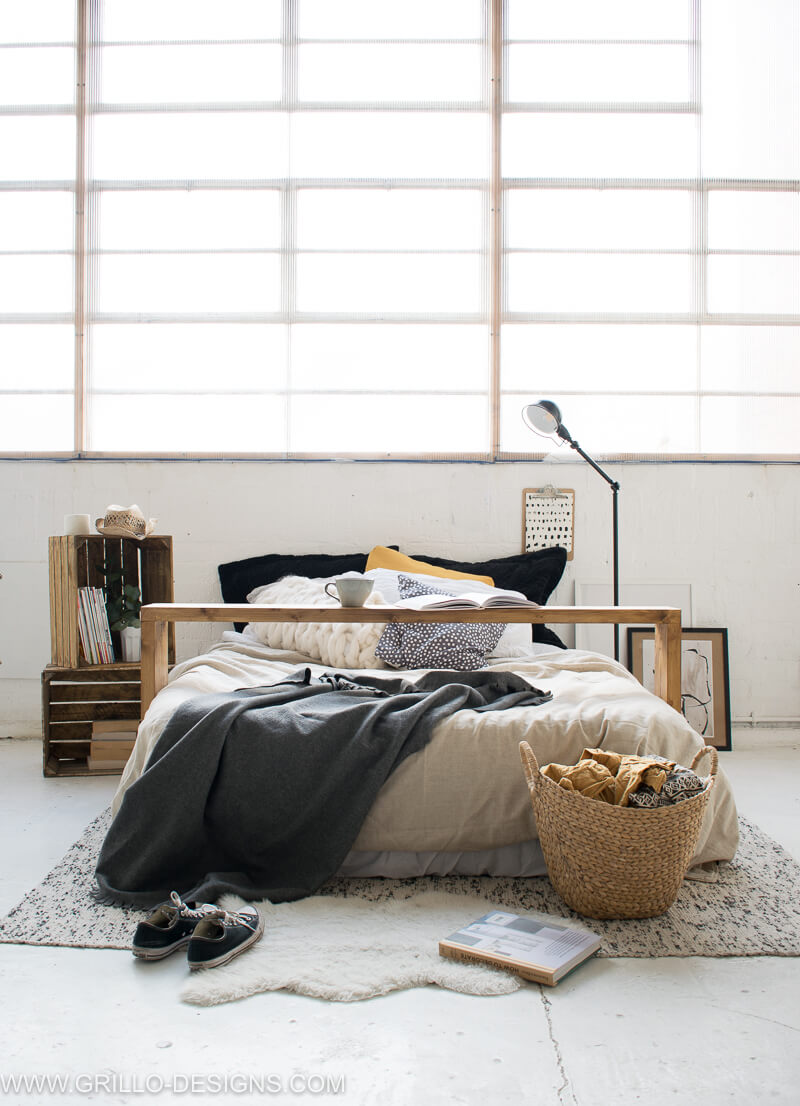
I love the side angle view of this overbed table ! As you can see, its super slim!
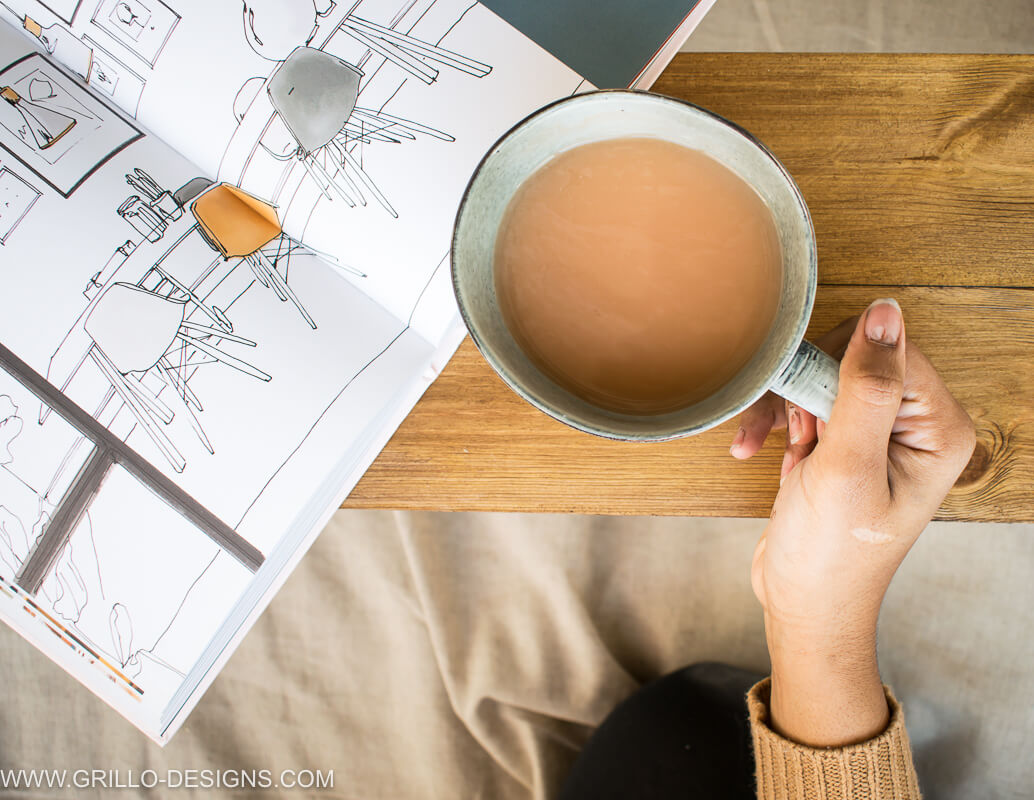
Nothing better than a cup of coffee and a pretty interior book to start the day right?


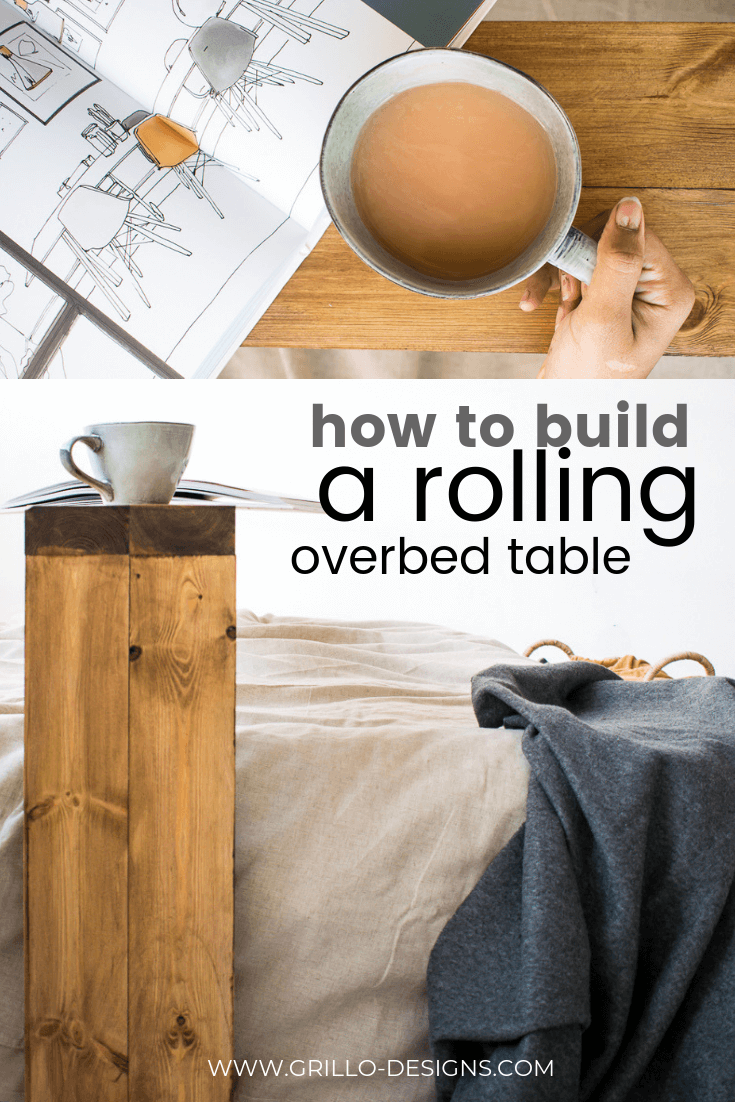
If you liked this DIY OVERBED TABLE idea, click the images below to save it to Pinterest!

HOW TO BUILD A ROLLING BAR CART
UNDER BED ROLLING STORAGE BOXES
If I were making this, I would use right-angle brackets under the top to secure the legs to the top. Especially with such a wide table and just in case someone decides to sit on it. (You know they will, it’s Murphy’s law.) I think you mentioned these brackets early in your instructions but you didn’t elaborate. Otherwise, the table looks very nice and definitely useful.
It’s amazing, last week I was looking at these console tables and pricing them. I was thinking to myself that I could also use it as a table for over my bed. I started thinking and planning on making this exact table. Thank you for giving me the physical how to do picture. This will be my next project.
OMG! This is perfect! O love the tutorial and how easy you make it look. I Want This! I’m going to try this.
Curious as to why you used narrow pieces of wood and glued together, rather than single wide pieces?
Was there structural reason, or more so for aesthetics?
Love the tutorial though!
It was more for aesthetics to be honest – this can definitely be done with a single piece though. At the time I just couldn’t find a piece of wood that was thick enough !
I would worry about this tipping over when I was moving it. Has anyone encountered this problem? Or is it just me overthinking it? lol
Hi,
Really enjoyed reading this post. Love the multiple purposes the rolling table has, whether it’s as a coffee rest or a shelf behind the sofa like you said.
Look forward to reading more from your blog.
All the best,
Emma
This is exactly what I needed last week. I started a finger knitting project. A throw made from looped yarn. It has gotten large enough that I had to sit in my bed and spread it out to work on the last several rows. I kept thinking-I need a table top over my bed! This is what I needed!
Brilliant as always Medina. I love it, I could do with one myself but then I’d find it even harder to get out of bed.
I absolutely love this! What a stylish and practical solution. I’ve ruined so many sets of bedding by trying to balance my weekend coffee on my lap and spilling it everywhere… I might have to give this a go!
Amazing job
Greetings from UAE. I love your account
Hi Maryam
Thank you!
This is so cool!
i would love to have one. you can work and still be in bed. i also like the varnish drying in 20 min. great idea!
Thanks for sharing! You`ve just helped me to came up with idea for the table like yours. I am mostly like your sister, I don`t spend time like this in the bed and don`t need that kind of table. But I have a friend which is an older disabled lady and something like your table would be perfect for her needs