Today’s contributor is Patricia from The Wood Spa and she is a sharing a tutorial on how to paint an ombre dresser. All posts contributed by Patricia for Grillo Designs can be found HERE.

I’m always pinning and saving pictures of ombre dressers from the Internet, but I had never painted one until recently. They make me smile with their fun colors and beautiful shades and I think they look especially nice in children’s bedrooms.

I will show you step by step how I painted this blue ombre dresser for a little boy’s bedroom. The original piece had been in his father bedroom since he was a little kid and after all these years it was still in very good shape.
This is how it looked before.

SUPPLIES USED TO CREATE THIS OMBRE DRESSER EFFECT:
This post contains affiliate links for your convenience – please see full disclosure here
- 120 grit sand block
- TSP with some water
- Gray primer paint
- Spray painter (I like to use this brand paint spayer)
- Benjamin Moore Hale Navy (satin)
- Benjamin Moore Super White
- wood filler
- foam roller – this brand looks as good as spray paint
- Polycrylic spray, satin.
- Scrap pieces of wood
HOW TO:
I started by cleaning the piece with TSP diluted in water and paper towel, then light sanding it with a 120 grit sand block.

Next I cleaned it again then sprayed Rustoleum gray primer over the entire piece.
This is how it looked after I primed it.

This chest had very few scratches, and since I could hardly see them in the original finish, I chose to fix the imperfections after it was all primed. I applied wood filler using a putty knife, and after an hour sanded the filled spots with a 220 grit sand paper. I then cleaned and sprayed the primer only on those spots.
The main color I used was Benjamin Moore Hale Navy (satin). I sprayed two coats on the main body of the chest using my Homeright paint sprayer.

Next I got to the fun part! Mixing paint to make the other five shades of blue to paint the drawers.
There was no exact recipe to make the other shades. I chose to make very subtle variations of the main blue because I wanted the final look to be mostly dark. It is a personal choice. I’ve seen ombré pieces where the shades have a higher contrast among themselves and the last drawer is totally white. Also very beautiful!
To make the darkest shade I added a little bit of white paint (Benjamin Moore Super White) to the Hale Navy blue.

I mixed it well and painted a small piece of wood. I used little pieces of wood to compare each new shade to the other ones. If I thought it was too dark or too light I did the necessary adjustments by adding more white or more blue to my paint, always trying it on the little piece of wood FIRST before moving to the actual drawer.

I also kept a small container with each shade of blue I used, so they can be used in case some touch-up is needed during the project or in the future.
When I was happy with my first shade, I rolled two coats on the bottom drawer using my very favorite foam roller.

This roller makes a very smooth finish and it’s the closest you can get to a spray painted finish.

I repeated the process for the other four shades, always painting small pieces of wood before painting the drawer, and saving a little container of each shade.

I sealed the finished piece with Polycrylic spray, satin.
And here is the final result!


Have you got a similar piece? Are you planning to do your own ombré dresser? Let me know if I can help! Also, here are some of my other painted furniture transformations from my blog.
DRESSER MAKEOVER FROM MY BLOG:

NAVY BLUE SIDEBOARD FOR A NURSERY

Don’t forget to follow me on social media to see all my projects.
PINTEREST / INSTAGRAM / FACEBOOK/ YOUTUBE
Thanks for reading!
Patricia Rios @The Wood Spa.
IF YOU LIKED THIS POST YOU MIGHT ALSO LIKE THIS TUTORIAL ON HOW TO APPLY NAIL HEAD TRIM TO A DRESSER

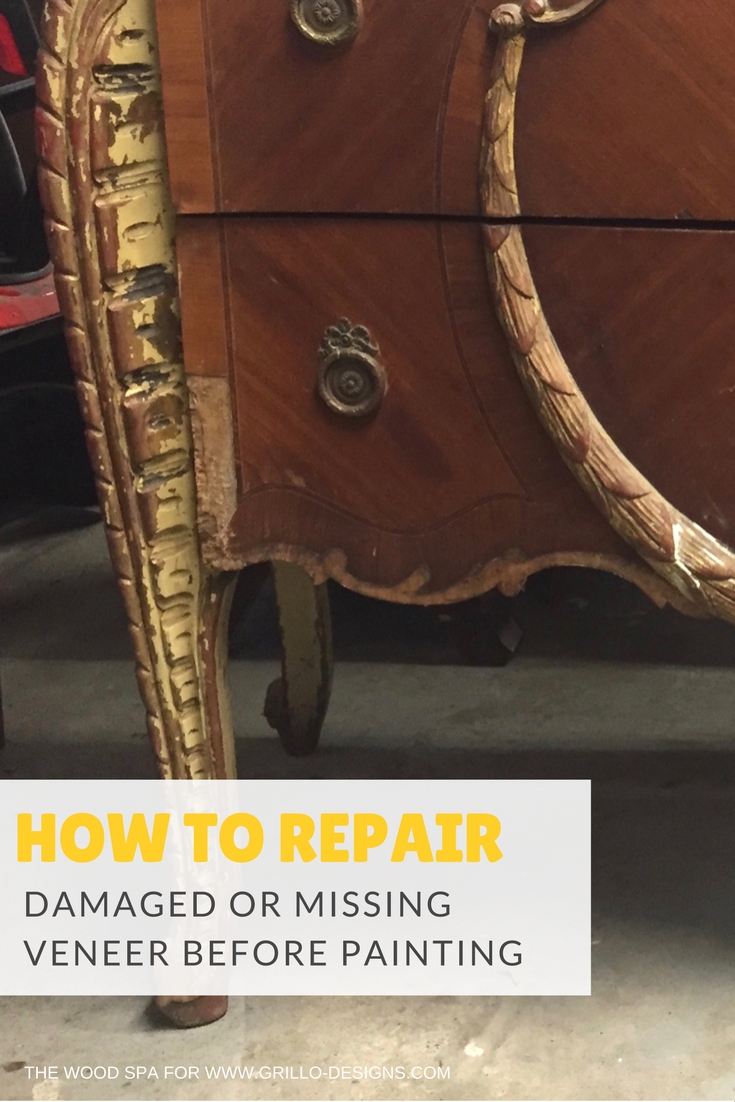
OR THIS POST ON HOW TO REPAIR DAMAGED VENEER ON FURNITURE
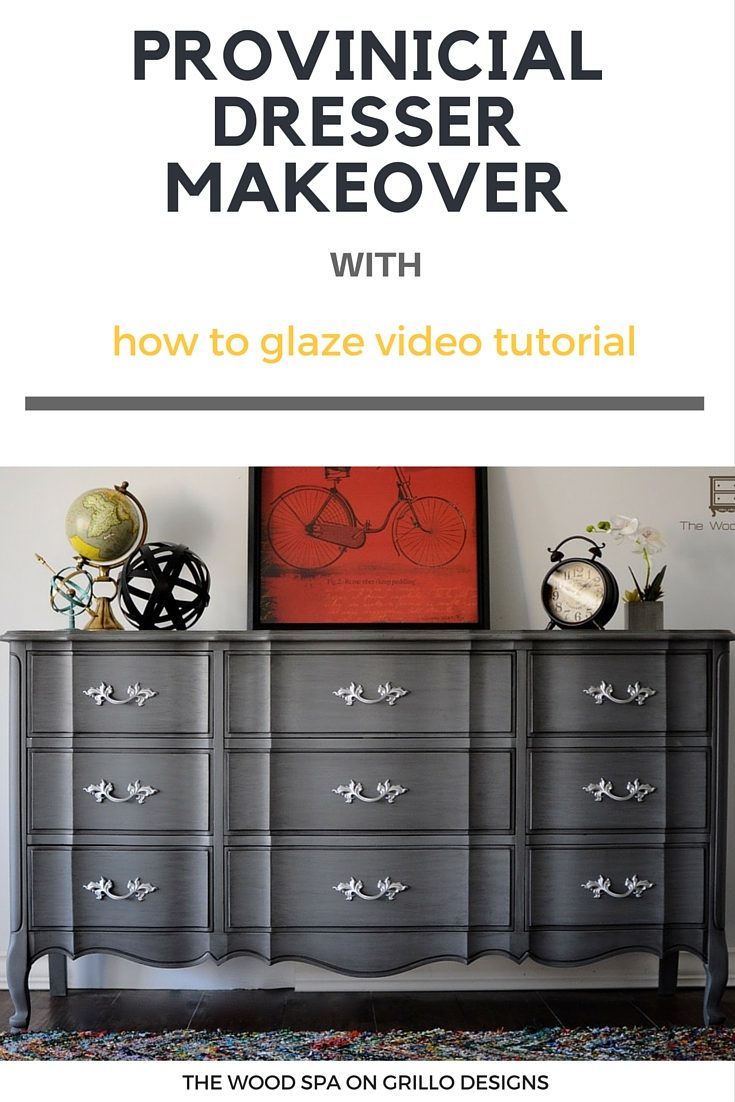
HOW TO GET THE GLAZED EFFECT ON ON A DRESSER


This is such a beautiful transformation! We have a few old dressers in desperate need of tlc, but I’ve always been too scared to attempt painting them. I’m pinning this tutorial so I know exactly how to do it when I’m ready. Thank you! 🙂
Thanks Emily!
No need to be scared. This is easier than it looks. Good luck!
Absolutely beautiful and inspiring! I’ve got several pieces that I need to do something with and had never considered painting it until I saw your work. Thank you so much for sharing with the rest of us !
Thanks for your kind words Jodi! Good luck on your painting projects.
Patricia.
Love the paint effect it looks very professional. Well done.
Thanks Claire!