Not only are wooden dowels really cheap to buy, but they are also very versatile, making them the ideal base material for simple crafting or DIY projects. Here are 4 creative ways you can use wooden dowels in your kitchen.

*** This post is sponsored by Hobby Craft.
So I know ‘Spring Cleaning’ gets all the online hype these days (from a millennial’s point of view that is), but I much rather prefer to do all my de-cluttering and organising in the more chillier seasons (i.e now)
Somehow the thought of cozy nights in, watching Netflix isn’t as appealing when youre surrounded by heaps of ‘stuff’ that really shouldn’t be there.
And if I’m being totally honest, I have lots of stuff.
In my home.
That shouldn’t be there.
And because this stuff’ no longer sparks any joy (Oh yes I’ve read that book). said ‘stuff’ really needs to go.
Starting with the stuff in the kitchen.. . which brings me to the reason for this post.
Last month I was sent a few crafting materials from Hobby Craft and was asked to create some simple DIY ideas from wooden dowels. Because I was already on a de-cluttering kick, I thought it would be a great idea to base these dowel projects around easy to do kitchen organisation ideas.

I’ve got four projects to share with you today – all of which are VERY achievable so please don’t be put off by the number of steps!
MATERIALS:
- 4 x Wooden dowels 3/8″ x 36 “
- 1 x plywood sheet 1/2 x 12 x 12 “
- Drill
- 3/8″ Hole cutter drill bit
- Manual Saw
- Hammer
- Wood glue
- Sander
- Clamps (optional)
HOW TO:
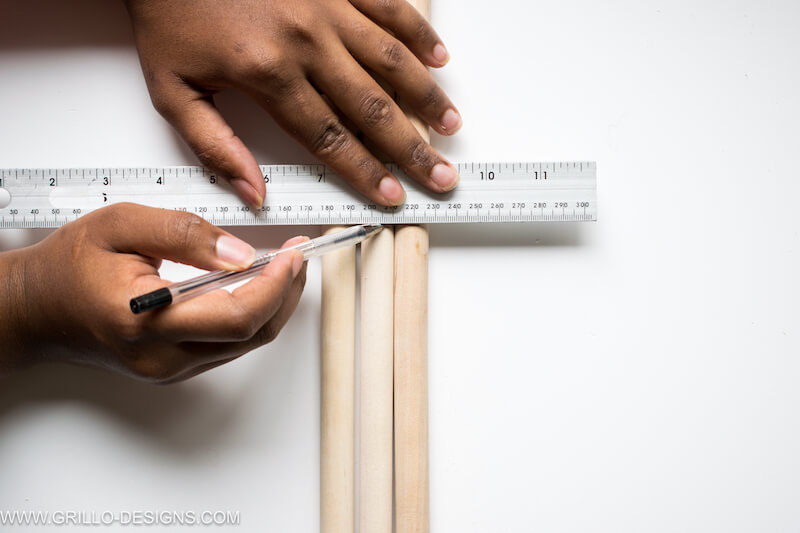
1. Using a ruler, measure and mark 4 equal sized strips from the plywood sheet. Cut with your saw (or jigsaw if you have one).

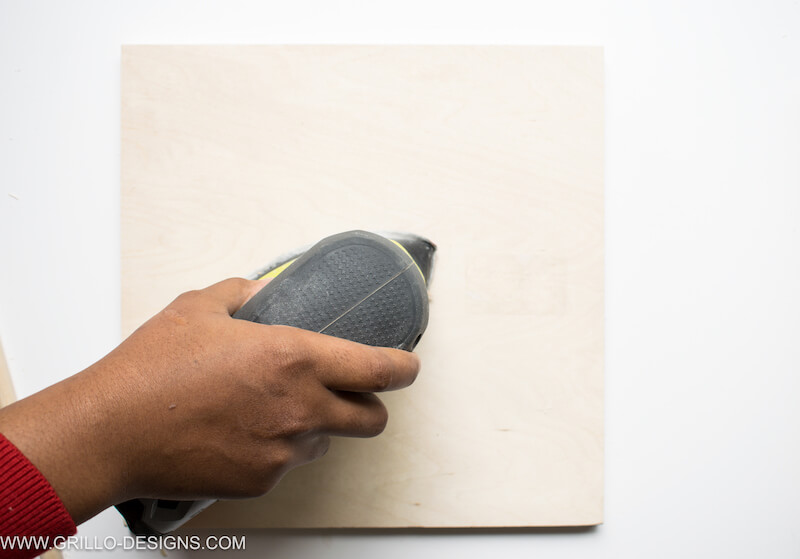
2. Sand both sides of the wood for a nice smooth finish.

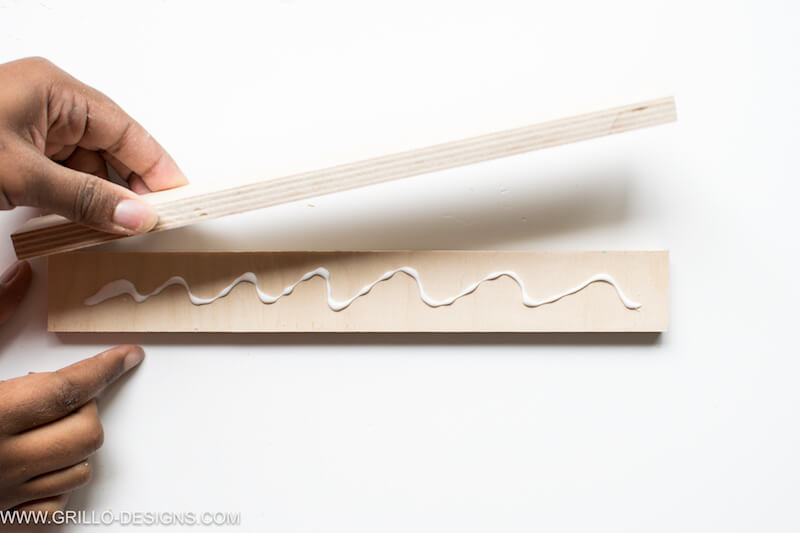
3. Apply wood glue to two of the wood strips and stick together.

4. While the glue is drying, cut your 3/8″ wooden dowels to a 8″ length. You will need at least 16 of these. Sand to remove any uneven edges/splinters

5. Once your plywood strips are dry, mark where you would like the dowel holes to be using a pen and ruler. It worked out to be about a 1″ gap between each hole.

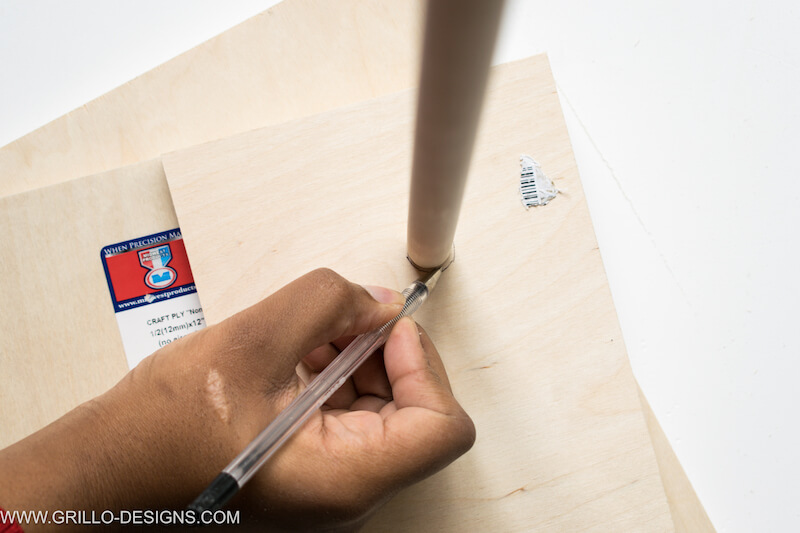
6. Next create your holes (7 holes per strip)
Attach the hole saw bit and drill directly through each of the points you have already marked on the plywood strip (it doesn’t matter if you drill completely through the wood – just make sure you have a solid base underneath to avoid any damage to the work surface).
You may find clamping the wood down helps to drill straight.

You will also need to make 2 holes to each side of the plywood strips so that they can be connected together with dowels
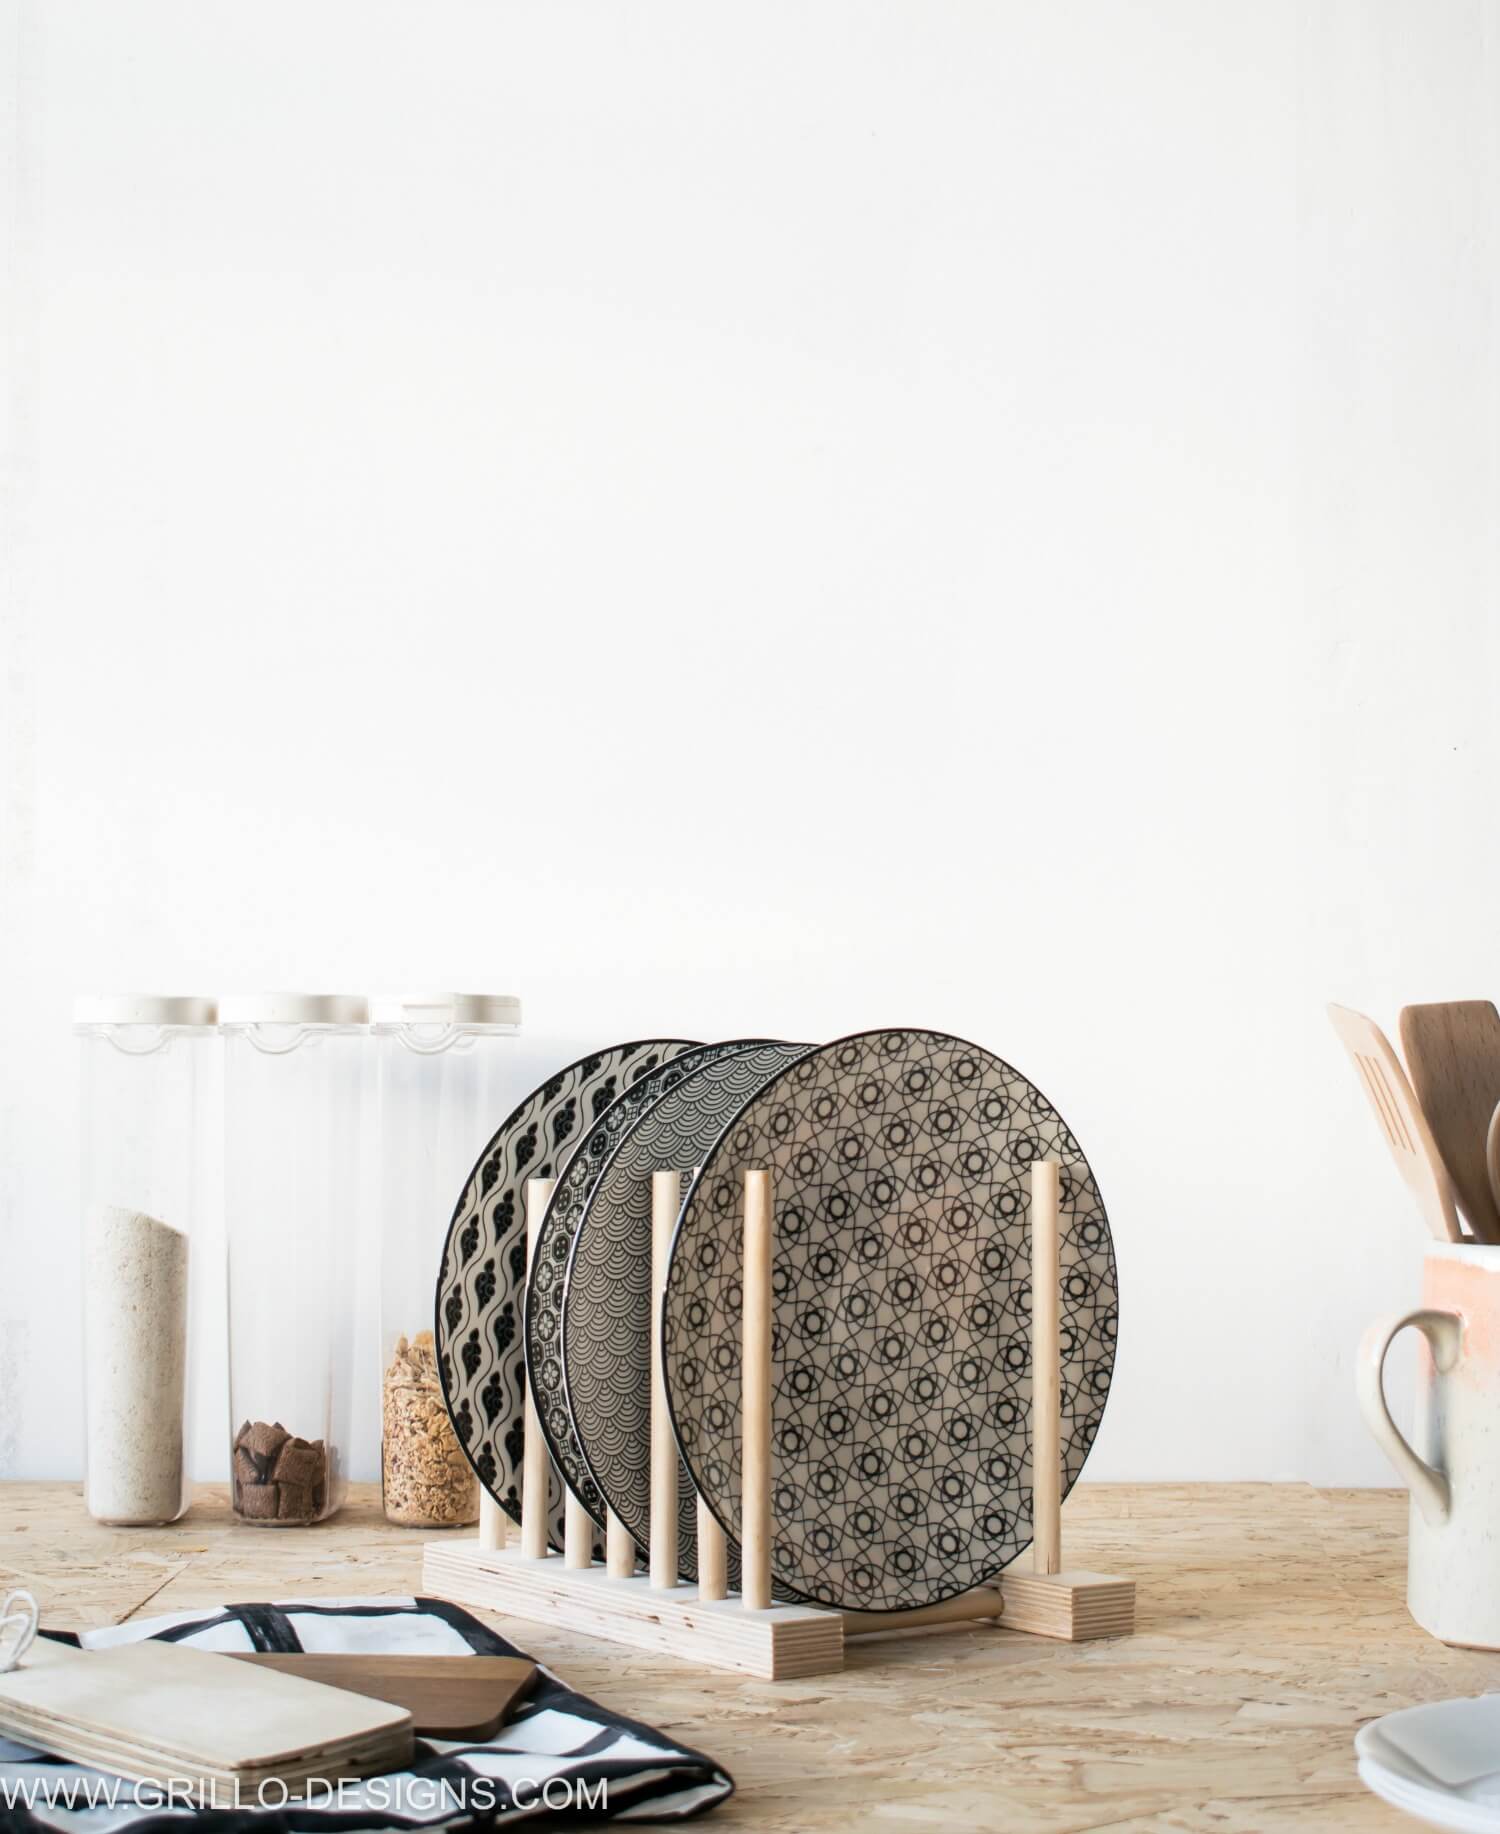
7. Hammer the dowels you previously cut into each hole.

Join the two plywood strips together with two dowels

And you have yourself a wooden dowel plate rack organiser!


MATERIALS:
- Multi-tool saw
- 1 x Wooden dowel 5/8″ x 36″
- 2 x screw eyes
- Menu print (of your choice)
- 1 x clear polyester sheet 11 x 7.6″ x 0.001″
- Jute twine
- Clamps
HOW TO:
1. Saw the wooden dowels to fit the width of the plastic sheet (7.6″ wide) . You will then need to create a slit in the wood to fit the sheet.
The most effective way to do this is by using a hand held multi-saw. Mark out a straight line through the middle of the dowel and cut.
You can use clamps to hold the dowel in place if you find your grip is a little unsteady.

2 Slide each end of the plastic sheet through the slits you made in the dowels (wood glue can be used if needed)
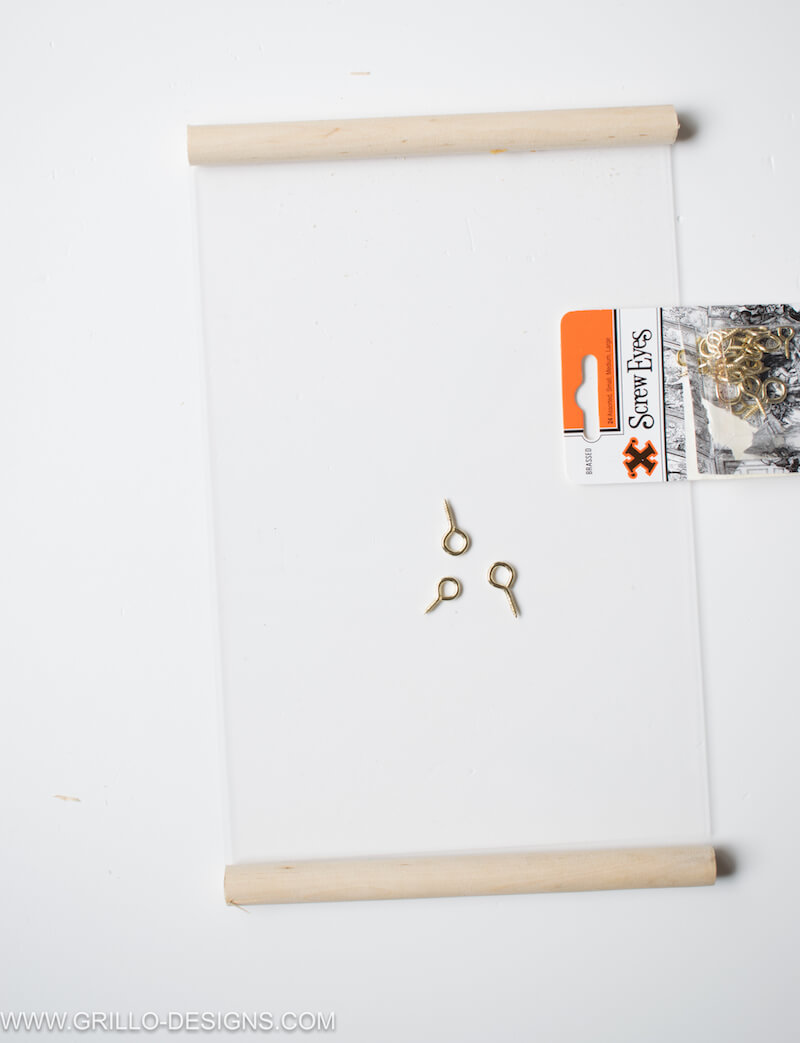
3. Stick your print to the back of the plastic sheet and screw in the eye screws to the sides of the dowels.

4. Tie on the jute twine and hang in place!
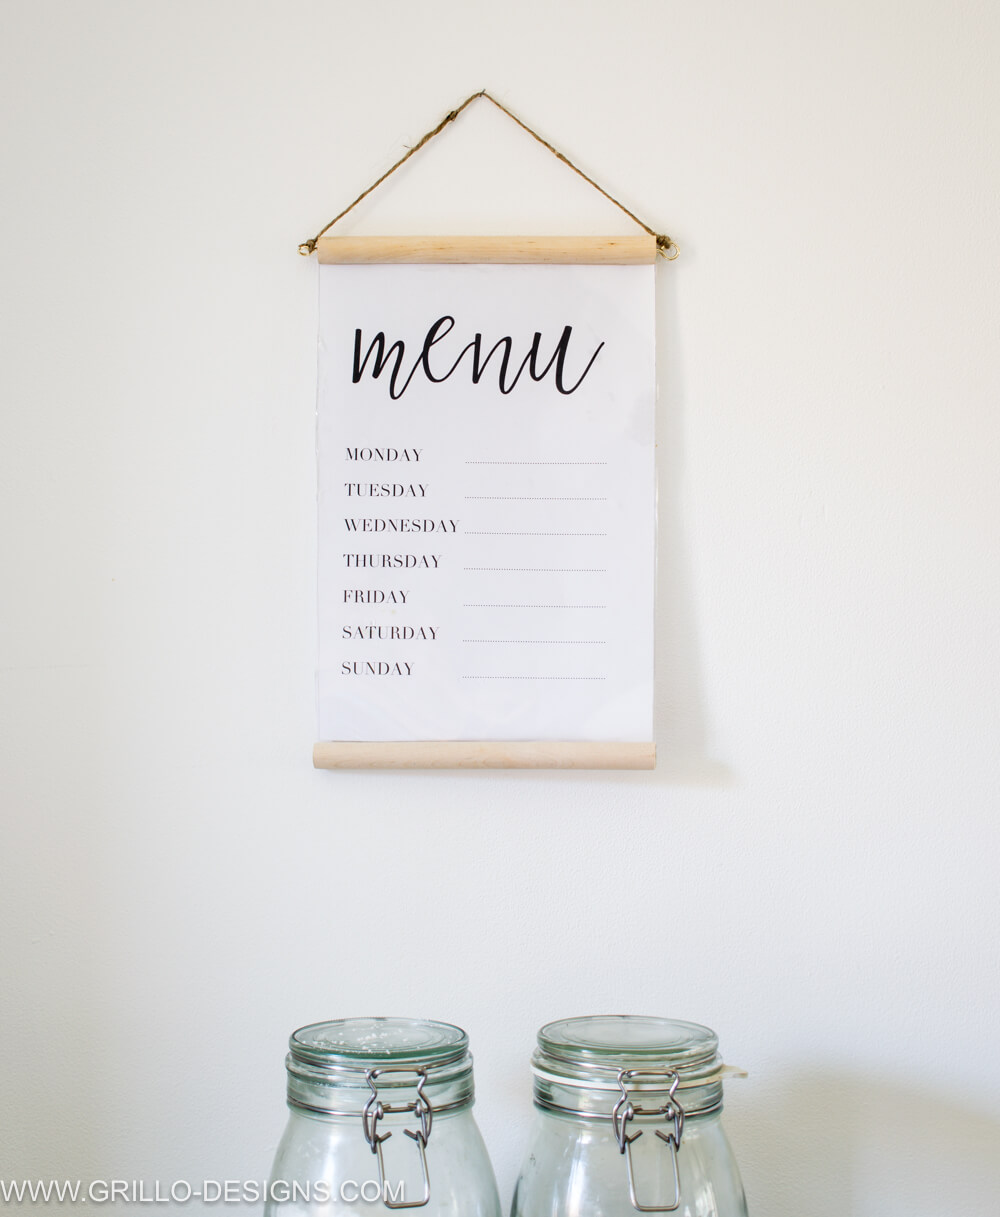
This idea is great for planning and organising your weekly menus – and once you’re done, you can to wipe it all away. Just be sure to use a non-permanent marker!
MATERIALS:
- 2 x plywood sheet 1/2 x 12 x 12 “
- 3 x x Wooden dowels 3/8″ x 36 “
- 3/8″ Hole cutter drill bit
- Manual Saw
- Hammer
- Wood glue
- Sander
HOW TO:
1 Sand both sides of the plywood sheets.
2. Measure, mark and cut the dowels to your desired length.
3. On what will be the insides of your bookshelf, measure and mark where you want the wooden dowels to be positioned on the plywood sheet.
Two of the dowels will hold the books (you can use your own cookbooks as a guide for the gap size) and the third dowel will be at the base of the shelf for added support.
4. Clamp the plywood sheet down and drill through marked points using the 3/8″ hole bit. Do NOT drill completely through the wood this time.

The holes should look like this.
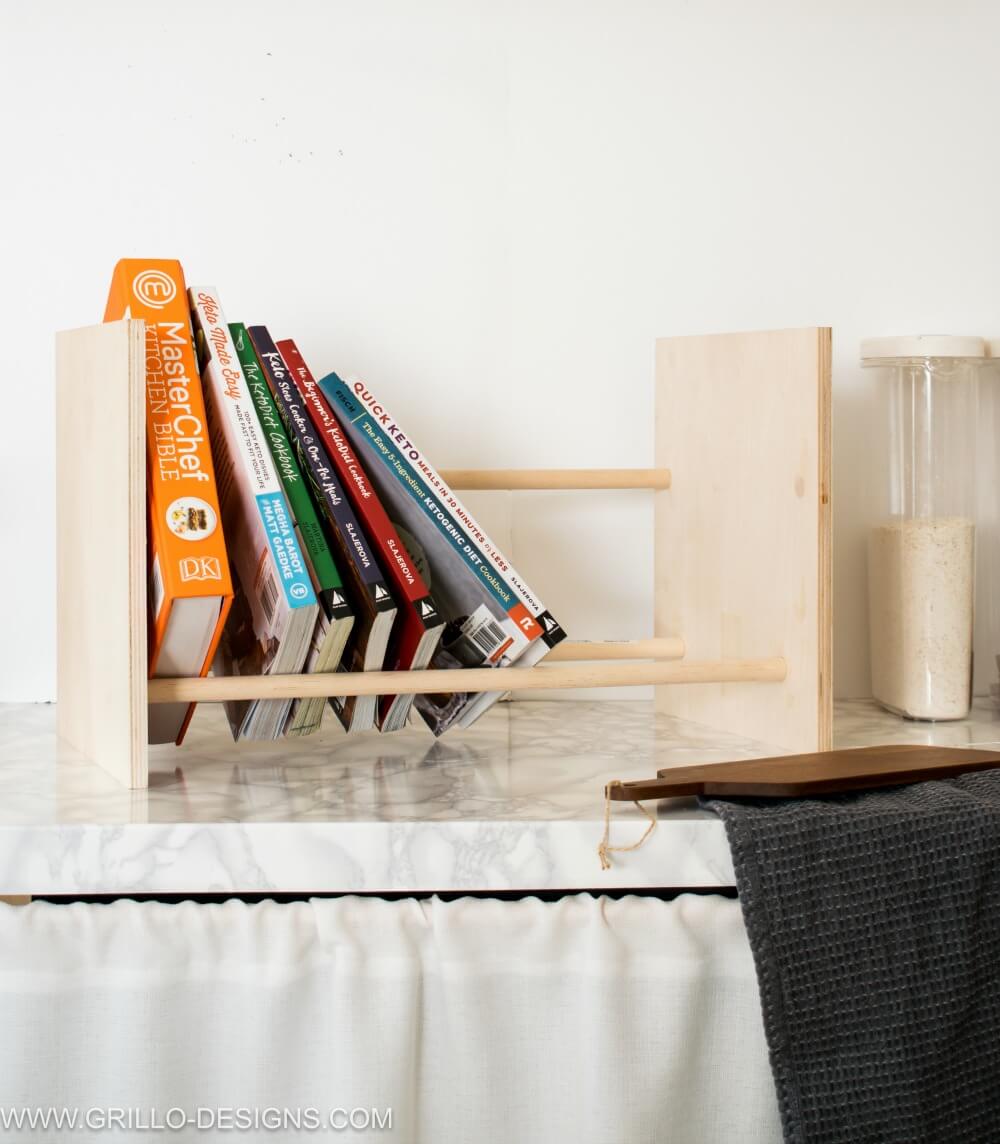
5. Squirt wood glue into each hole and place the dowel rods inside. Then attach the opposite plywood sheet to the other end of the dowels and leave to dry.

Place the shelf on your kitchen counters to hold your cookbooks!

MATERIALS:
- Wooden dowels 7/8″ x 36″
- Drill
- Scews
- Sealant glue
- Manual Saw
HOW TO:
1. Cut 2 of the dowels to make 4 rungs for your ladder rack. To create a similar sized rack to mine – the ‘rungs’ needs to be at least 8″ wide.
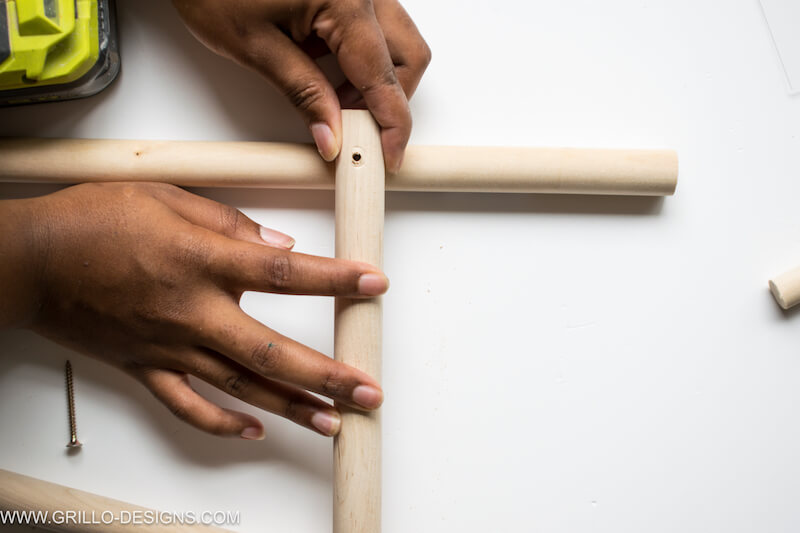
2. Place the rungs across the two longer sized wooden dowels to create a ladder. Measure and mark where to position the rungs (ensuring each rung is equally spaced).
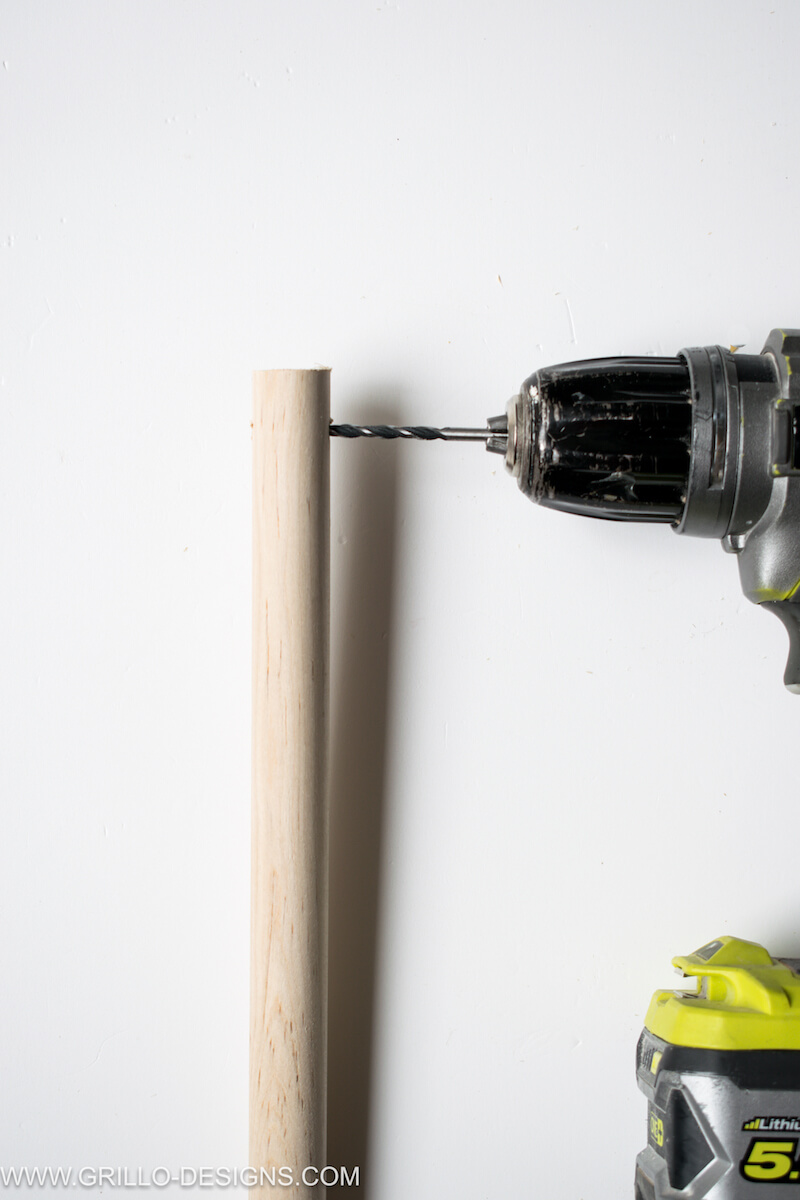
3. Pre drill holes onto each end of the the shorter dowels (the rungs) .
4. Place the shorter dowel horizontally across the longer piece of dowel and screw in place with the drill.
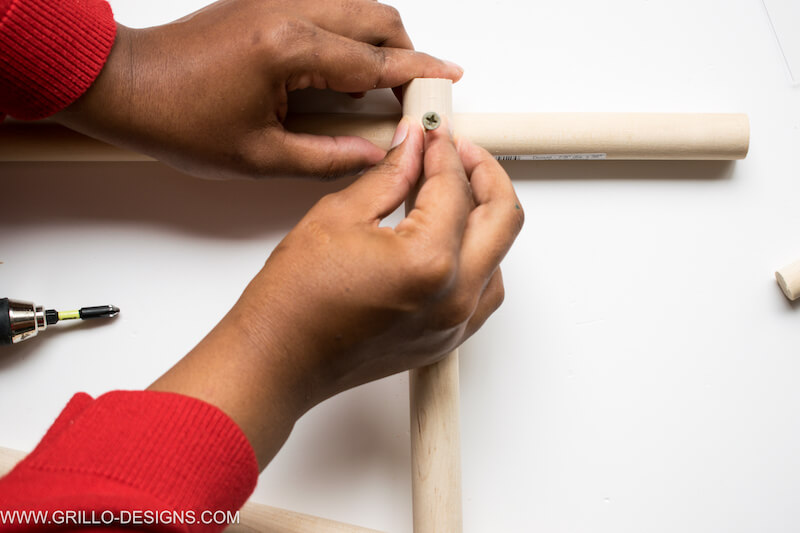
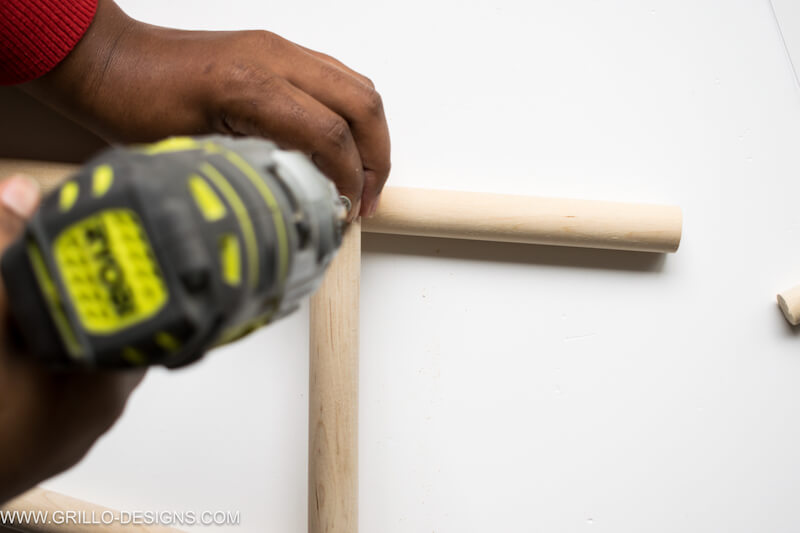
Repeat this step on the other side (and for all the other 3 rungs)
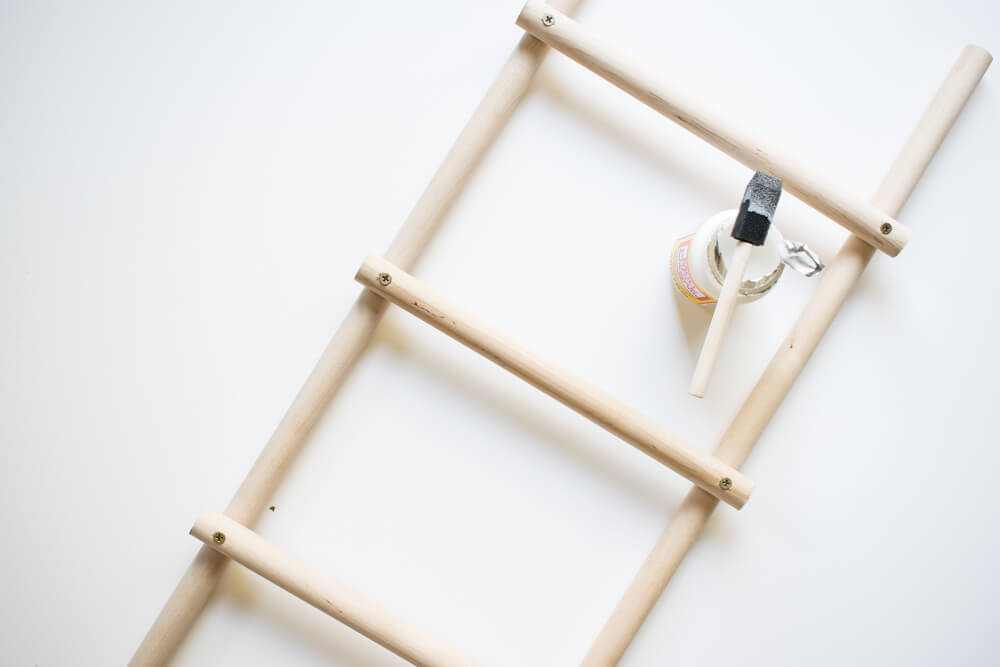
5. Once complete, you can seal the wood with modpodge glue to protect it.

Now Lean it against your kitchen wall and hang your various pots and utensils from it!


Wasn’t that fun?
I really enjoyed putting these wooden dowel projects together. Its always the best feeling when you create things for your home that you know will be so useful.
Have you ever used wooden dowels in your projects before?
***This post was sponsored by Hobby Craft. I received products and payment for my time creating this post. I only partner with brands I LOVE and think you will LOVE too! All ideas, photos and opinions are 100% my own.


EASY WAYS TO DE-CLUTTER KITCHEN COUNTERS

You’re welcome!
Brilliant, love them all! thanks so much for sharing on craft schooling Sunday , great to see you again!
I love all of these projects. Thanks for sharing at the Snickerdoodle Create Bake Make Party.
I got one of those really cheap pine shelves that come with kind of wavy, solid brackets, that you can get in places like B&Q, and a length of 1 inch thick dowelling. I drilled a hole in both of the triangular bits, and fitted the brackets and shelf on the wall above the window, with the brackets positioned on each side of the window, and so the shelf sat a little higher than the top of the window. Then I cut the dowel a few inches longer than the width of the window, threaded on a pair of curtains I’d made, with a channel at the top large enough for the dowel to go through, and then poked the dowel through the holes in the brackets.
So, I now have a handy shelf above the window, and a sturdy curtain rail, all in one.
I love dowels, they’re so useful. I really liked your little ladder. It would also be good for hooking pots of herbs on too.
Oh wow love that Julie – how resourceful of you! And thank you – the ladder is my fav too 🙂
I love these projects and it’s great to find a supplier of dowels that can ship to Canada! Dowels aren’t so easy to find here when you want them!
Glad you like these ideas Sara!
They are all really clever and handy ideas. But I think my favourite is the mini ladder at the end. It reminds me of those popular blanket ladders. Instead of blankets you could have t-towels. Great tutorials too.
That’s my fav too!