Hi there! Join Grillo Designs on Instagram and Pinterest to keep up with my latest posts and ideas. If you’re on Facebook, why not join my Home decorating, Upcycling and DIY group too – inspiration is guaranteed!
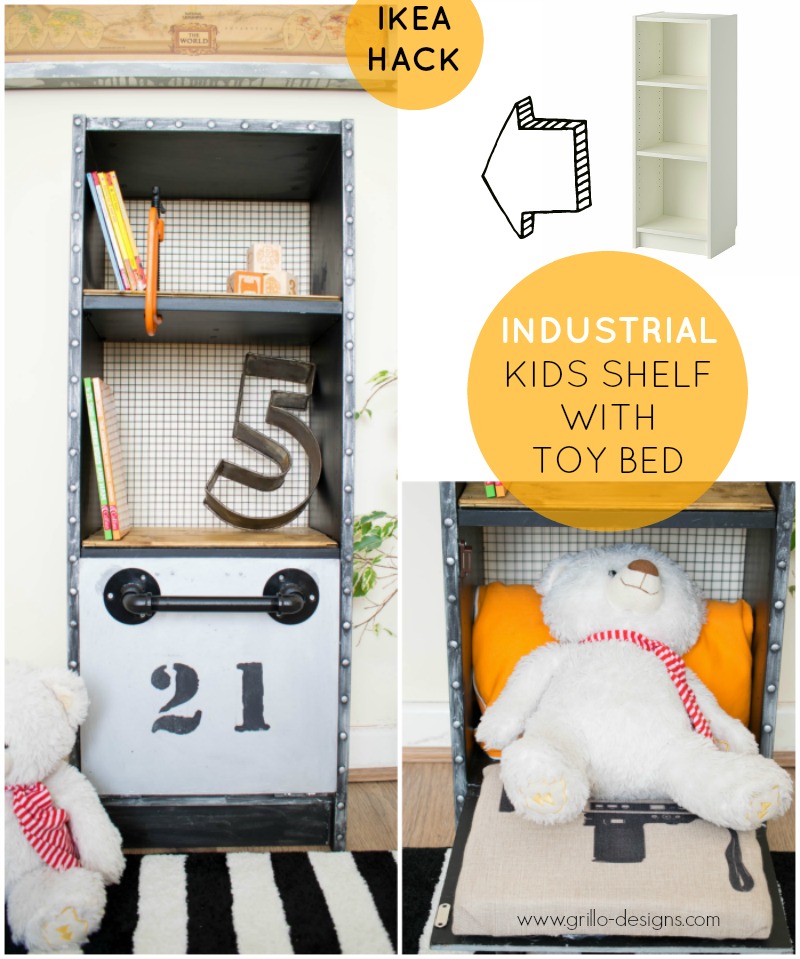
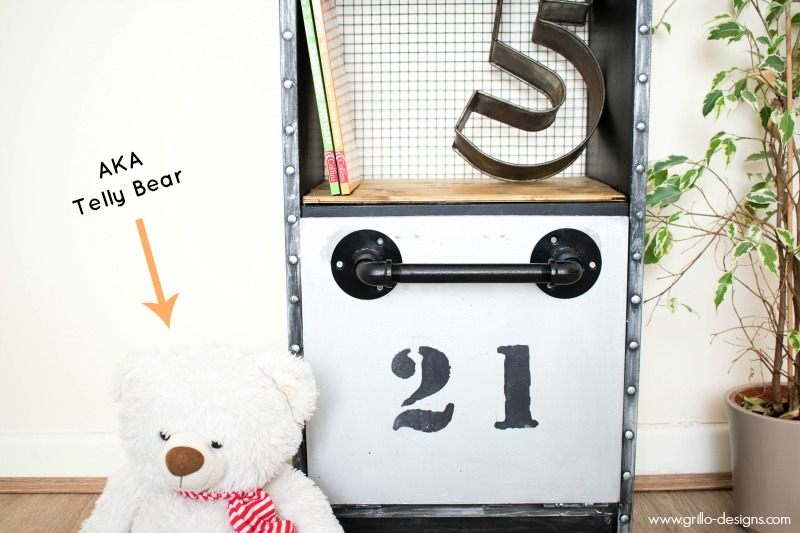
So let’s talk toys beds! They are cute, mini-sized, cheap to buy and a great way to ensure Teddy or Doll gets a good nights sleep. My son happens to have a teddy whom he loves to role play with. He fondly refers to him as ‘Telly bear’ or ‘Uman’ (yup his teddy has two names because he is too cool).
For my son, role playing usually involves burying said Teddy under layers of duvets on his bed to ‘tuck him in’. My son can’t really talk yet, nor can his teddy (obviously) – but my mummy telepathy powers was telling me Teddy needed a bed of his own ….
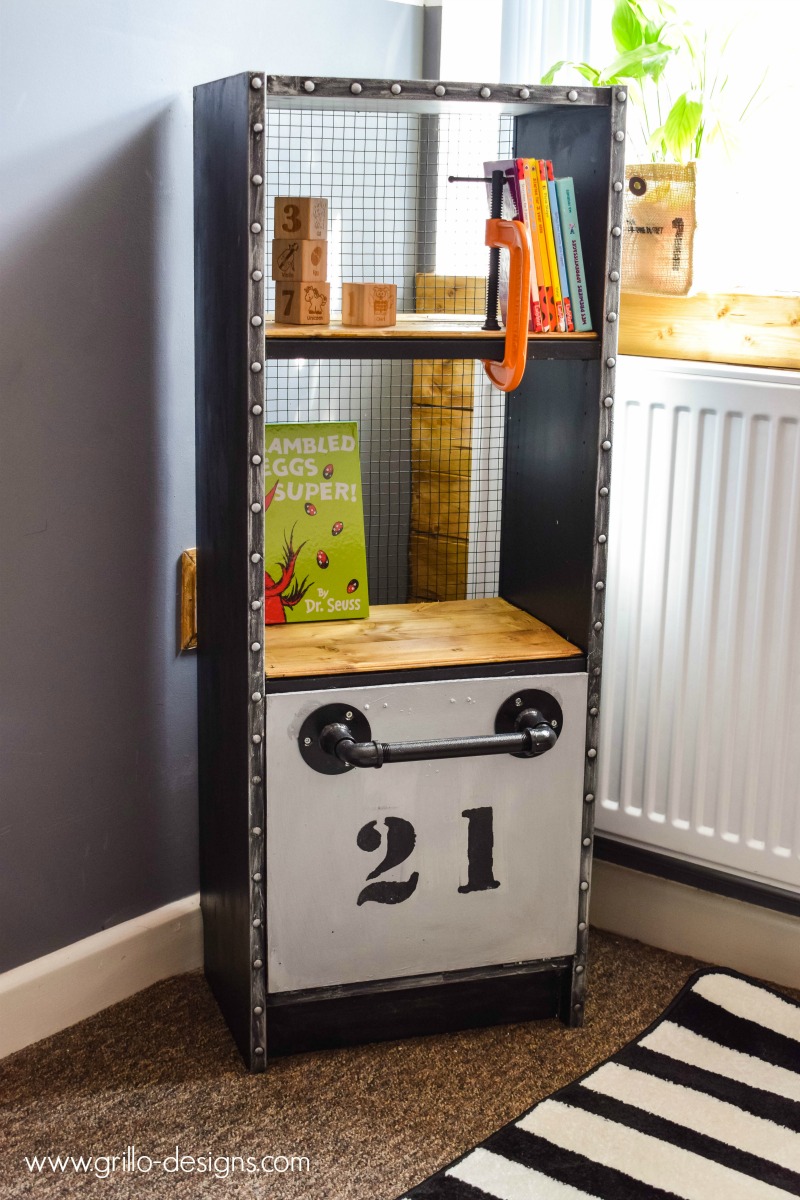
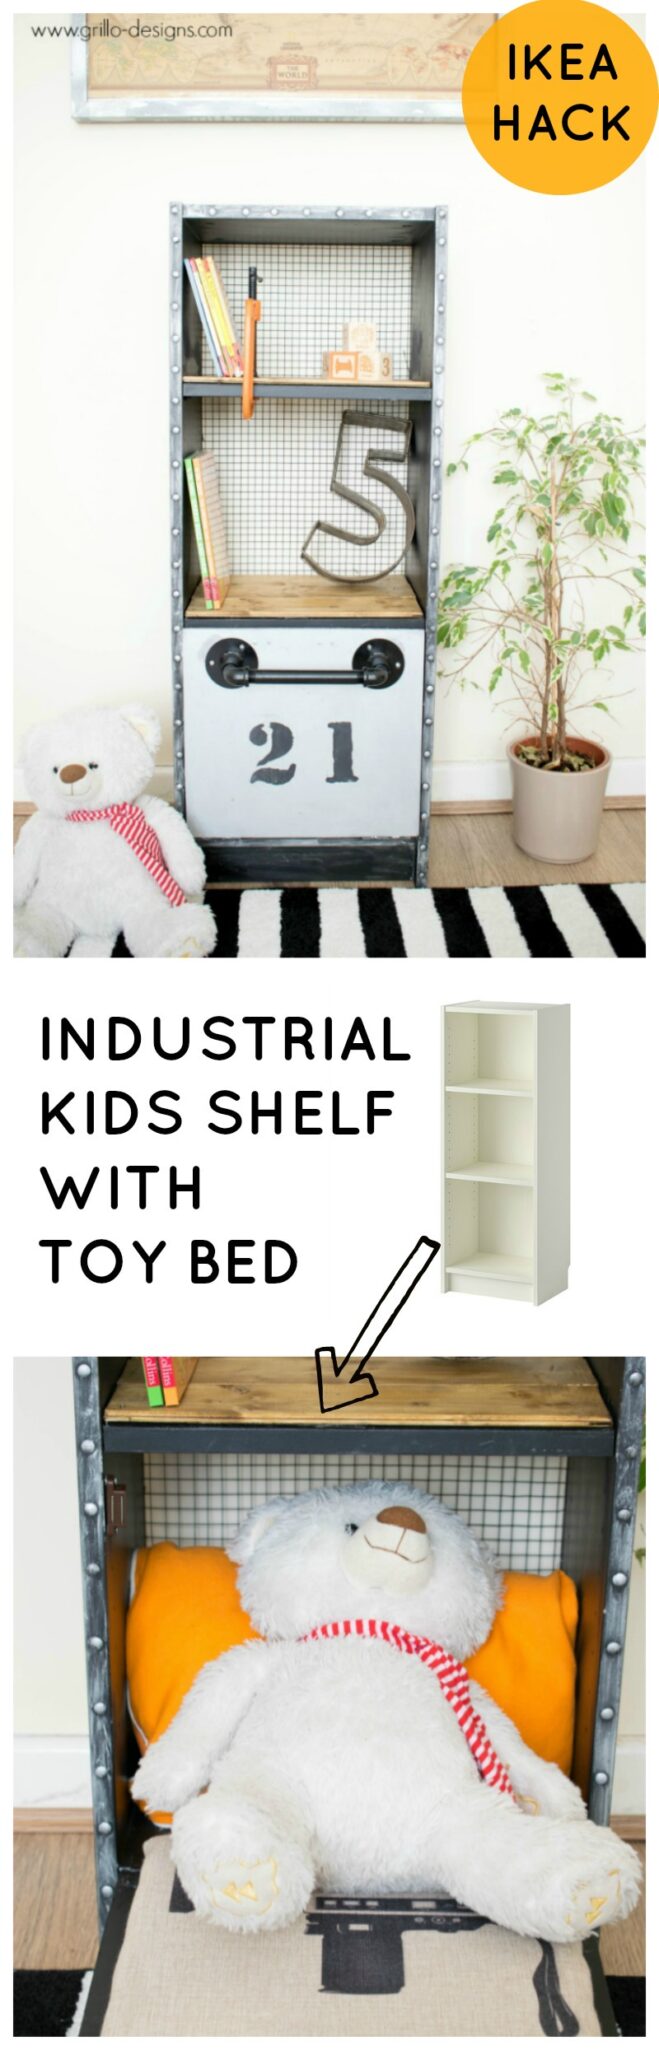
And I needed to make it (again, obviously) But here’s the thing, my sons room is so small I had no idea where a toy bed would go once built. He already had a toy box under his bed so it couldn’t go there. I did some thinking and came up with the idea of hacking a BILLY bookcase and using the bottom shelf as a mini toy bed.
By day: it would serve as a cool looking industrial bookshelf
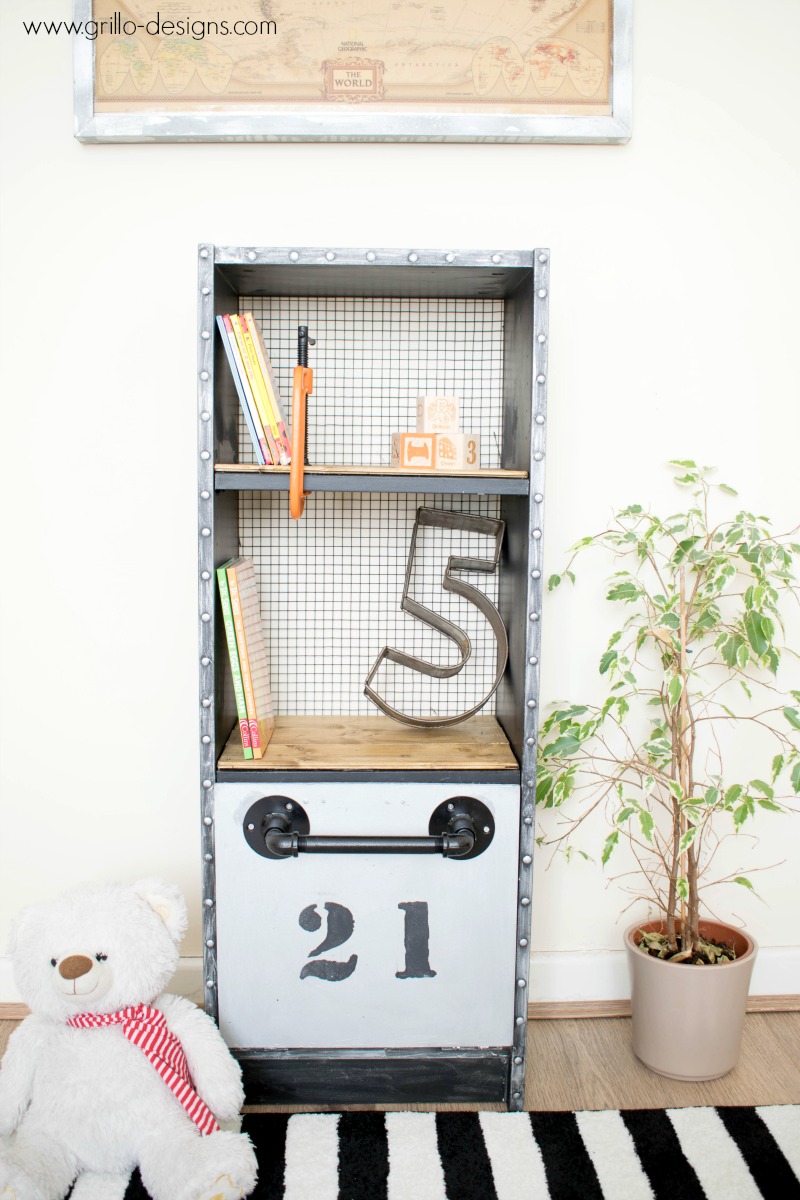
By night: It would be Telly bear’s sleeping quarters!
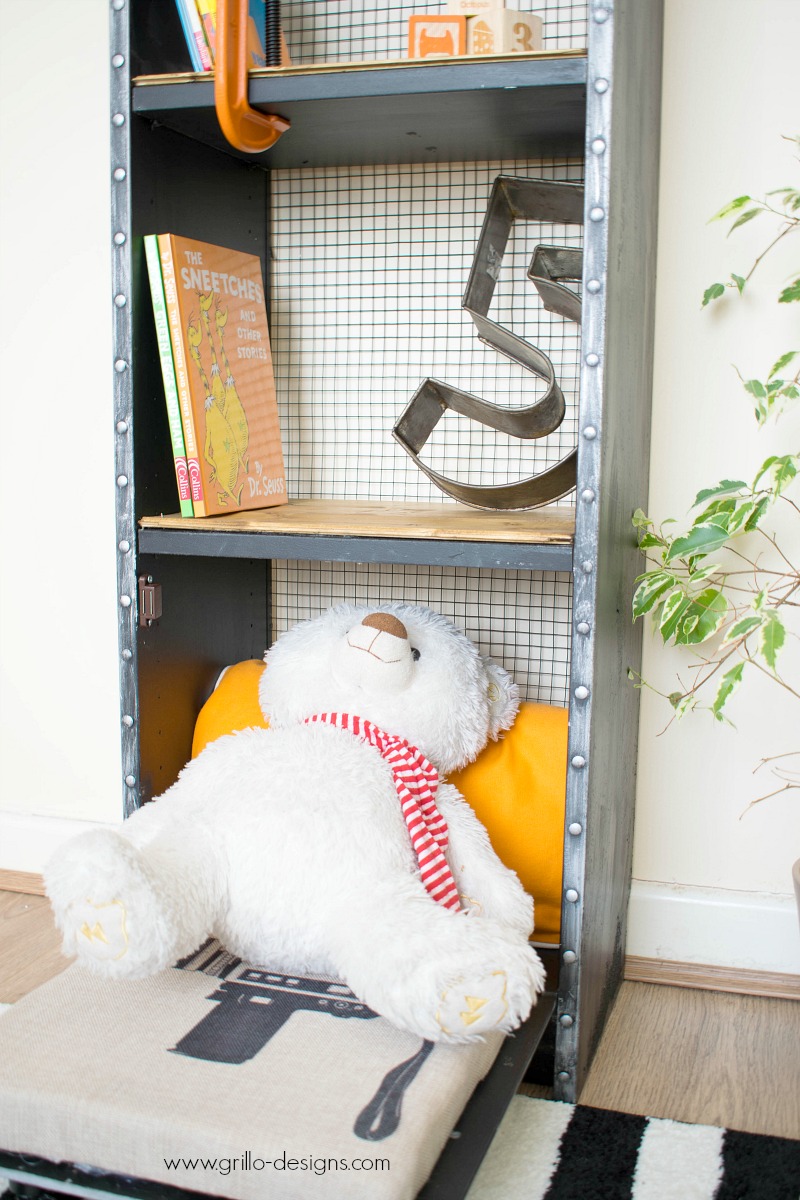
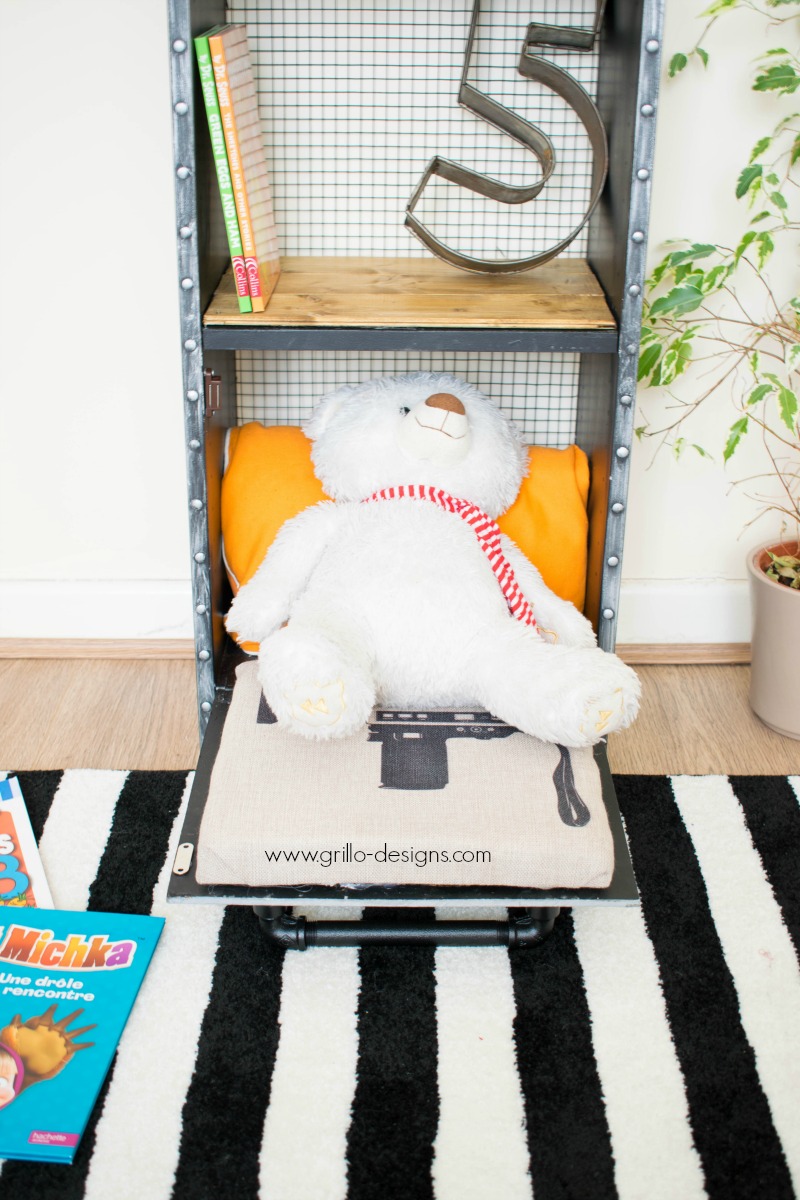
Not a bad idea huh? The handle is large and all you have to do is pull on it and a little mattress and bed appears. I love that it is hidden away just like a Murphy Bed!

I had to take photos of the bookshelf in a lighter room (as seen above) so you could see it all in better detail, but here is a bedroom picture! If your’e wondering why this shelf is looking very industrial – check out his other bed room projects here (including his new reading nook) and it will all make sense I promise!
Now lets get to the important part – How I made it! Dont be put off by the long list of materials – I mean it when I say, this really is NOT difficult to put together. And if you happen to have an extra pair of hands (in my case my hubby and little builder) even better!
Materials I Used
(*This post contains Affiliate links for your convenience. See full disclosure here)
- IKEA Billy Bookcase
- Spray paint black primer
- Wickes Grey wall (latex) paint
- Rustins Black Board Paint
- Rubb and buff metallic wax
(This stuff is amazing!)
- Notice Board Pins (Thumb tacks)
- MDF wood
- Foam roller and paint brush
- Staple gun
- Glue gun
- Door magnet
- Foam (for bed)
- Thin wooden planks
- Ronseal dark oak Varnish
- Ronseal clear varnish
- chicken wire grid
- 2 x door hinges
- Liquid nails glue
- Industrial door handle
- Industrial stencils
How To
I did everything a little backward with this shelf so apologies in advance if it seems like the steps aren’t logically sequenced! Please also note, I have not included any measurements in this tutorial as this idea can be done with any sized bookshelf.
First, I sawed the MDF wood to make a door at the bottom of the shelf, measuring the exact size before hand.
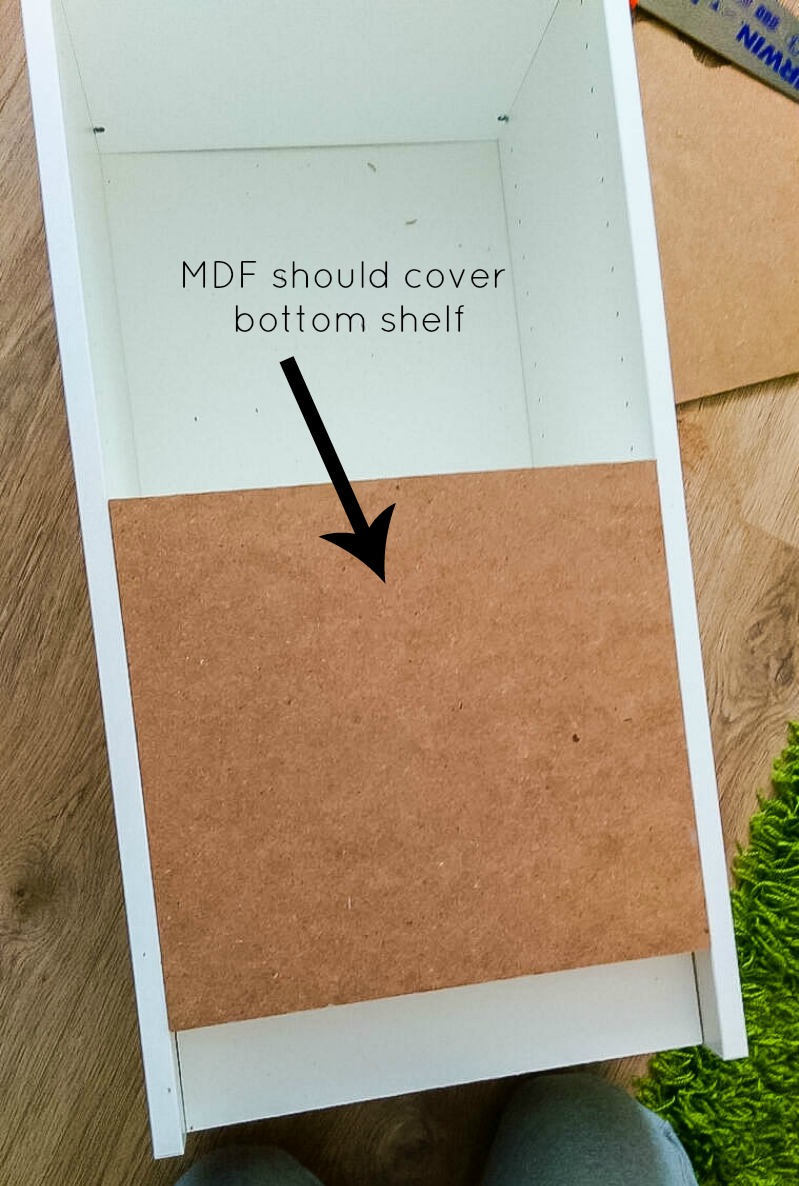
I applied liquid nails to the side of the door hinges that would attach to the wood. The other door hinge side was screwed in place to the bottom shelf of the bookcase. It looks a little messy at this point but dont worry it was all going to be panted over!

Next I ripped out the backing of the shelf and sanded the whole bookcase down with my mouse sander.
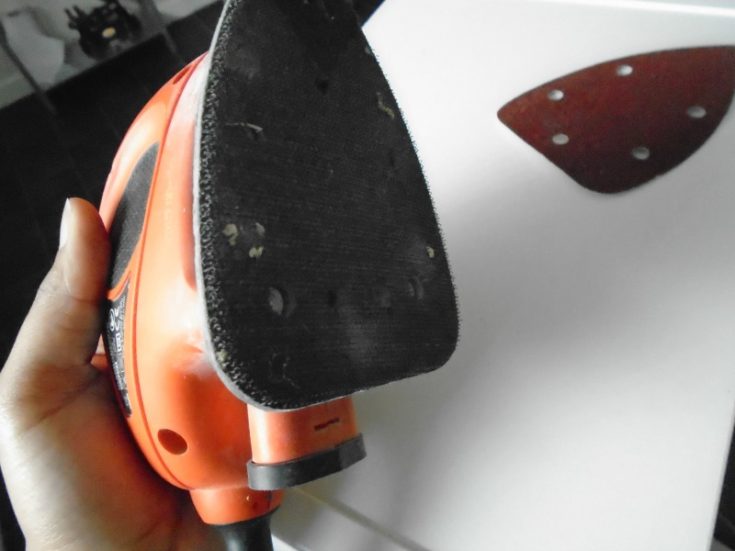
I then sprayed painted the whole unit with a grey primer, both inside and out. IKEA furniture has a smooth sometimes laminate finish to it and a good paint primer and sanding before ensured paint would not rub off once completed.
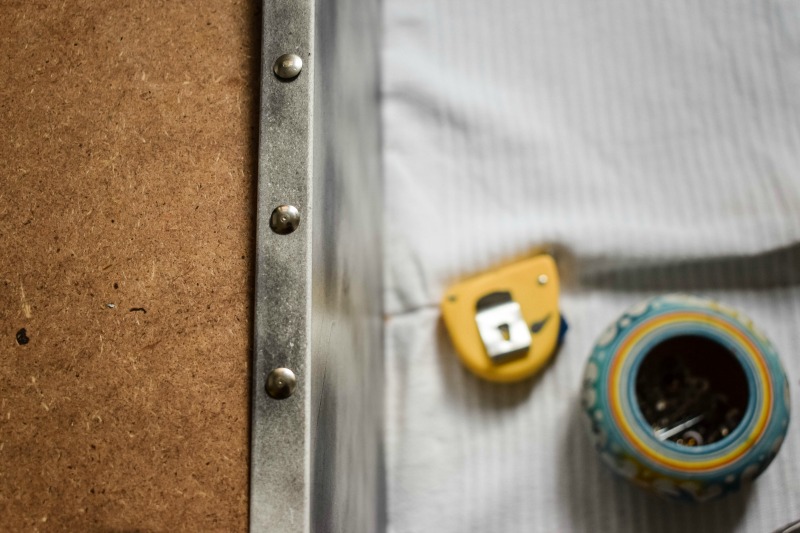
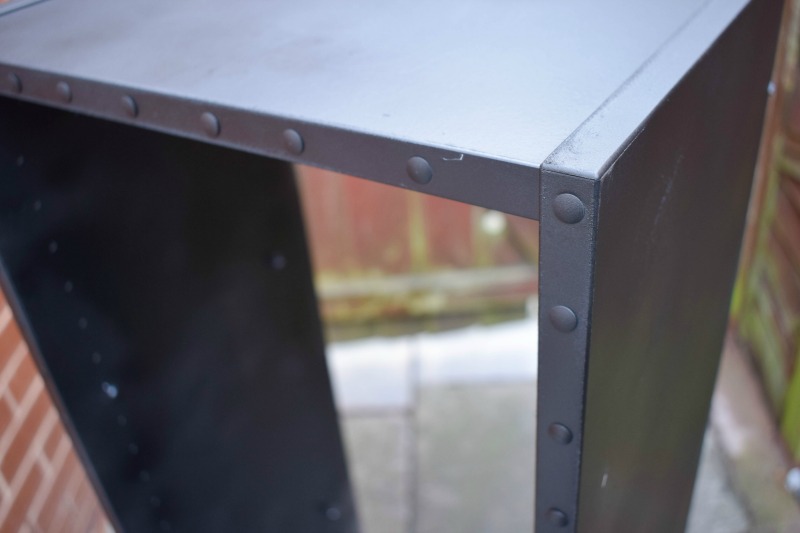
I applied the notice board pins (thumb tacks) to the front of the bookshelf. This was super easy to do, I literally just pushed them in!
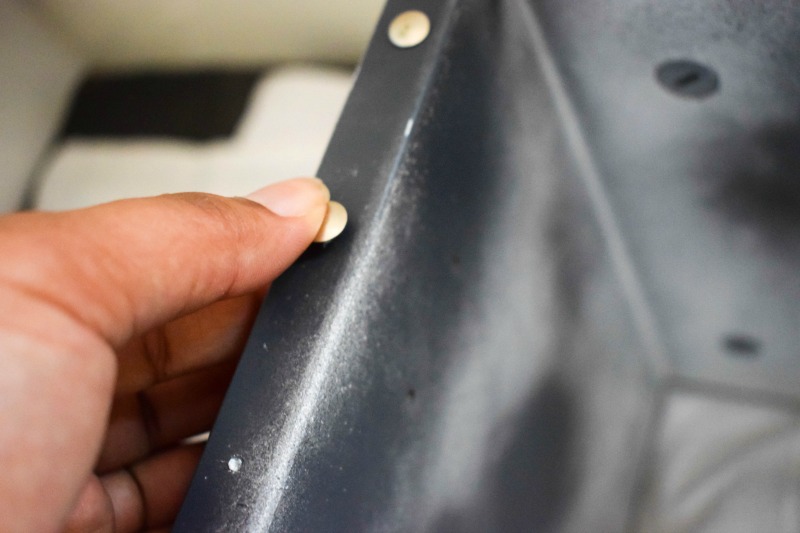
I measured out the width between each pin first to ensure their position was symmetrical on each length of the shelf. I know if I didn’t get their placement totally symmetrical, it would bother me at a later date haha
I spray painted over the primer in black and left to dry in the garden for a couple of hours
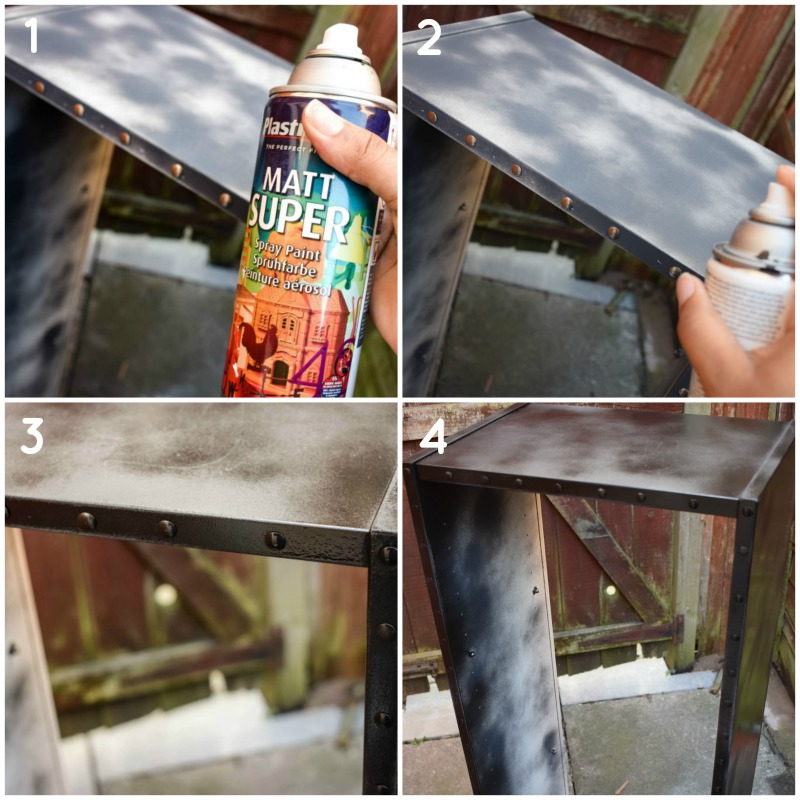
Once dry to to touch, I painted over the black spray paint with a roller. The top coat I used here was Rustins Black Board Paint (I love the Rustins brand!)
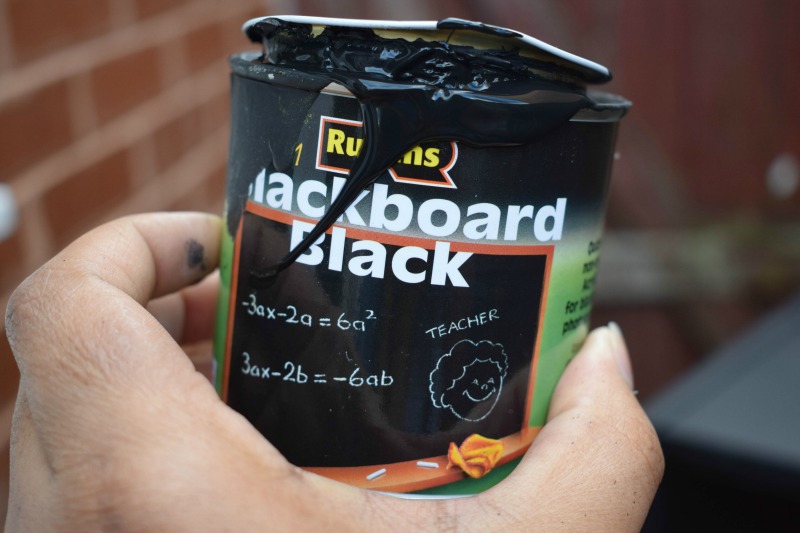
I really just love the finish of black board paint. It leaves a chalky and rough look which seeing as this was an industrial type makeover, that was exactly the look I wanted to achieve!
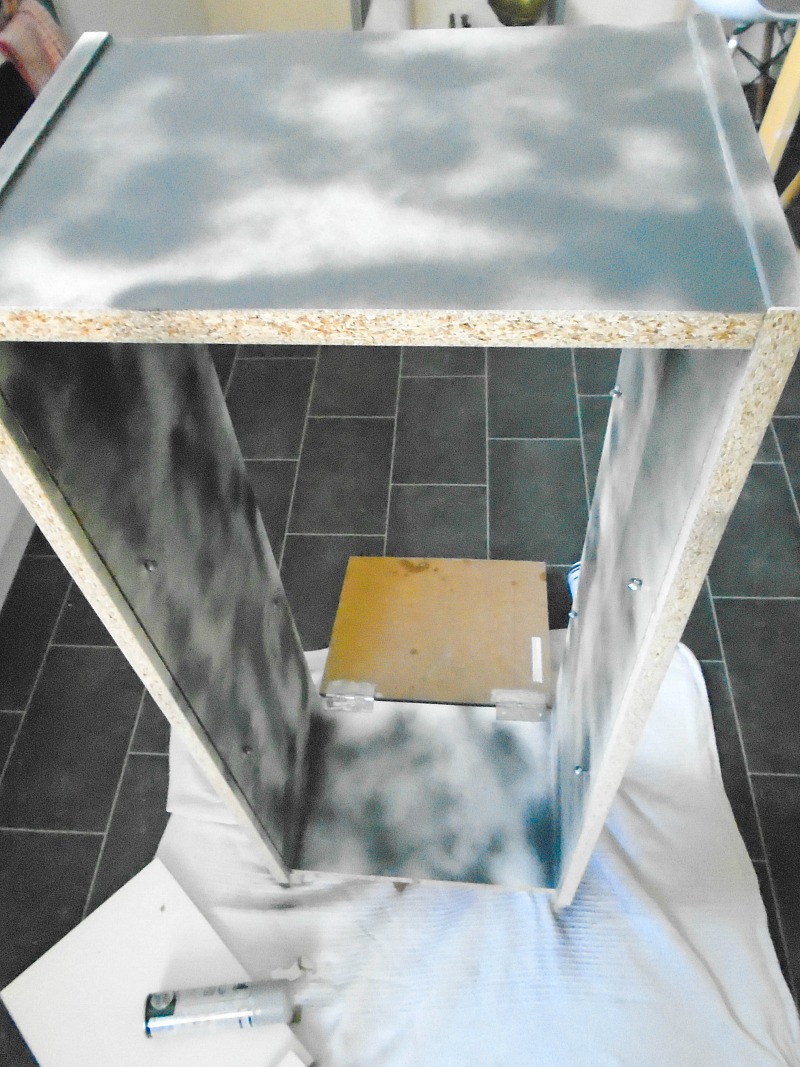
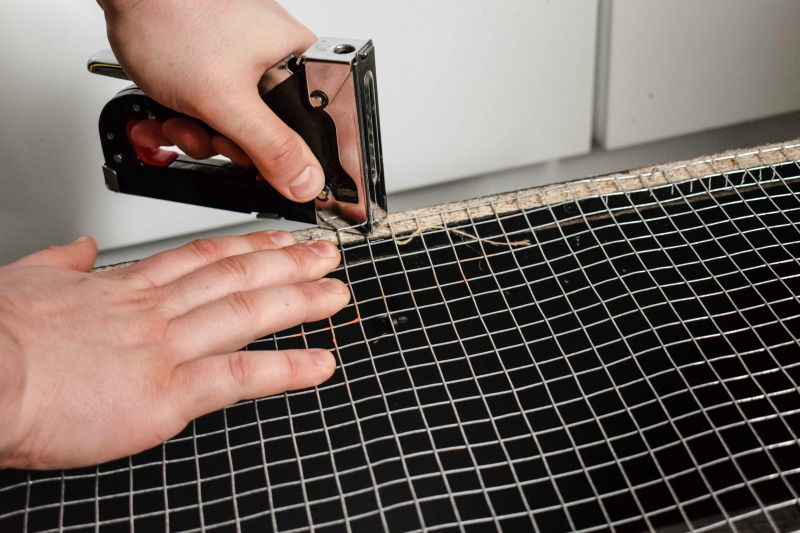
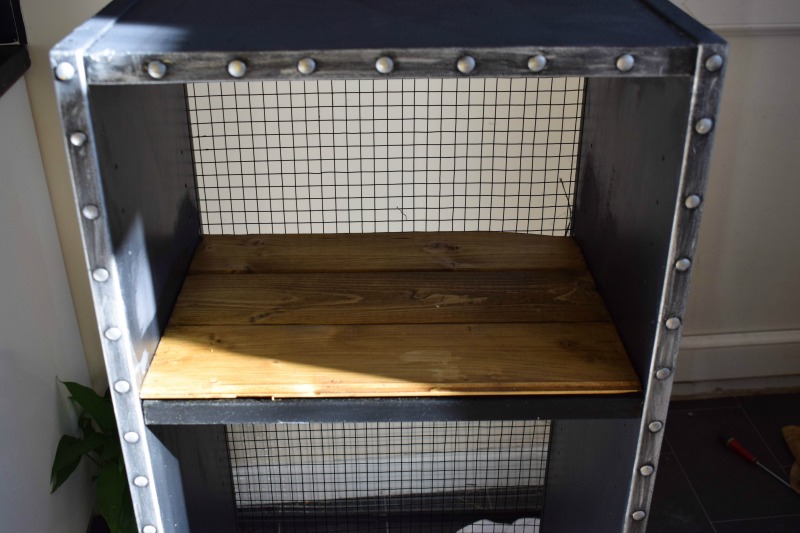
I kindly asked my husband to add the metal wire backing (he is always so helpful!) and he did so with a staple gun. I cut the metal grid to size with scissors but would probably advise clippers for this step as using scissors was a nightmare! Once the backing was in place, I then had to take the whole shelf outside again to spray paint the metal wire black (see what I mean about doing things backwards!).
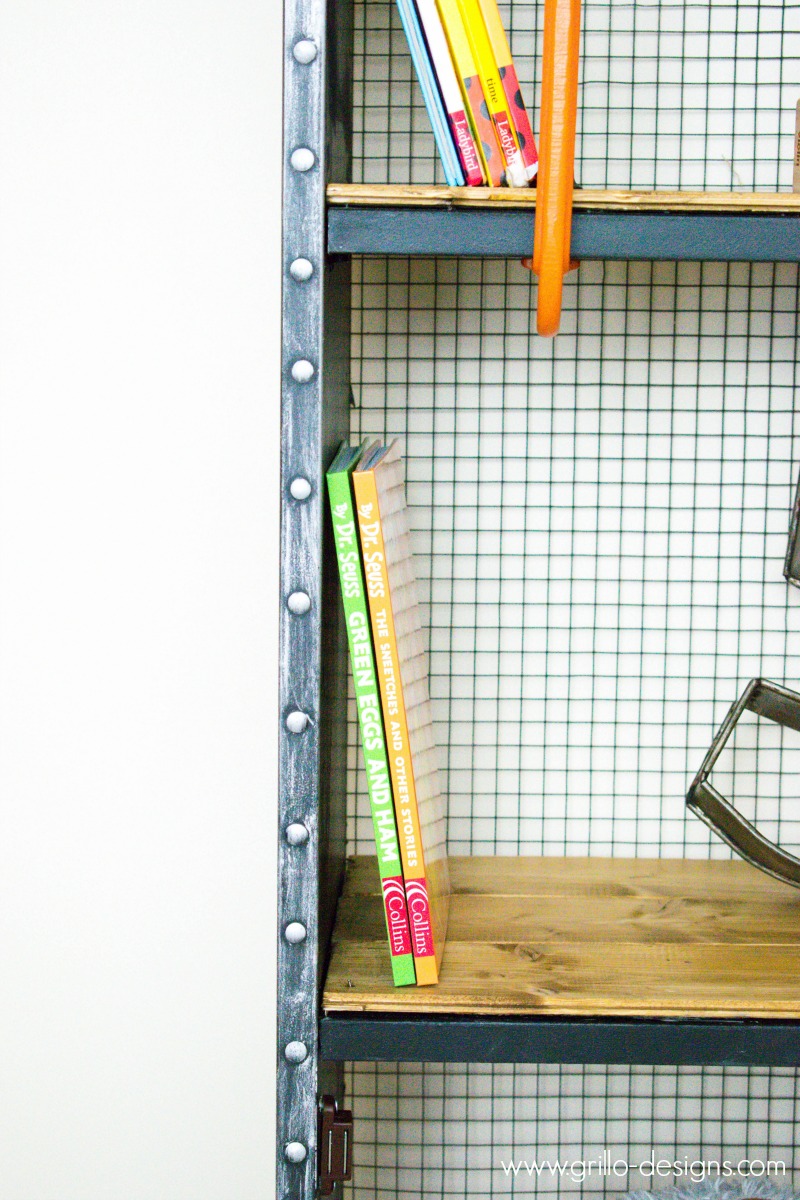
I decided to add some rustic charm to the shelf by applying very thin wooden planks to two of the shelves on the bookcase. I sawed planks to size and glued them in rows of three to each shelf with the liquid nails adhesive. NOTE: This is when I actually realised that the book shelves were still white. I had forgotten about them! I had to apply the same priming and painting process used above before gluing on the wood!
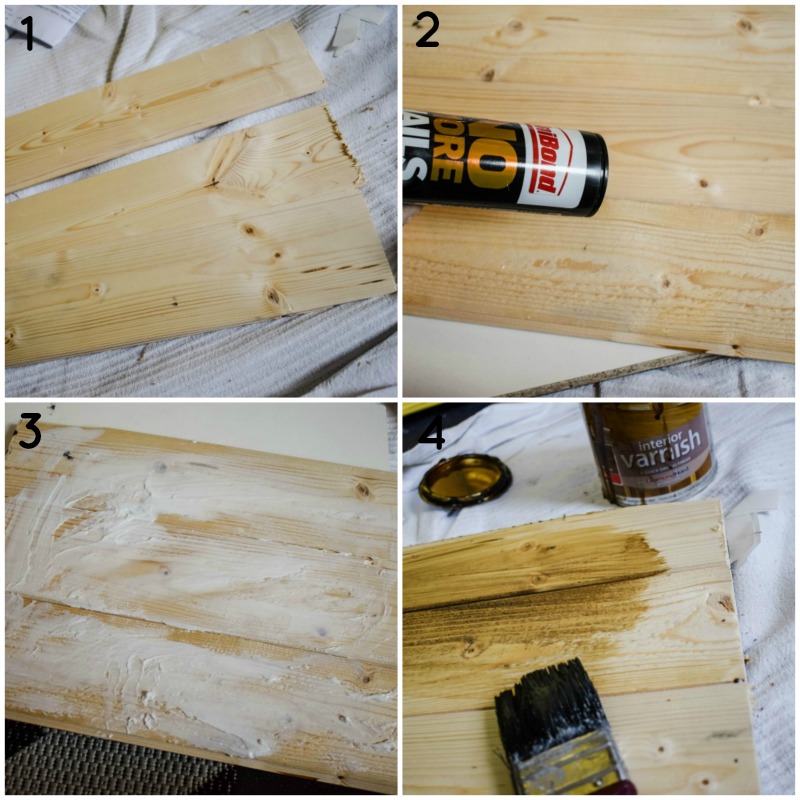
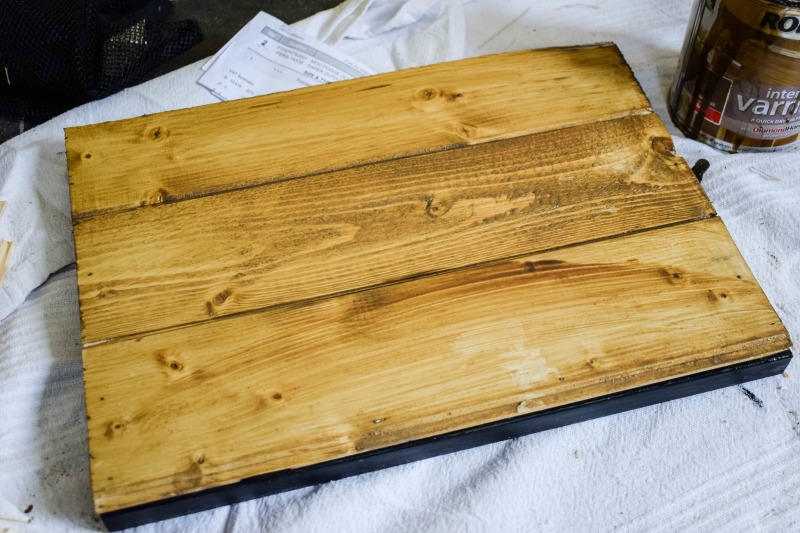
Next I added dark varnish to bring out the wood grain and this is how it looked. I forgot to sand before hand though.. can you tell??
I then painted the bookshelf door I had created with a grey latex paint. To give the whole shelf a little more of an industrial vibe I also applied metallic leaf wax to the front of the shelf as well as the door. The stuff is awesome by the way, if you haven’t already you need to try it!
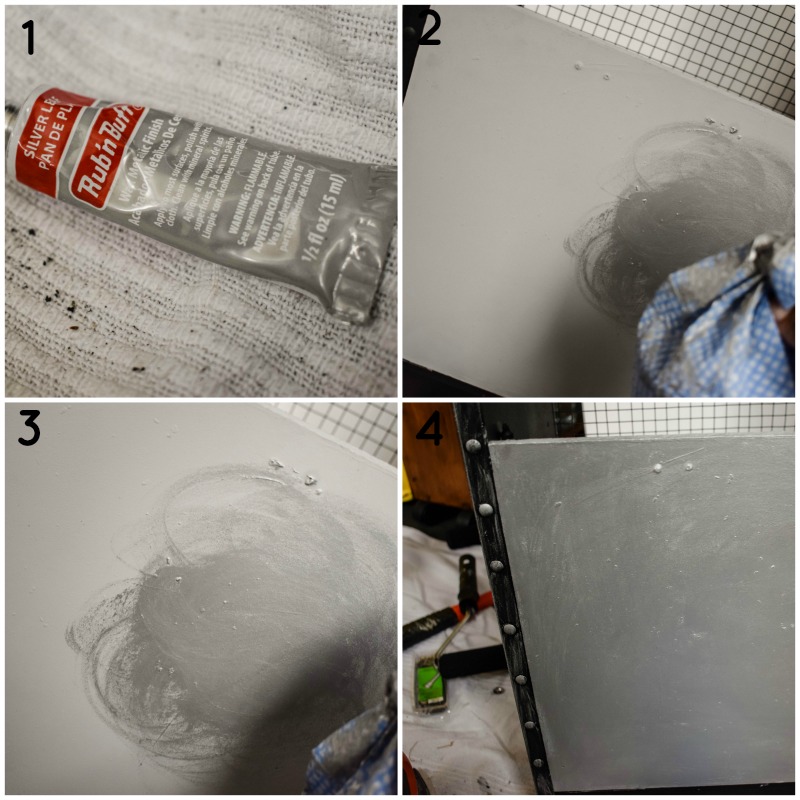
To the front I just wiped the wax on lightly rather than rub it in to get this streaky look.
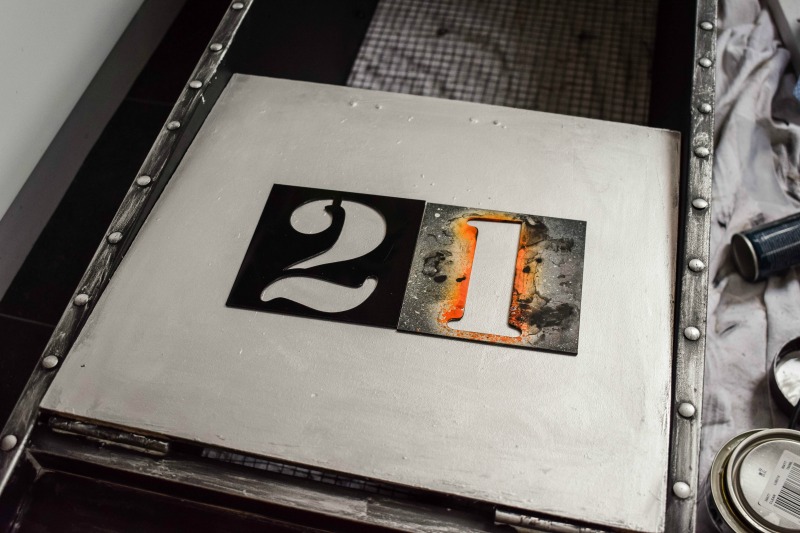
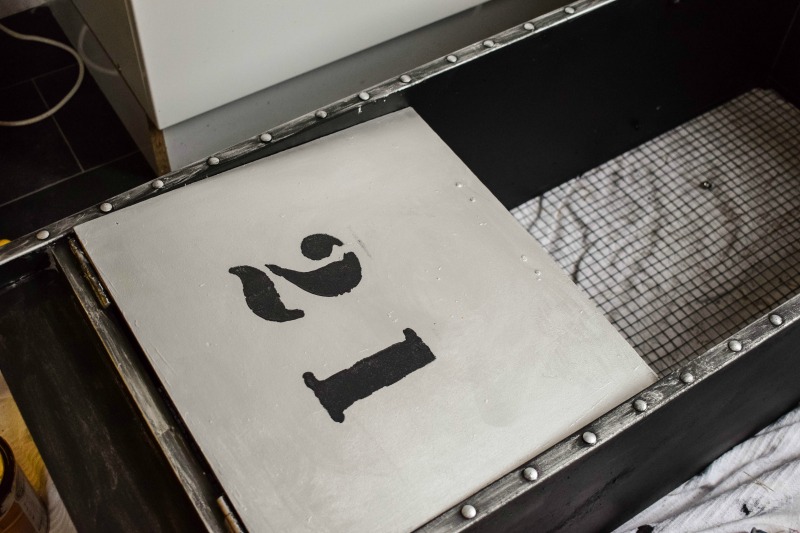
I also painted on numbers to the front of the drop down door using these number stencils – sorry did I miss that part
THE BED:
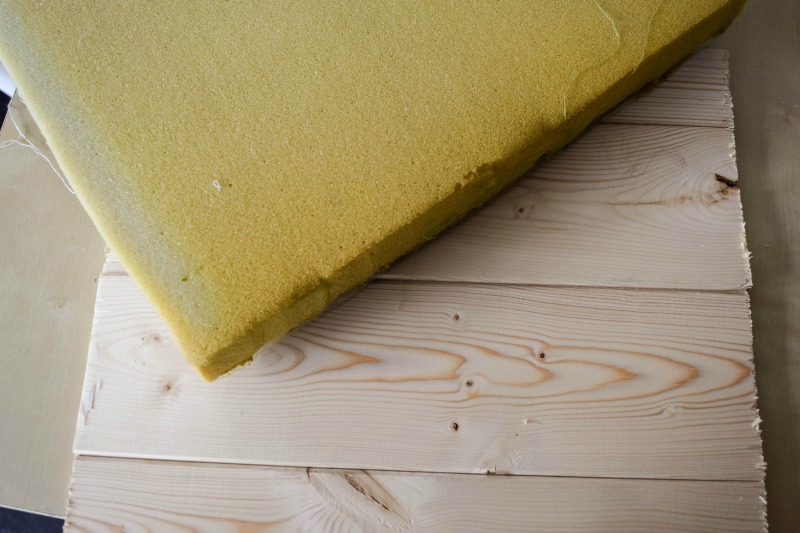
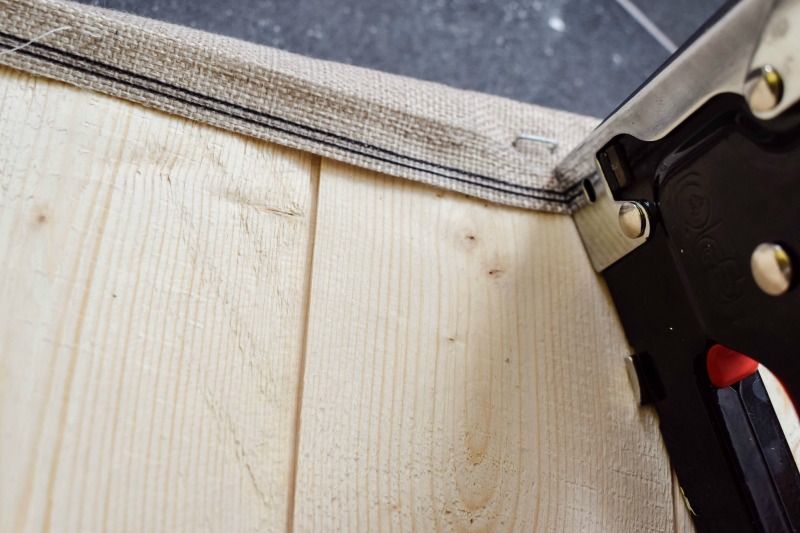
I applied foam to three planks of wood (the wood slotted in to each other) and stapled fabric in place by flipping it all over . You could also just use a thin piece of plywood to form the base of the bed if needed.
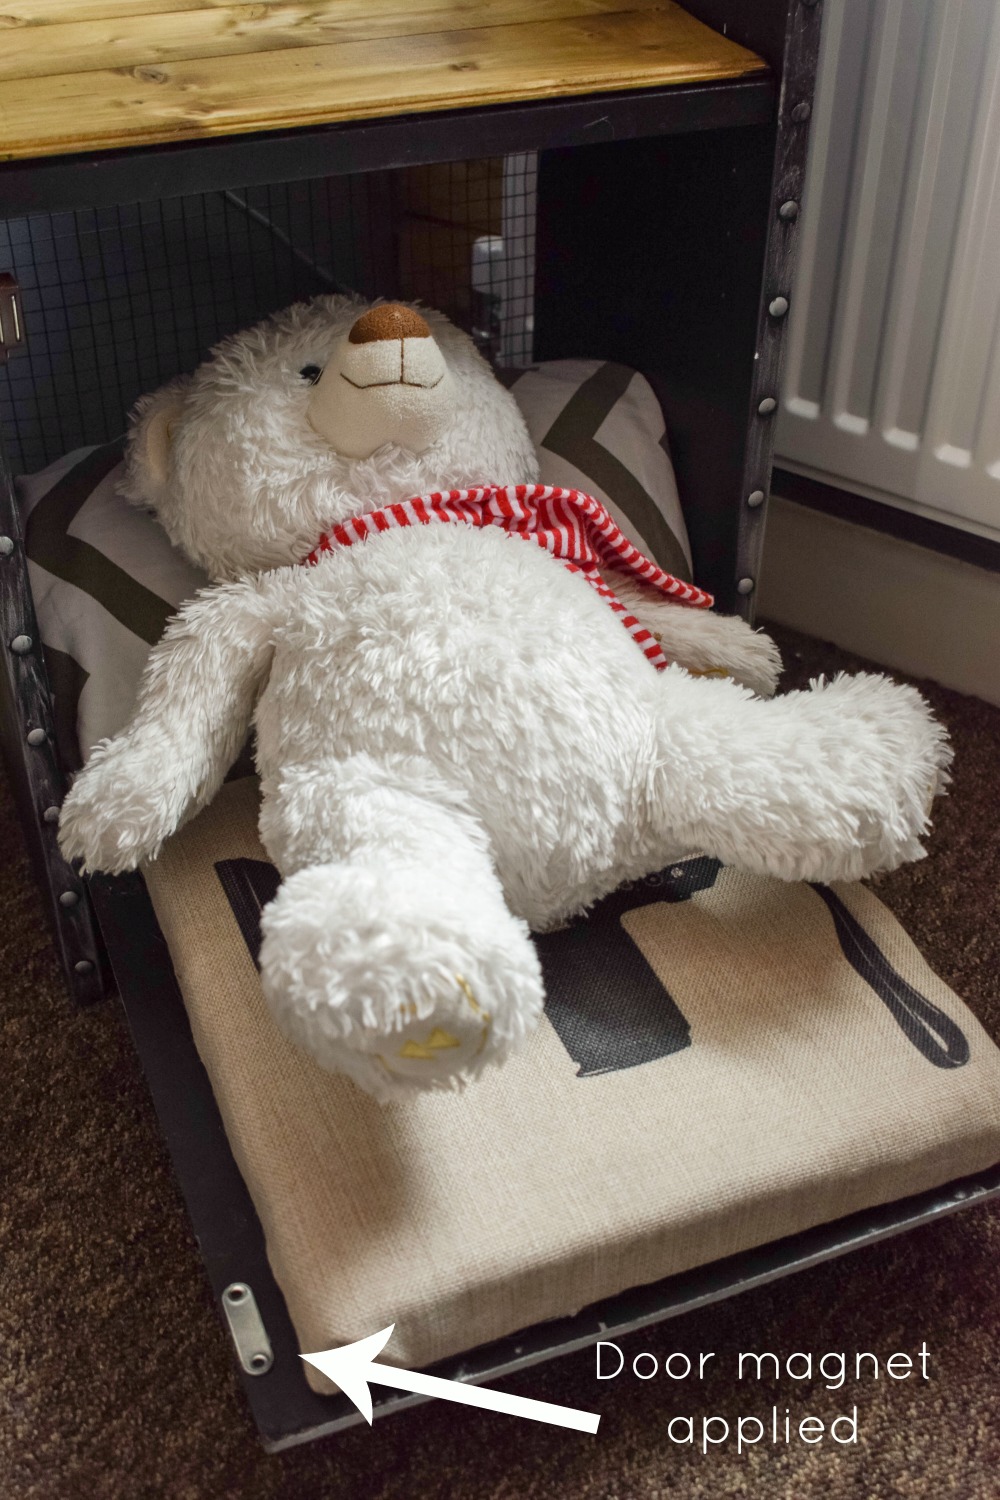
This ‘mattress’ was then attached to the inside of the bookcase door with liquid glue. By screwing in an industrial door handle (This is beautifully handmade!) to the outside of the door, the mattress itself was further secured in position.

I made sure to use a door handle that was just the right size to ensure the mattress was level with the bookcase bottom shelf when pulled open.
I glued (with glue gun) a door magnet to the inside of the door to ensure the door stayed shut when closed as the handle was quite heavy.
Voila!! Both son and Teddy were very happy! Just look at that grin on Teddys face!
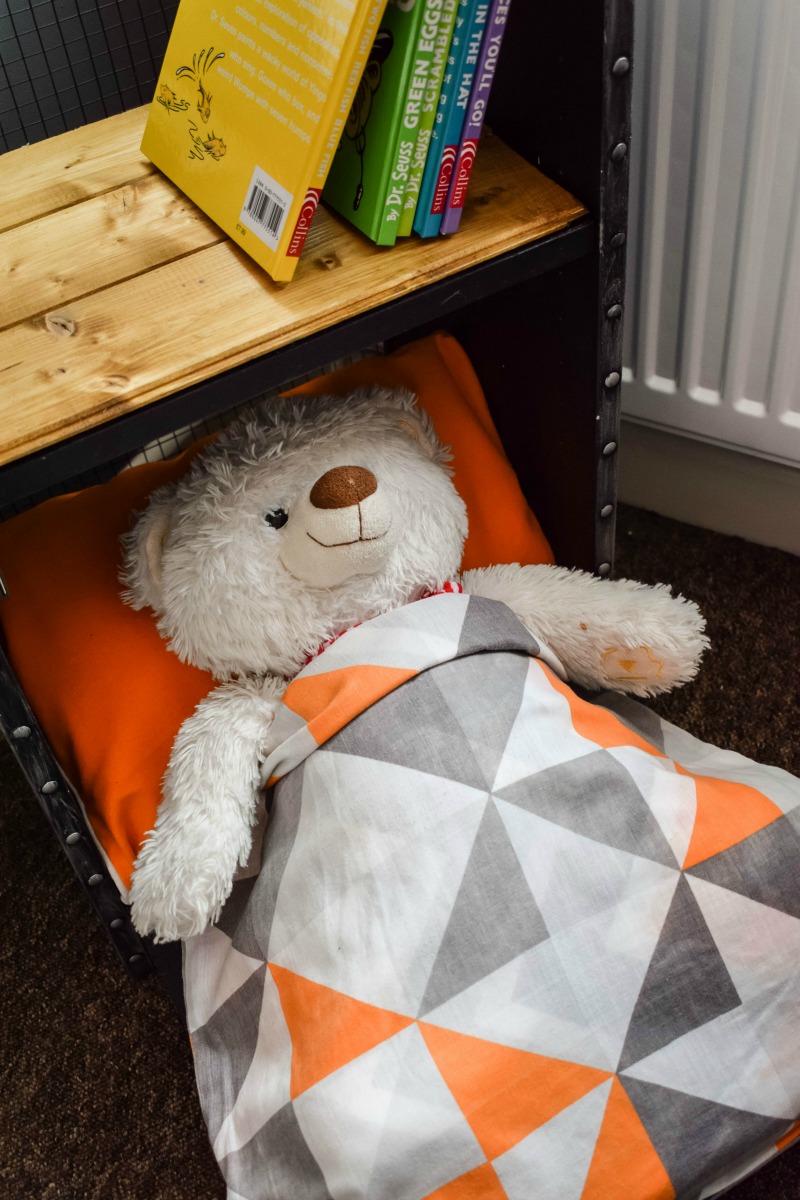
See what I mean about my son burying poor teddy! One a side note though – doesn’t his little geometric duvet look cute? I bought it from here
SAVE TO PINTEREST:
Other projects you might like:
I would love to see your children’s toy beds! Have you built or bought them? Let me know in the comments below!
Wow that was odd. I just wrote an really long comment but after I clicked submit my comment didn’t show up.
Grrrr… well I’m not writing all that over again. Anyhow, just wanted
to say excellent blog!
Hi!
LOVE this!! I am about to launch into a, now he is a tween, makeover of my sons IKEA cabinets. I am gonna g to do the industrial vibe you show here. Since these cabinets are frequently used, I want to do a poly type seal rather than a wax. Can this type of seal be used over the metallic silver leaf wax? I know you can’t do that with the wax used over chalk paint. Does this metallic wax have the same problem? Thanks!
Kindly,
Tween Boy-Mom
oh that sounds so fun! Hmm I’m actually not sure, I wonder if you can test an area on a piece of wood first just to see how it hold up. My gut feeling is telling me that it will work though 🙂
Oh my this is beautiful! You did an amazing job transforming this. LOVE
Wow I’m so honoured that you stopped by. Thanks so much Sandra 🙂
I love a good Ikea hack and this one is good!! The industrial look fits in with all kinds of personal decor! Amazing job!
Thanks Leanne 🙂
Oh my goodness, the toy bed is SO cute!!! My kids would go crazy over that! Awesome job!
Thank you so much!
That’s so cute, and I love how it turned out! Thanks for sharing at Merry Monday!
Thank you and thanks for having me 🙂
Amazing idea, I bet he loves it, my HUbby is in the process of making a toy bed for our daughter for her birthday I am sure she is going to love it xx
Thanks for linking up to COMH
Thank you and thanks for having me 🙂