If you’ve suddenly decided your home (or garden) is in need of a bench, why not try making one yourself! In this tutorial, I’ll show you how to build a bench – THE EASY WAY!

[Psst! Join me on Instagram and Pinterest to keep up with my latest posts and ideas]
………………………..
I have always wanted one of those rustic looking wooden benches for my entrance (you know the fancy kind you might find in West Elm or Anthroplogie) but the amount of zeros I see in their prices has seriously put me off fulfilling that need.
When it comes down to it…. I’m only really left with four options
- Win the lottery (very slim chances of that happening for someone who never takes part)
- In the words of Dory, ‘just keep swimming’ (in my case, just keep waiting….waiting!)
- Relieve my current tired old IKEA bench from TV display duty – to bum duty
- DIY IT!
I’m pretty sure you can guess which option I went for right?
Mind you, I didn’t want to try building something too complicated. I’m fairly new to woodworking and the fear of losing an eye or finger (or more) is still always at the forefront of my mind . ((EDIT: I’ve since then built an outdoor bench for my sofa –come see!)
So this is what I pulled together. (MAKE SURE TO SCROLL RIGHT TO THE BOTTOM OF THIS POST IF YOU WANT TO SHOP SOMETHING IN THIS PHOTO!)

It does the job …. looks great in my hallway (although not photographed there yet but you can see how far I’ve got with the makeover here ) and is super easy to build!
I’m not kidding about the super easy part (even if I did kinda cheat by buying pre-made legs).

MATERIALS NEEDED TO BUILD A BENCH
This post may contain affiliate links for your convenience – please see full disclosure here
- Hard wood timber – I bought this from my local hardware store Wickes – my go to place for all my wood projects!
- Jigsaw or circular saw – I’m a huge fan of the Ryobi cordless selection!
- Wood stain – this is my favourite but its a European Brand. Here is a good alternative!
- Sanding machine
- 2 x Heavy strap tie
- 4 x hairpin legs – 40cm (16inch) in height
- Screws
HOW TO BUILD A BENCH
I’m fairly certain that if I were in the US the sized wood planks I used would be 2″ x 4 “? Am I right? In any case, here are the exact measurements of the bench that I built (see image below)
As you can see, we like to use the metric system here in the UK. But I can google..so I also converted some of these measurements for my US readers. L 39.3″ X D 10.3″ X W 1.4′)

Its a very simple design.
I cut the wooden planks to a length of 100cm (39.3″) with a jigsaw, and sanded each plank for a smooth finish.
I then connected the three wooden planks together using 2 heavy strap ties – one at either end of the bench seat for support (see image below). Each strap tie was secured in place with 3.8cm screws (1-1/2 “)

And that might have been the hardest part of this whole tutorial. All I had left to do was stain the wood, seal and attach the hairpin legs.
I used Ronseal Medium Oak varnish to stain and seal this bench. Here is a great tutorial on how to stain raw wood by the way . (I decided not to stain the underside of the bench seat because no one would see it)

As for the legs, I found an awesome selection on Amazon. Here are just a few of those options:
I also sanded the wood back a little after staining to give it a slightly weathered look. I’m a huge fan of the new but old and battered style.


UPDATE: Ive since moved this bench into my new decorated porch – see it here!
So whats the verdict? Do you think this bench is something you might try building? If you have any questions about anything, please leave me a comment below. I’m always happy to help!
Medina!

 is in need of a bench, why not try making a bench yourself! In this tutorial, I'll show you how to build a bench - THE EASY WAY!")

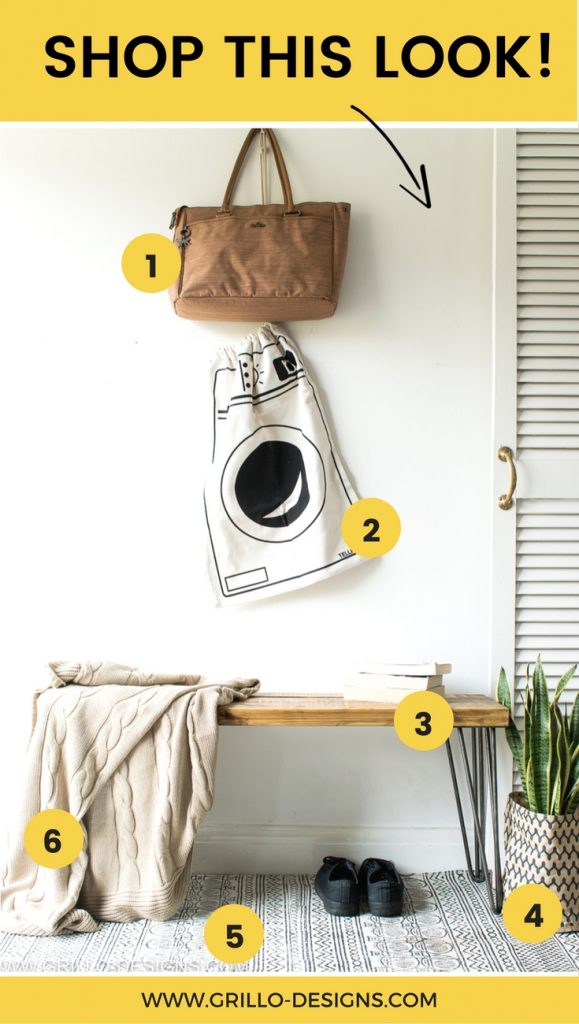
I get a lot of questions about where everything in this picture is from, so I thought I’d list all the shops below:
- KIPLING BAG – bought here in the UK, bought from here in the US
- LAUNDRY BAG – bought here in the UK, bought here in the US
- BENCH made by me – see tutorial here
- PAPER PLANT BAG – bought here in the US
- RUG – bought here in the UK, bought here in the US
- THROW – bought here in the UK, bought here in the US

Building this bench was definitely fun…and a learning curve! Here are some other building projects you might like!

HOW TO BUILD MASON JAR CANDLE HOLDERS


HOW TO BUILD PALLET MUD KITCHEN

HOW TO BUILD A ROLL OUT PANTRY

I am obsessed with how this bench turned out! Thanks for all the tips. I would love to recreate this to use at my dining table in my kitchen. I am going to reface my kitchen cabinets here in Charleston, and once they are finished this would be the perfect finishing touch for the space. Thank you so much for the amazing ideas!
Good luck with this Jackie!
Just ordered the hairpin legs!! Husband just got back from Lowe’s with the wood, stain, sealant, screws, ties, I’m so excited!! I absolutely love the look! Thanks so much for sharing!!
Yay! Good luck!
Do you think I could apply the same concept to a table i.e just using more wood and ties etc?
Yes definetly!
I love this bench! This is now on the top of my DIY to-do list.
Thank you!
I’m really excited to give this a go! Did you use anything else to keep the three pieces of wood together other than the strong ties?
Nope just the strong ties!
I’ve been searching for a bench and just can’t find any that I like! Found your tutorial and ordered the legs already! Headed to the Home Depot tomorrow to get wood and other stuff and I’m making this bench this weekend!! So excited!
Yay! Cant wait to see it – good luck!
Thank you so much for sharing!!! My husband and I made these bench this weekend and I love it!!
yay!! so glad – please share pics with me if you can!
Medina!!! I popped over and read this a couple of week’s ago but didn’t want to write a tiny ‘thanks for linking up’ comment!! And then life took over and I totally forgot to come back until now! SO SORRY!! This is such a fabulous tutorial — you must be thrilled with how the bench turned out. The legs definitely make it — love that mid-century feel. Totally fabulous!! Well done and thanks so much for sharing Cx #HomeEtc
I love these rustic looking benches too, especially with the hairpin legs. Your tutorials are always so great and I feel inspired, although I only just used an electric drill for the first time the other day! Thank you for linking up to #HomeEtc X
Thank you Lin 🙂
Hi,
Using this method to build a dining table and benches.
Would the 16″ hairpin legs be a good height for the 28″ legs for the dining table?
Yes that length is fine! Go for it and good luck 🙂
hi, i love the look of the bench! i’ve already bought the hairpin legs from amazon, but my son in law tells me that the bench may be wobbly unless i add cross pieces, etc….(getting beyond my skill/comfort zone. i want to make it for a very small breakfast nook, where it would get used often. have you noticed any wobbling side to side? Do you have to be careful the way you sit on it?
It wont be wobbly, well at least mine isn’t. I added two of those metal strips to the back for added support and that has worked great 🙂
Lovely bench. Nicely done!
Do you think this would be sturdy enough to sit on? I’m looking to build a bench for my dining room table. Thanks!
Yes most defiantly my husband can sit on this bench and he is quite a tall guy!
Looks fabulous!!! and seems to be a fairly easy DIY. I have a hairpin leg table my grandpa made years ago and LOVE it. I’m going to DIY a kitchen table with hairpin legs and a top from and old teacher school desk 🙂
Loving that blanket on the bench…just what I’m looking for for my sofa. Where did you find???
Thanks
Dawn
Thank you! That sounds amazing! 🙂 The blanket is from IKEA
I am always finding ideas on your site that I never knew I wanted to make but now I do! Love this!
This was so easy michelle! You should try it 🙂
I’m a bag stalker lol, is that brown bag in the photos a Kipling? 🙂 Thanks! And good looking bench too!
Haha yes it is! Im impressed!
This is really simple, and it looks so good. I’ve been trying to figure out what to use for a bench for our entry way, and this would be perfect. Thanks!
Very nice, Thank you for sharing.
I love it! Where is your rug from? (I love that too!)
Hi tiffany, my rug is from an online store called EYes of india
Oh by the way, I will be featuring you on Tuesday for the next party. Have a great day!
This looks so good! Thank you so much for sharing #iDIYedthat! Hope to see you next week again.
Thank you so much!
I love this! So easy but looks like you bought it fromPottery Barn, this is a must try for me this summer.
Thank you Julie! And go for it- so easy to do!
I love this bench! Pinned it. Thanks for linking up at the Home Matters Link Party! We hope to see you again next week:) #HomeMattersParty
Love your bench I love the finish on it. I was thinking of building a console table for my hallway the same but taller.
Thanks claire 🙂 Yes this would make a great console table also!