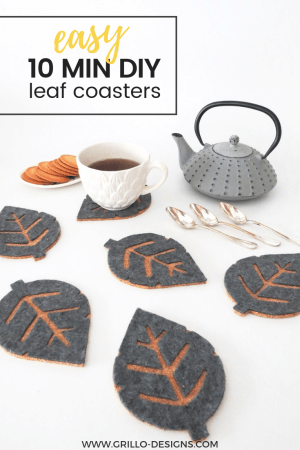
Learn how to make coasters from vintage tart tins/pans. These make for great gifts too – just saying

………………………..
See this mark here?

Yes the one with huge arrow pointing at it…. Today I’m calling it the ‘ring of death’.
Why?
Because when I find out who is responsible for it, there will be pre-mediated thoughts of killing. And other equally gruesome things ending in possible harm for said culprit (too much?)
Not that I’m trying to be the next ‘Dexter’ or anything (I don’t own a chainsaw)… I just really hate seeing these ring marks on my furniture. They look gross and are a nightmare to get rid of sometimes. Also, its not like we are a coaster-less home, quite the opposite actually. There are plenty around, just waiting to be used!
Deep breath Medina.
OK so heres my theory. Maybe, if there were even more coasters around.. like lots more, stacked up real high, people (let’s not pretend here. I mean my husband) will take the hint and actually use them?
Worth a try right?
10 MINUTE DIY CHALLENGE
I promise there is a point to the above rant and I’m getting to it.
For this months 10 min DIY challenge, myself and 6 other bloggers had to upcycle something. I chose to upcycle these vintage tart tins pictured below (you might want to get a heads up on my baking tin collecting habit here)

….. and turn them into funky table coasters (that I’m hoping my husband will start to use) . Please tell me you approve?
[RELATED: DIY FALL INSPIRED COASTERS]


You can see what my other blogging friends made for this quick DIY challenge by scrolling right to the bottom of this post.
MATERIAL USED TO MAKE THESE TART TIN COASTERS:
This post contains affiliate links for your convenience – please see full disclosure here
- 4 x 12cm (4.7″) tart tins/pans – of course mine were rusty vintages ones but you can buy new here
- Modpodge fabric glue
- Paint Brush or foam brush
- Scissors
- Fabric scraps – similar fabric found here
- Pen
- Felt dots (optional)
- Glue gun (optional)
HOW TO MAKE COASTERS:
1: Remove the base from your tart tin.

2.Choose your fabric, flip it over and trace around the tart tin base with a pen or marker.

3. Cut around the shape you have just drawn with your scissors

4. Coat the tart tin base in a thin layer of modpodge glue.

5. Smooth the fabric over this and then another layer of glue on top to seal. It will look pasty white at the start but once dry it will turn clear . Ideally you should follow the modpodge glue instructions which states to wait 2 hours before sealing, but I was a little short on time so I cut a few corners
You however are probably not, so try to do it by the book 😉

6. Once the glue starts to dry it hardens making it super easy to cut. Use your scissors and tidy up the edges!

7. Place the base back into the tart tin and you are done – with the first coaster! You’ve got 3 more to make now!
OPTIONAL: You can use your glue gun to stick the bases down more permanently (I chose not to as I like the idea of being able to change it up!). You can also add felt dots to the bottom of your new coasters if your worry about them scratching your furniture.

What I love about this idea is that you can use just about anything to transform tart tins into coasters i.e paint, contact paper, wall paper, washi tape, you name it!. The sky or in our case, Amazon prime is the limit!

Now where is that husband of mine? I need to start dropping some very not so subtle hints about my new DIY coasters.


Make sure to check out all of the other ladies who are sharing #10MinuteDIYs!

Farmhouse Style Books – Twelve on Main
Succulent Plant Stand – Uncookie Cutter
Wine Bottle Bud Vase – By Brittany G
Glass Tabletop Fire Pit – DNA Designs
Industrial Chic Desk Organizer – Love Create Celebrate
10 Min Lazy Susan – Pocketful of Posies

You might also like some of these other quick repurposing ideas like:
HOW TO MAKE A BAKING TIN HERB GARDEN


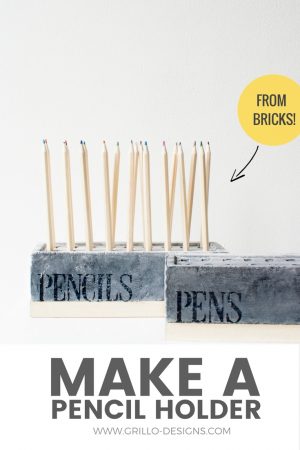
HOW TO MAKE A DIY PENCIL HOLDER
I love this idea. Functional and fabulous. I got to make thes with the two I have. Thanks fr sharing.
These are so cute! When I made coasters I found the mod podge went funny when it got wet, did you find that at all? I ended up giving mine a few coats of plasticote and it worked a treat
Oh really, No i havent found that yet, how many coats did you do? I did quite a few
Good luck training the husband, they look great 🙂
Haha thanks!
I love these! What a creative idea! Had to pin and share them.
Really cute idea, love the fabric choices. Thanks for sharing at Funtastic Friday!
Thank you!
Cute idea. Thanks for joining us at the Inspiration Spotlight party. Pinned & sharing.
This is such a fun idea! And we can always use more coasters in this house!
Love these! Thanks for sharing. Pinned.
These are really fun. I don’t think I would have had the imagination to use a tart tin as a coaster but it is brilliant! I love the black and white fabrics mixed with the vintage tin too. Very nice!
Thanks Michelle 🙂
Medina, those coaster are adorbs! And I love how you can change them out to suit your whims. Great upcycle!
Thanks so much Lynn!
These are so cute! I love the patterns you picked with the mix of texture with the metal tins.
Thank you Lindsay!
Your coasters look fantastic. I love the color selections. What a fun idea to use tart tins. Thanks for sharing at Snickerdoodle. Pinning.
These are fantastic! I love that it is an easy way to incorporate some metal decor elements to your home. Thanks for the awesome DIY!
Thank you 🙂
I need to get in to the mod podge groove. These are adorable, and I love the fabric you chose!
Thanks Brittany!
Love that these can be customized any way that one desires. And it’s an easy craft too.
Thanks! It really is
Beautiful and easy! Love it! The fabric is perfect.
Thanks April
LOVE this idea! I want to make some for my own home now! Love the patterns your chose too 🙂