cCreating a Farmhouse sign is the perfect way to add that touch of Fixer Upper charm to your home. Get the tutorial here!

Hi! I’m Colleen from Life on Kaydeross Creek and I’m so excited to be here on Grillo Designs today to share my project with you! I love adding unique pieces to my home and one way to do that is with cool wall décor.
I’m a huge fan of farmhouse decor so what’s more perfect than adding some character with a DIY farmhouse sign?

It’s much easier than you think!
MATERIALS USED TO MAKE THIS FARMHOUSE SIGN:
This post may contain affiliate links for your convenience – please see full disclosure here
- Wood of your choice
- Painters tape
- Craft paint or any paint really
- Stencils (size according to what size your background is) – you can always make your own stencils too!
- Stencil brush
- Measuring tape
- “D” ring or saw tooth hangers
HOW TO MAKE IT:
The cool part is since you are DIY’ing (yes, that is a word 🙂 ), you can make it any size you’d like. For my project, I wanted the wooden sign to fit centered above a set of windows which are 83″ across including the trim. We made the sign 61 inches so that we would have about 11 inches on either side – that’s 154cm long!
For the wood, we chose rough saw pine from a local mill. They have boards that have not been smoothed down by a planer so the surface is still rough. I like the texture it adds to the final product plus it’s cheaper. 🙂

*Tip – you can pick up a pre-made sign at Michaels or other craft store if you want to skip this part.
The board we started with was 10 inches wide and 10 feet long (25.4cm wide and 304cm long). I wanted this sign to be made up of three individual pieces not just one solid board. We cut it down and made each board four inches wide (10cm wide)
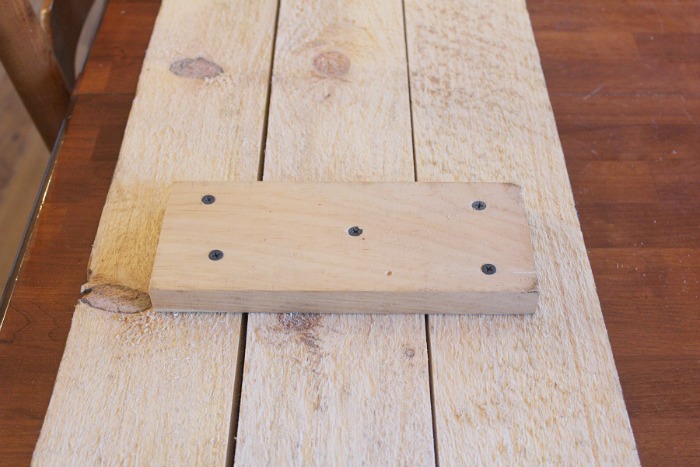
Once we attached the pieces together on the back using three pieces of scrap wood with one in the middle and one on each end, this DIY farmhouse sign was ready to go.
OK, on to the paint. I wanted this sign to feel antique-y (also a word) and I thought I could create that look by adding a faded boarder around the edges. I used painters tape to make straight lines.

To get the faded look, I mixed some inexpensive black craft paint with a bit of brown and a tiny bit of water to thin it out. I used my stencil brush to apply it. By using just a a small of paint on the stencil brush it helped to keep the paint on top of the wood instead of soaking into it.
That also helped it to look faded. Once the first line was done on the outside I added the second line and then removed the tape.

For the word FARMHOUSE I chose 6 inch stencils in Roman Times font because I think they look a bit well, farmhouse-y. (You can find similar ones here)

The key to spacing the letters evenly across the wood (or as evenly as possible) is to measure from the widest point on the letter to the widest point on the next letter. Each letter should be approximately the same distance apart.

This takes a bit of adjusting. Once you have them where you want them, use the painters tape to stick them to the wood while you are stencilling so they don’t move.


Once the letters were done, we added “D” ring hangers on the back to hang it on the wall.

I really love the way this farmhouse sign came out. It’s the perfect size for above the window and adds that farmhouse character I was looking for. What’s so great about doing this yourself is you create exactly what you want and something that is truly unique for your home. It doesn’t have to be perfect, just perfect for you.

The round shelf was another farmhouse wall décor project and you can see that here.
Thanks for spending some time with me today and thanks to Medina for having me over at Grillo Designs! For more great wall decor and other projects, stop by and see me over on my blog!
Happy DIY’ing!
Colleen
FOLLOW ME ON SOCIAL MEDIA: PINTEREST / TWITTER / FACEBOOK


FARMHOUSE STYLE MASON JAR CANDLE HOLDERS

THE BEST FARMHOUSE STYLE IKEA HACKS

FARMHOUSE REPURPOSED KIDS COT (CRIB)


Home and DIY
Organizing
Cleaning
Crafting
Introduce yourself!
Hey! I love this so much, I featured it today on my round-up of farmhouse style DIY projects at http://www.PopItUpGirl.com
Come take a look!
Thats great thanks! Do you mind also linking to life on kaydeross creek too as this was a guest post 🙂
Gosh, this farmhouse sign is so cute! I can’t wait to try and make one. Love the tutorial. Thank you!
Thank you so much, Carolann!
Such a cute sign and a great tutorial. Thanks!
Thank you, Lynn! I love that it’s so easy but adds so much charm 🙂